How to Disconnect Jeep Electrical Connectors the Right Way
Knowing how to disconnect Jeep electrical connectors safely saves time and prevents costly damage. Whether you are replacing a part, troubleshooting a wiring issue, or upgrading your Jeep’s electrical system, using the correct technique is essential. This guide walks you through every step with clear instructions, helpful tips, and common mistakes to avoid.
If you own a Jeep, you will eventually need to disconnect an electrical connector. Maybe you are replacing a sensor. Perhaps you are installing a new accessory. Or maybe a connector is corroded and needs inspection. Whatever the reason, how to disconnect Jeep electrical connectors the right way matters a lot.
Wrong techniques can break locking clips, bend pins, or damage the wiring harness. That leads to frustrating repairs and unexpected costs. This guide gives you everything you need to know. We cover every connector type, the tools you need, and step-by-step instructions you can follow with confidence.
Whether you drive a Jeep Wrangler, Grand Cherokee, or any other model, this article applies to you. Let us get into it.
Key Takeaways
- Use the right tools: A proper connector removal tool prevents damage to locking clips and pins.
- Identify the connector type first: Different Jeep connectors require different removal techniques.
- Always disconnect the battery: Safety comes first when working with any electrical component.
- Check for connector seals: Removing a sealed connector incorrectly can let moisture in.
- Label wires before disconnecting: This makes reassembly fast and error-free.
- Inspect pins and terminals: Corroded or damaged connectors should be replaced, not reused.
- Reset relevant systems after reconnecting: Some Jeep systems need a reset after electrical work.
📑 Table of Contents
Understanding Jeep Electrical Connectors
Before you grab any tools, it helps to understand what you are working with. Jeep electrical connectors come in several shapes and sizes. Each one serves a specific purpose and uses a different locking mechanism.
Types of Jeep Electrical Connectors
Most Jeep connectors fall into a few common categories:
- Push-Pull Connectors: These are the most common type. You push to lock and pull to release. They are used for sensors, lights, and simple wiring jobs.
- Tab-Lock Connectors: These have a small plastic tab that you squeeze or lift before pulling. You will find these in older Jeep models.
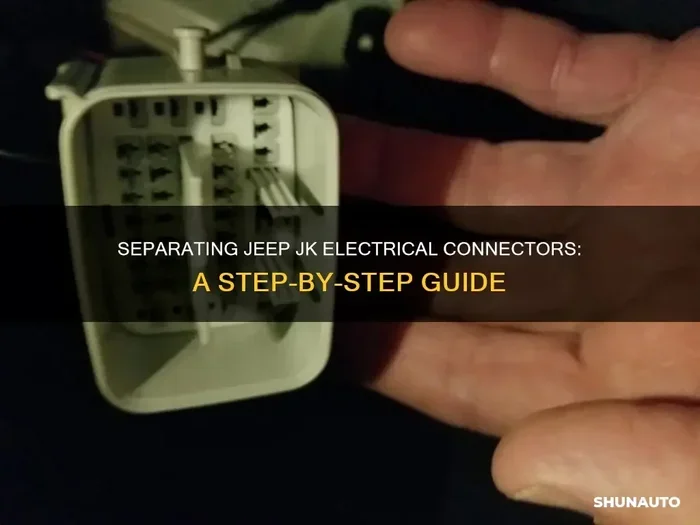
- Weatherpack Connectors: These are sealed connectors designed to keep moisture out. They are common in Jeep Wrangler and Gladiator models.
- Metri-Pack Connectors: These rectangular connectors are often used for larger wiring harnesses. They appear in Jeep Grand Cherokee and Liberty models.
- Bullet Connectors: These are round pin connectors used for simple wire-to-wire connections. They are common in aftermarket installations.
Why Proper Disconnection Matters
You might be tempted to just yank a connector out. Resist that urge. Here is why proper disconnection matters:
- Protects the locking mechanism: Broken clips mean loose connections and potential electrical failures.
- Prevents pin damage: Bent pins can cause intermittent connections or complete failure.
- Maintains weather sealing: Damaged seals let water in, which leads to corrosion.
- Saves time and money: One broken connector can turn a 10-minute job into a two-hour repair.
If you have ever dealt with a bad battery causing the wrench light to come on, you know how confusing electrical gremlins can be. Proper connector handling prevents many of these mysterious issues.
Tools You Will Need
You do not need a garage full of tools. But having the right ones makes the job much easier and safer.
Essential Tools
- Connector removal tool set: These small plastic tools are designed to release locking clips without damage. They cost under $15 and are worth every penny.
- Flathead screwdriver: Useful for gently prying open tab-lock connectors. Use it carefully to avoid scratching.
- Needle-nose pliers: Helpful for gripping small pins or tabs that need lifting.
- Electrical contact cleaner: This spray cleans corroded terminals and ensures good connections after reassembly.
- Wire labels or masking tape: You will use these to mark wires before disconnecting them.
- Multimeter: Optional but helpful for testing connections before and after the job.
Optional but Helpful Tools
- Zip ties: Use these to bundle wires out of the way during the job.
- Dielectric grease: Apply this to connectors after reassembly to protect against moisture.
- Flashlight or headlamp: Jeep wiring can be tight and hard to see in cramped spaces.
Step-by-Step Guide to Disconnect Jeep Electrical Connectors
Now for the main event. Follow these steps carefully and you will disconnect any Jeep connector without issues.
Step 1: Disconnect the Battery
Safety first. Always disconnect the negative battery terminal before working on any electrical component. This prevents short circuits and protects both you and your Jeep’s wiring. Wait at least five minutes after disconnecting to let any residual charge dissipate.
Step 2: Locate the Connector
Find the connector you need to work on. Follow the wire from the component to the plug. Take a photo or make a sketch of how the wires are routed. This will save you headaches during reassembly.
Step 3: Inspect the Connector
Before you touch anything, look closely at the connector. Check for:
- Corrosion on the pins or terminals
- Damage to the locking clip
- Moisture or dirt inside the housing
- Worn or frayed wires near the connector
If you see heavy corrosion or damage, you may need to replace the entire connector rather than just disconnecting it.
Step 4: Release the Locking Mechanism
This is the most important step. The method depends on your connector type:
- Push-Pull: Squeeze the small tabs on the sides of the connector housing. Pull straight out with steady, gentle pressure. Do not yank.
- Tab-Lock: Lift or squeeze the small tab with a flathead screwdriver or your fingernail. Then pull the connector apart.
- Weatherpack: Use the special Weatherpack removal tool. Insert it into the release slot and squeeze while pulling. These connectors are tight by design.
- Metri-Pack: Lift the locking latch on the top or side of the connector. Then pull the two halves apart.
If the connector feels stuck, do not force it. Double-check that you have released the locking mechanism completely. Sometimes there is a secondary latch that is easy to miss.
Step 5: Label and Remove the Wires
Once the connector housing is open, label each wire before pulling it out. Use small pieces of tape or a wire label maker. Note the wire color and its function. This simple step saves enormous time when you put everything back together.
Step 6: Clean and Inspect
With the connector disconnected, take the opportunity to clean the terminals. Spray a small amount of electrical contact cleaner on each pin. Let it dry completely before reconnecting. Inspect each pin for bent or corroded contacts. Replace any damaged pins before reassembly.
After cleaning, check if the connector needs a new seal. If the rubber gasket is cracked or damaged, replace it before reconnecting. This maintains the weatherproofing that protects your Jeep from moisture damage.
Common Mistakes to Avoid
Even experienced DIYers make mistakes when disconnecting electrical connectors. Here are the most common ones and how to avoid them.
Forcing the Connector
The number one mistake is using too much force. If a connector does not come apart easily, something is blocking it. Check for a secondary locking mechanism or a misaligned tab. Forcing the connector can break the housing, bend the pins, or tear the wires.
Skipping the Battery Disconnect
Some connectors are low-voltage and seem safe to work on while connected. But you never know when a wire might short against metal. Always disconnect the battery first. It takes 30 seconds and it protects everything.
Forgetting to Label Wires
Jeep wiring harnesses can have dozens of wires in a single connector. Without labels, you will guess during reassembly. Guessing leads to wrong connections, error codes, and electrical problems. Label every single wire.
Reusing Damaged Connectors
If a locking clip is broken or a pin is corroded, do not reuse the connector. A damaged connector can cause intermittent electrical issues that are very hard to diagnose. Replace it with a new one. Most Jeep connectors are affordable and widely available.
Ignoring Moisture Damage
If you find moisture inside a connector, do not just dry it out and reconnect. Moisture causes corrosion over time. Find the source of the water intrusion, fix it, and then replace the connector or its seal before reconnecting.
Reconnecting Jeep Electrical Connectors
Disconnection is only half the job. Reconnecting correctly ensures everything works as it should.
How to Reconnect Properly
Follow these steps when putting everything back together:
- Make sure all pins are clean and straight.
- Apply a thin layer of dielectric grease to each pin (optional but recommended).
- Align the connector housing carefully. Misalignment is the most common cause of connection issues.
- Push the connector together firmly until you hear or feel the locking click.
- Double-check that the locking mechanism is fully engaged.
- Reconnect the battery negative terminal.
- Test the component to verify proper operation.
When to Seek Professional Help
Not every electrical job is a DIY project. If you encounter extensive corrosion, damaged wiring harnesses, or connectors that refuse to release, it may be time to call a professional. Sometimes the cost of a professional repair is less than the cost of replacing a connector you broke during a DIY attempt.
Also, if your Jeep has complex electrical systems like a panoramic view camera or advanced sensor arrays, the connectors can be very small and delicate. In these cases, a professional mechanic with the right tools and experience is your best bet.
On the other hand, simple connectors like those for auxiliary lights or aftermarket accessories are straightforward and very doable at home. Know your limits and work within them.
Maintenance Tips for Jeep Electrical Connectors
Prevention is always better than repair. A few simple maintenance habits keep your Jeep’s electrical connectors in great shape.
Regular Inspection
Once every few months, visually inspect your Jeep’s connectors. Look for signs of corrosion, loose pins, or cracked housing. Early detection prevents bigger problems down the road.
Keep Connectors Dry
Moisture is the enemy of electrical connections. If your Jeep sits for long periods, consider using a breathable cover for the engine bay. After off-road adventures, check connectors for mud or water intrusion and dry them thoroughly.
Use Dielectric Grease
A small amount of dielectric grease on connectors repels moisture and prevents corrosion. It also makes future disconnections easier. Apply it sparingly, though. Too much grease can attract dirt and create a mess.
Address Warning Signs Promptly
If you notice flickering lights, intermittent electrical failures, or warning lights on your dashboard, investigate early. A loose or corroded connector is often the culprit. The sooner you address it, the less damage it can cause.
Sometimes electrical issues stem from a connector that was not fully reconnected after maintenance. If you recently had work done and notice electrical problems, check that all connectors are properly seated and locked. You may also want to reset the light after an oil change or other service, as some warning lights can be triggered by routine maintenance.
Conclusion
Learning how to disconnect Jeep electrical connectors the right way is a valuable skill for any Jeep owner. It saves money, builds confidence, and keeps your Jeep running smoothly. With the right tools, a little patience, and the steps outlined in this guide, you can handle most connector jobs at home.
Remember to always disconnect the battery first, identify the connector type, release the locking mechanism gently, and label everything before you start. Avoid the common mistakes that lead to damaged connectors and electrical headaches.
Your Jeep is built to handle tough conditions. With proper care and maintenance of its electrical system, it will keep running strong for years to come. Now grab your tools and get to work.
Frequently Asked Questions
Can I use a regular screwdriver to disconnect a Jeep electrical connector?
You should avoid using a regular screwdriver on electrical connectors. It can damage the locking clips and scratch the connector housing. Instead, use a dedicated connector removal tool set. These inexpensive tools are designed to release clips safely without causing any damage.
How do I know if a Jeep connector is sealed?
Sealed connectors have a rubber gasket or O-ring around the housing where the two halves meet. They feel tighter to pull apart than standard connectors. If you see a rubber seal, use the proper removal tool for that connector type to avoid breaking the seal and letting moisture in.
What should I do if a connector pin is bent?
Do not try to reconnect a connector with a bent pin. Carefully remove the pin using needle-nose pliers and replace it with a new one. You can buy replacement pins at most auto parts stores. Reusing a bent pin causes poor electrical contact and intermittent failures.
How often should I inspect my Jeep electrical connectors?
A visual inspection every three to six months is a good habit. If you frequently drive in wet or muddy conditions, check more often. After any off-road adventure, take a few minutes to look at your connectors for signs of dirt, moisture, or damage.
Can corroded connectors cause the check engine light to come on?
Yes, corroded connectors can absolutely trigger the check engine light. Corrosion creates resistance in the electrical circuit, which sends incorrect signals to your Jeep’s computer. If you notice the check engine light alongside electrical issues, inspect the connectors first before assuming a more serious problem.
Is dielectric grease necessary for Jeep electrical connectors?
Dielectric grease is not strictly necessary, but it is highly recommended. It protects against moisture, prevents corrosion, and makes future disconnections easier. Apply a thin layer to pins and inside the connector housing. Avoid using too much, as excess grease can attract dirt and debris.