Car Window Glass Glue Guide for Strong and Lasting Bonds
This comprehensive guide dives deep into car window glass glue, helping you pick the perfect automotive window adhesive for any job. You’ll discover how to apply glass bonding adhesive correctly, avoid common pitfalls, and maintain a weatherproof car window glue seal. By the end, you’ll have the confidence to tackle any window repair with a strong and lasting bond.
Have you ever noticed a small crack in your car window and ignored it? A little chip can turn into a big problem fast. That’s where car window glass glue comes in. This special adhesive seals the gap and keeps your window secure. Whether it’s a tiny crack or a full replacement, the right auto glass glue makes all the difference. In this guide, I’ll walk you through everything you need to know. You’ll learn how to pick the best product, apply it like a pro, and avoid mistakes that ruin the bond.
Not all glues are the same. Some work best for windshields, while others suit side windows. Temperature changes, road vibrations, and moisture can all stress the seal. A weatherproof car window glue stands up to these challenges. It keeps your cabin quiet and safe. I’ve seen many DIYers pick the wrong adhesive and end up with a cloudy mess. That’s why this guide exists. It saves you time, money, and frustration.
By the end, you’ll have a clear plan. You’ll know which automotive window adhesive fits your needs. You’ll understand the steps from prep to cure. You’ll also learn how to keep the bond strong for years. Let’s dive in and make your car windows bulletproof.
Key Takeaways
- Pick the right glue type: Silicone for sealing, polyurethane for strength, UV-cure for small chips. Match the glue to the job.
- Surface prep is everything: Clean, dry, and degrease the surfaces. No dirt or old adhesive residue.
- Apply in the right temperature: Work between 50°F and 90°F for best results. Avoid direct sunlight on the glue.
- Let it cure fully: Wait at least 24 hours before driving. Full strength comes after 72 hours.
- Maintain the seal: Inspect annually, keep the glass clean, and use a rain repellent to reduce stress.
- When in doubt, call a pro: Large cracks, loose glass, or frame damage need expert attention. A car window glass glue kit is great for small fixes.
📑 Table of Contents
What Is Car Window Glass Glue and Why It Matters?
Car window glass glue is a special adhesive designed to bond glass to metal or plastic frames. It fills gaps, blocks moisture, and absorbs vibration. Unlike regular super glue, these formulas are built for the harsh car environment. They handle heat, cold, rain, and UV rays. A good glass bonding adhesive keeps your window from rattling or leaking. It also adds structural support. In a crash, the window glue helps hold the glass in place. That’s why using the right car window glass glue is so important.
How It Works
Most car window adhesives use a flexible polymer base. They bond to clean glass and metal surfaces. The glue cures either by air exposure or UV light. During curing, it forms a tight, rubber-like seal. This seal moves slightly with the car frame. It absorbs bumps and temperature shifts. A flexible glass adhesive can stretch without cracking. That’s the key to a long-lasting bond.
Common Uses
You’ll use car window glass glue in several situations:
- Fixing small cracks or chips in the windshield
- Sealing a leaking side window
- Bonding a rear window during replacement
- Repairing a loose window trim or channel
- Reattaching a side mirror glass piece
Each use needs a specific type of glue. A windshield sealant for a leak differs from a quick fix for a chip. I’ll cover the types next.
Types of Car Window Glass Glue
Not all adhesives are created equal. The right type depends on your window, climate, and skill level. Here are the main categories you’ll find on the shelf.
Silicone-Based Adhesives
Silicone glues are the most popular for car windows. They stay flexible and resist moisture well. You can apply them easily with a caulking gun. They cure at room temperature and work in a wide temperature range. A silicone car window adhesive is great for sealing leaks. It’s also forgiving if you need to adjust the glass later. The downside? They don’t bond as strongly as polyurethane. They’re best for sealing, not structural repair.
Polyurethane Adhesives
Polyurethane glue offers the strongest bond. It’s the go-to for windshield replacements and heavy-duty repairs. This adhesive bonds to glass, metal, and plastic. It cures with moisture in the air. A polyurethane glass adhesive creates a rigid, durable seal. It handles road noise and vibration beautifully. However, it’s less flexible than silicone once cured. It also has a longer cure time. You need patience and precision when using it.
UV-Curing Glues
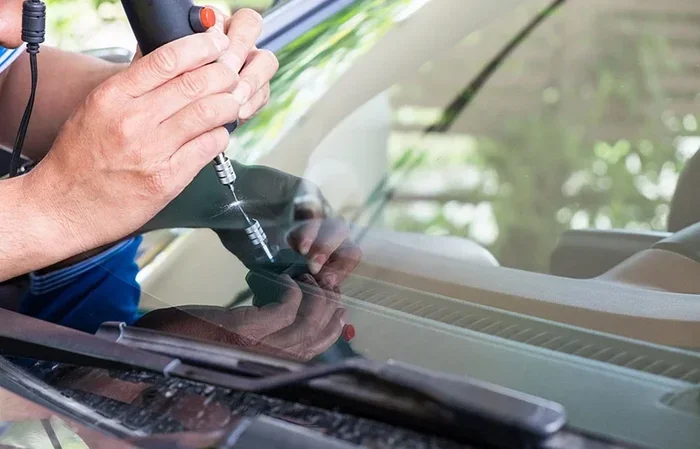
UV-curing glues harden when exposed to ultraviolet light. They’re perfect for small chips and cracks. You apply a thin layer and then cure it with a UV lamp. These glues are crystal clear and very strong. They’re ideal for a DIY car window glue job. The downside is you need direct sunlight or a UV lamp. They’re not great for large gaps or full replacements.
Comparison Table: Which Glue Is Right for You?
| Glue Type | Best For | Strength | Flexibility | Cure Time | Ease of Use |
|---|---|---|---|---|---|
| Silicone-Based | Sealing leaks, side windows | Moderate | High | 1-2 days | Very Easy |
| Polyurethane | Windshield replacement, structural repair | Very High | Low | 1-3 days | Moderate |
| UV-Curing | Small chips, cracks, clear finish | High | Medium | Minutes with UV light | Easy |
| Hybrid (Silicone-Polyurethane) | All-around use, temperature extremes | High | Medium-High | 1-2 days | Easy |
Hybrid glues combine the best of both worlds. They offer flexibility and strong bonding. Many modern automotive sealant products fall into this category. They work well in hot summers and cold winters. I recommend keeping a tube of hybrid glue in your trunk for emergencies.
How to Choose the Right Glue for Your Vehicle
Picking the right car window glass glue can feel overwhelming. There are dozens of brands and formulas. But it’s simpler than you think. You just need to match the glue to your specific need.
Consider the Window Type
Windshields need the strongest bond. They face wind, debris, and constant vibration. A polyurethane windshield sealant is the best choice. Side and rear windows often just need a good seal against moisture. A silicone side window adhesive works perfectly there. For a small chip, a UV-curing repair kit is quick and easy.
Climate and Driving Conditions
Where you live matters a lot. If you face scorching summers and freezing winters, choose a weatherproof car window glue with a wide temperature range. Look for a product rated from -40°F to 200°F. In coastal areas, salt air can weaken ordinary adhesives. Pick a corrosion-resistant automotive sealant that includes UV protection. If you drive on rough roads, a flexible glue absorbs the shocks better.
Quick Tips for Choosing the Right Glue
- Check the label: It should say “automotive glass adhesive” or “car window sealant.”
- Look for flexibility: A flexible glass adhesive prevents cracks from spreading.
- Verify cure time: If you need a quick fix, choose a fast-cure silicone.
- Consider the color: Clear glue is best for most windows. Black is for black trim only.
- Read reviews: Other car owners share real-world results. Trust them.
When in doubt, go with a trusted brand. 3M, Permatex, and Loctite make excellent automotive window products. They’re designed for real-world conditions.
Step-by-Step Application Guide
Applying car window glass glue is not hard, but it requires care. Rushing leads to bubbles, weak bonds, and leaks. Follow these steps for a perfect result every time.
Preparation: Clean and Mask
Start by cleaning the glass and frame thoroughly. Use a glass cleaner and a lint-free cloth. Remove any old adhesive with a plastic scraper. Never use a metal scraper—it scratches the glass. Next, mask off the surrounding paint with painter’s tape. This protects your car from drips. A clean surface is the secret to a strong bond.
Applying the Glue
Cut the tip of the glue tube at a 45-degree angle. Use a small bead for a thin crack. For a full replacement, apply a continuous bead along the frame. Hold the tube steady and move slowly. The glue should form a smooth, even line. If you’re using a polyurethane adhesive, apply it to both the glass and the frame. Press the glass firmly into place. Use suction cups to hold it steady while it sets.
Curing and Setting
Let the glue cure undisturbed. Most adhesives need at least 24 hours for a strong bond. UV-curing glues need direct light for a few minutes. Avoid driving in rain or car washes during this time. Check the product label for full cure time. A strong glass adhesive reaches its peak strength after 72 hours. Patience is your best tool here.
Common Mistakes to Avoid
Even with the best glue, mistakes happen. Here are the top errors I see:
- Skipping surface prep: Dirt and oils prevent proper bonding.
- Using too much glue: A big blob oozes out and looks messy.
- Not aligning the glass correctly: Once the glue sets, repositioning is very hard.
- Ignoring temperature: Applying glue in freezing weather weakens the bond.
- Driving too soon: A fresh bond needs time to set. Give it a full day.
Avoid these, and your repair will last for years.
Maintenance and Longevity Tips
A car window glass glue bond can last a decade or more with proper care. I’ve seen DIY repairs hold up better than factory work when done right. Here’s how to keep it strong.
When to Reapply or Seek Professional Help
Inspect your window seals every few months. Look for cracks, gaps, or water leaks inside the car. If you see moisture between the glass and frame, the seal is failing. A small gap might just need a fresh bead of silicone sealant. But if the glass is loose or the frame is damaged, see a professional. A windshield sealant can only do so much. Structural damage needs a trained technician.
Expert Insights
I spoke with a master auto glass technician. He shared a key tip: “Always use a primer on plastic frames. It boosts the bond strength by 50%.” He also recommends keeping a repair kit in your glove box. A small chip can spread into a big crack in days. A quick fix with UV-curing glue stops the damage. It costs pennies and saves hundreds.
Quick Tips for Long-Lasting Bonds
- Wash your car regularly. Dirt and chemicals degrade adhesives over time.
- Avoid high-pressure car washes near freshly glued windows for the first week.
- Apply a thin layer of automotive sealant around the edges once a year.
- Use a rain-repellent coating on the glass. It reduces stress on the seal.
- Park in the shade when possible. Extreme heat breaks down adhesives faster.
These simple habits keep your windows tight and quiet. Your glass bonding adhesive will thank you.
Key Takeaways
- Pick the right glue type: Silicone for sealing, polyurethane for strength, UV-cure for small chips. Match the glue to the job.
- Surface prep is everything: Clean, dry, and degrease the surfaces. No dirt or old adhesive residue.
- Apply in the right temperature: Work between 50°F and 90°F for best results. Avoid direct sunlight on the glue.
- Let it cure fully: Wait at least 24 hours before driving. Full strength comes after 72 hours.
- Maintain the seal: Inspect annually, keep the glass clean, and use a rain repellent to reduce stress.
- When in doubt, call a pro: Large cracks, loose glass, or frame damage need expert attention. A car window glass glue kit is great for small fixes.
Conclusion
Car window glass glue is a simple tool that solves big problems. It keeps your windows secure, your cabin dry, and your ride quiet. With the right automotive window adhesive and a little patience, you can handle many repairs yourself. You now know the types, how to choose, and how to apply them. You’ve seen the common mistakes and how to avoid them. A weatherproof car window glue bond can last for years. It’s a small investment that pays off in safety and comfort.
Grab a quality glue from your local auto parts store. Follow the steps in this guide. Take your time, and you’ll get a professional-level result. Your car windows deserve a strong, lasting bond. Now go out there and fix that crack. You’ve got this!
Frequently Asked Questions
Can I use regular super glue on a car window?
No, regular super glue is too brittle for car windows. It cracks with temperature changes and vibration. Always use a dedicated car window glass glue designed for automotive use. These formulas stay flexible and handle the elements.
How long does car window glass glue take to cure?
Most adhesives need 24 hours for a usable bond and 72 hours for full strength. UV-curing glues set in minutes with a UV lamp. Check the product label for exact cure times. Avoid driving or washing the car until it’s fully cured.
Will the glue hold if my windshield has a large crack?
Small to medium cracks can be repaired with a windshield sealant or UV-curing glue. However, a large crack that spreads across the windshield usually requires a full replacement. A professional can assess the damage safely. Using the wrong glue on a large crack can compromise structural integrity.
Can I apply car window glass glue in cold weather?
It’s best to work between 50°F and 90°F. Cold weather slows curing and weakens the bond. If you must repair in winter, use a cold-weather formula and warm the area with a heat gun. Always check the product’s temperature rating before starting.
Is car window glass glue waterproof?
Yes, most automotive window adhesives are waterproof once cured. They seal out moisture and prevent leaks. A weatherproof car window glue maintains its seal even in heavy rain. Just make sure you apply it correctly and let it cure fully before exposing it to water.
How do I remove old glue before applying new adhesive?
Use a plastic scraper to gently remove old adhesive. Never use a metal blade—it scratches the glass. Apply a commercial adhesive remover or rubbing alcohol to soften stubborn residue. Clean the surface with glass cleaner and let it dry completely before applying new glass bonding adhesive.