Can You Program a Garage Door Opener Yourself at Home
Yes, you can absolutely program a garage door opener yourself at home. Most modern garage door openers use simple programming buttons and rolling code technology that make DIY setup quick and easy. With just a few minutes and basic steps, you can program your garage door remote, wall control panel, and keypad without hiring a professional.
Have you ever stood in your driveway, remote in hand, wondering if you could just program a garage door opener yourself? The answer is a resounding yes. You do not need a technician or a expensive service call to get your garage door working perfectly. With a little patience and the right guidance, you can handle garage door opener programming right from your living room.
Programming your own garage door opener is one of the easiest home improvement tasks you can tackle. Most modern openers come with clear instructions and simple buttons that walk you through the process. Whether you just bought a new garage door remote or need to reset your existing system, this guide covers everything you need to know.
In this article, we will walk you through every step of the process. You will learn how garage door openers work, how to program different devices, and what to do when things do not go as planned. By the end, you will feel confident handling your DIY garage door opener setup like a pro.
Key Takeaways
- DIY programming saves money: You can avoid costly service calls by learning to program your opener yourself.
- Most openers are user-friendly: Major brands like Chamberlain, LiftMaster, Genie, and Craftsman all offer simple programming methods.
- Rolling code technology keeps you safe: Modern openers use advanced security features that are easy to set up.
- You can program multiple devices: Remotes, keypads, and wall panels can all be programmed in one session.
- Common mistakes are easy to fix: Most programming issues have simple solutions you can handle at home.
- Know when to call a pro: Some complex issues or older models may need professional help.
📑 Table of Contents
- Why Programming Your Garage Door Opener Yourself Makes Sense
- Understanding How Garage Door Openers Work
- Step-by-Step Guide to Programming Your Garage Door Opener
- Programming Methods for Popular Garage Door Opener Brands
- Common Programming Mistakes and How to Avoid Them
- When Should You Call a Professional?
- Key Takeaways
- Conclusion
Why Programming Your Garage Door Opener Yourself Makes Sense
The Benefits of DIY Programming
There are many reasons to program your garage door opener on your own. First, it saves you a significant amount of money. Professional programming services can cost anywhere from $75 to $200 or more. When you do it yourself, that cost drops to zero. All you need is about 10 to 15 minutes of your time.
Second, DIY programming gives you full control over your garage door system. You decide which remotes work, which keypads are active, and how many devices are connected. This level of control matters for garage door security. You can remove old remotes immediately if they are lost or stolen.
Third, learning how your opener works builds confidence. Once you understand the basics, you can handle future changes without calling for help. Whether you add a new remote or replace a battery, you will know exactly what to do.
How Much Money Can You Save?
Let us put some numbers on this. A typical service call for programming a garage door opener costs between $75 and $150. If you need to program multiple remotes or add a keypad, the cost goes up. By doing it yourself, you save that entire amount.
Over the life of your garage door system, you might need to reprogram devices several times. New remotes, new keypads, or a motor replacement could all require reprogramming. Each time, choosing the DIY garage door opener route saves you real money.
Here is a quick comparison:
- Professional service call: $75 to $200 per visit
- DIY programming: $0 (just your time)
- Total savings over 5 years: $150 to $1,000+
Those savings add up fast. Plus, you learn a valuable skill that makes you more self-sufficient as a homeowner.
Understanding How Garage Door Openers Work
The Basics of Garage Door Opener Technology
Before you start programming a garage door opener, it helps to understand how the system works. At its core, a garage door opener has two main parts. The first is the motor unit mounted on your garage ceiling. The second is the handheld garage door remote you carry in your car or on your keychain.
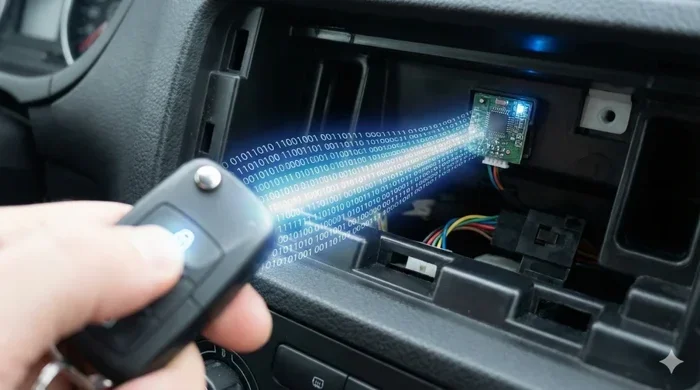
When you press the button on your remote, it sends a radio signal to the motor unit. The motor unit receives the signal and checks if it matches a recognized code. If the code matches, the motor activates and opens or closes the door. This entire process happens in less than a second.
The wall control panel works the same way. It is a permanent station inside your garage that lets you open the door with a button. Many people also use a garage door keypad on the outside of their garage. This allows entry with a personal code.
Rolling Code vs Fixed Code Systems
Older garage door openers used fixed code technology. This means the remote sent the same code every time you pressed the button. While simple, fixed code systems are less secure because someone could intercept and copy the signal.
Modern openers use rolling code technology. This is a much smarter system. Every time you press the remote button, it sends a new, unique code. The receiver in the motor unit also changes its expected code. This makes it nearly impossible for someone to duplicate your signal.
Rolling code technology is why you need to follow the proper garage door programming steps. The system must sync the codes between the remote and the receiver. Once they are synced, the system handles the rest automatically.
Almost all openers sold today use rolling code technology. This includes Chamberlain garage door opener models, LiftMaster units, Genie openers, and Craftsman garage door openers. The programming process is similar across all brands, which makes it easy to learn once.
Step-by-Step Guide to Programming Your Garage Door Opener
Preparing for Programming
Before you begin garage door opener programming, gather a few things. You will need your garage door remote or the device you want to program. Make sure it has fresh batteries. Dead batteries are the number one cause of programming failures.
Next, locate the motor unit on your garage ceiling. You need to access the back or side of this unit. Most motor units have a light cover that lifts off or a panel that slides open. Inside, you will find the learn button. This is the key to programming your opener.
The learn button is usually colored. It might be red, orange, green, or purple depending on your model. On some units, it is a small pinhole button. Note the color and location of this button before you start.
Programming the Remote Control
Now let us get into the actual steps. Follow these carefully for a smooth garage door remote programming experience.
- Press and release the learn button on the motor unit. You will usually hear a clicking sound or see a light blink.
- Within 30 seconds, press and hold the button on your remote that you want to program.
- Wait for a confirmation signal. The motor unit light will flash, or you will hear two clicks.
- Release the remote button. Your remote is now programmed.
That is it! You just completed the basic garage door programming steps. Test your remote by standing at a safe distance and pressing the button. The door should respond immediately.
If you need to program additional remotes, repeat the same process. Each remote will sync with the motor unit independently. You can program up to five or more remotes on most models.
Programming the Wall Control Panel
The wall control panel is the button mounted inside your garage. Programming it is slightly different from programming a remote because it is wired directly to the motor unit.
Most wall control panels come pre-programmed from the factory. However, if you have replaced yours or need to reset it, here is what to do:
- Locate the wires connecting the wall panel to the motor unit.
- Check that the wires are securely connected to the correct terminals.
- If your panel has a learn button feature, press it and follow the on-screen prompts.
- Test the wall button to confirm the door responds.
The wall control panel is one of the most reliable components in your garage door system. It rarely needs reprogramming unless you have done electrical work or replaced the unit.
Setting Up a Garage Door Keypad
A garage door keypad is a great addition to any home. It lets family members and guests enter without carrying a remote. Programming a keypad follows the same basic process as programming a remote.
Start by mounting the keypad outside your garage at a comfortable height. Then follow these steps:
- Press and release the learn button on the motor unit.
- Enter your preferred PIN code on the keypad within 30 seconds.
- Press the Enter or OK button on the keypad.
- Wait for the confirmation signal from the motor unit.
Once programmed, anyone who knows the PIN can open your garage door. This is why you should choose a code that is not easy to guess. Avoid simple codes like 1234 or your birth year.
Programming Methods for Popular Garage Door Opener Brands
Chamberlain and LiftMaster Programming
Chamberlain garage door opener and LiftMaster units are among the most popular on the market. Their programming process is straightforward and consistent across models.
For most Chamberlain and LiftMaster openers, look for the smart button or learn button on the back of the motor unit. It is usually red and sits under a light cover. Press it once, then press and hold the button on your remote within 30 seconds. The motor unit light will flash to confirm the connection.
Chamberlain also offers the MyQ smart garage door system. This lets you control your opener from your phone. Programming the MyQ app is done through the app itself. You simply follow the on-screen prompts to connect your opener to your home Wi-Fi network.
One thing to note: some older Chamberlain models use a different learn button color. Purple learn buttons are found on some models and require holding the button for 3 to 5 seconds instead of a quick press. Always check your owner’s manual for the specific garage door programming steps for your model.
Genie Garage Door Opener Programming
Genie is another major brand in the garage door industry. Genie openers are known for their durability and quiet operation. Programming a Genie opener is just as simple as programming a Chamberlain.
On most Genie units, the learn button is located on the back of the motor head. It may be black, orange, or red depending on the model. Press the learn button once, then press and hold the button on your Genie remote within 30 seconds. The indicator light on the motor unit will confirm the programming.
Genie also offers wireless keypads and smart controls. Their Aladdin Connect system works similarly to Chamberlain’s MyQ. You can program and monitor your garage door from your smartphone with the Genie app.
Craftsman Garage Door Opener Programming
Craftsman garage door openers are sold at Sears and other retailers. They use the same rolling code technology as other major brands. The programming process is very similar.
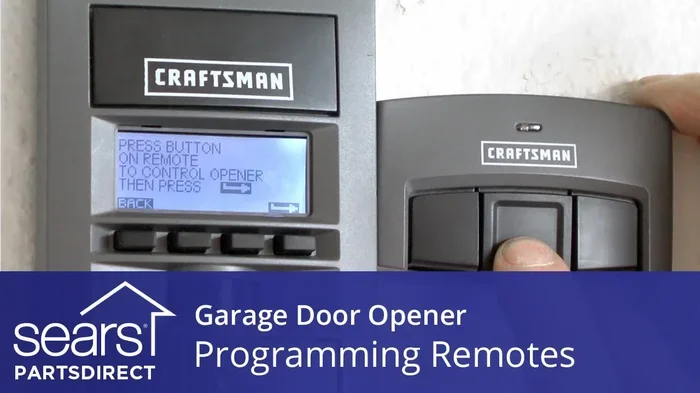
On Craftsman openers, the learn button is typically a white, red, or orange button on the back of the motor unit. Some newer models have a smart control panel with a digital display that guides you through programming step by step.
For older Craftsman models, the process is: press the learn button, then press the remote button within 30 seconds. The motor unit light will flash to confirm the sync. Craftsman remotes and keypads are interchangeable with other brands in many cases, which gives you flexibility if you ever switch brands.
Common Programming Mistakes and How to Avoid Them
Mistakes That Cause Programming Failures
Even with clear instructions, things can go wrong during garage door opener programming. Here are the most common mistakes people make and how to avoid them.
- Waiting too long between steps. Most openers give you only 30 seconds to complete each step. If you pause too long, the programming window closes. Start the process when you are ready and have your remote in hand.
- Using dead batteries. A weak or dead battery in your remote is the most common reason programming fails. Always replace batteries before you start.
- Pressing the wrong button. Make sure you are pressing the learn button on the motor unit, not a different button. On some models, the learn button is hidden under a cover or behind a light lens.
- Programming in the wrong order. Always press the learn button first, then press the remote button. Reversing this order will not work.
- Not clearing old codes. If your opener has stored old codes, it may conflict with new ones. Use the erase or reset function before programming new devices.
Quick Tips for Success
Follow these simple tips to make your garage door remote programming a breeze:
- Work in a well-lit area so you can see the motor unit indicator lights clearly.
- Keep your owner’s manual nearby for model-specific instructions.
- Program one device at a time to avoid confusion.
- Test each device immediately after programming to confirm it works.
- Write down your PIN codes and keep them in a safe place.
- Repeat the process for all remotes you want to add, even if the first one works perfectly.
Expert Insights on Garage Door Opener Programming
According to garage door industry experts, most programming issues come down to three things: dead batteries, timing, and pressing the wrong button. Professional technicians often say that if you follow the 30-second rule and double-check your learn button, you will succeed 95% of the time.
Experts also recommend updating your opener’s firmware if it is a smart model. Manufacturers regularly release updates that improve performance and garage door security. These updates are usually done through the companion app and take just a few minutes.
One often-overlooked tip: clean the contacts on your remote and motor unit terminals. Dust and corrosion can interfere with the signal. A quick wipe with a dry cloth can solve mysterious programming problems.
When Should You Call a Professional?
Signs You Need Expert Help
While DIY garage door opener programming works for most situations, there are times when you should call a professional. Here are the clear signs that you need expert help.
- Your motor unit does not have a learn button. Some very old models or commercial-grade openers use different programming methods that require specialized knowledge.
- The motor unit light does not flash when you press the learn button. This could indicate an electrical problem or a faulty control board.
- Your door responds inconsistently after programming. If the remote works sometimes but not always, there may be a deeper issue with the receiver or antenna.
- You have tried multiple times and cannot get any device to sync. This could point to a defective remote or motor unit.
- Your opener is more than 15 years old. Older openers may not support modern programming methods and could benefit from a full replacement.
Cost vs DIY Considerations
When deciding whether to call a professional, weigh the cost against the effort. A service call costs $75 to $200, but it guarantees the job is done right. If you have tried and failed multiple times, paying for professional help might actually save you frustration and time.
However, if your opener is a standard modern model and you have fresh batteries, the DIY route almost always works. The programming steps are designed to be simple enough for anyone to follow. Give it a fair try before you spend money on a service call.
Also consider the age of your opener. If your garage door motor is old and failing, programming a new remote will not fix the underlying problem. In that case, a professional can assess whether you need a repair or a full replacement.
Key Takeaways
- You can absolutely program a garage door opener yourself at home without any special tools or training.
- DIY programming saves significant money compared to hiring a professional service call.
- Modern openers use rolling code technology that is secure and easy to sync with remotes and keypads.
- The learn button is the key to programming all major brands including Chamberlain, LiftMaster, Genie, and Craftsman.
- Avoid common mistakes like dead batteries, waiting too long, and pressing the wrong sequence of buttons.
- Call a professional when needed if you encounter electrical issues, inconsistent responses, or very old equipment.
Conclusion
Can you program a garage door opener yourself? The answer is a clear and confident yes. You now have all the knowledge you need to handle garage door opener programming right at home. From understanding how rolling code technology works to following the simple garage door programming steps, you are equipped to take on this task.
Programming your garage door remote, wall control panel, or garage door keypad does not require special skills or expensive tools. It takes just a few minutes and a little patience. The satisfaction of completing a home project on your own is a bonus that makes the effort worthwhile.
Remember the key points we covered. Always check your batteries first. Find the learn button on your motor unit. Follow the 30-second rule for each step. Test your devices immediately after programming. And know when it is time to call a professional for help.
With this guide, you can tackle garage door programming with confidence. Your DIY garage door opener setup is well within your reach. So grab your remote, find that learn button, and get started today. Your garage door will be working perfectly in no time.
Frequently Asked Questions
How long does it take to program a garage door opener yourself?
Most people complete the entire programming process in 10 to 15 minutes. The actual steps are quick and straightforward. You just need to press the learn button and sync your remote within 30 seconds. If you are programming multiple remotes or a keypad, add a few extra minutes.
Do I need any special tools to program my garage door opener?
No special tools are needed at all. You only need a fresh battery in your remote and access to the motor unit on your garage ceiling. A stepladder might be helpful to reach the motor unit safely. That is all you need for successful garage door opener programming.
Can I program a universal garage door remote myself?
Yes, universal remotes can be programmed just like brand-specific remotes. Most universal remotes have a set of dip switches or a learn mode that lets you match them to your opener. Check the instructions that come with your universal remote for brand-specific garage door programming steps.
Why is my newly programmed garage door remote not working?
The most common reason is dead or weak batteries. Replace the batteries and try again. Another possibility is that you waited too long between pressing the learn button and pressing the remote button. The 30-second window is strict. Also make sure you are pressing the correct learn button and that your remote is compatible with your opener model.
Is it safe to program my garage door opener myself?
Absolutely. Programming your opener yourself is completely safe. You are not working with dangerous electrical components. You are simply syncing a radio signal between your remote and the motor unit. Always use a stepladder when accessing the motor unit on your ceiling, and make sure the garage door is fully closed during programming.
Can I program my garage door opener without the original remote?
Yes, you can. You do not need the original remote to program new devices. Simply press the learn button on the motor unit and follow the programming steps with your new remote or keypad. If you have lost all remotes and want to clear old codes, you can usually press and hold the learn button for 6 to 10 seconds to erase all stored codes before starting fresh.