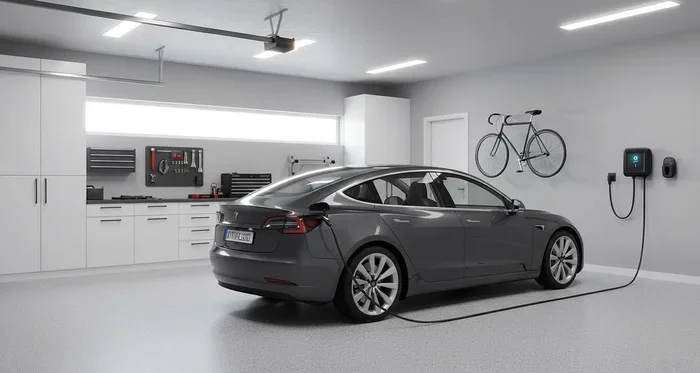
How Many Amps Does It Take to Charge a Tesla at Home
How many amps does it take to charge a Tesla? Most Tesla owners use a Level 2 charger running on a 240-volt circuit with 30 to 48 amps for efficient home charging. Understanding your charging rate and electrical setup helps you get the best charging speed every night.
Key Takeaways
- Amps matter: The number of amps directly controls how fast your Tesla charges at home.
- Level 2 charging is standard: Most homeowners install a 240-volt Level 2 charger for overnight power.
- 30-48 amps is typical: A Tesla home charging setup usually runs between 30 and 48 amps depending on your vehicle and charger.
- Electrical upgrades may be needed: Older homes might need a panel upgrade to support a dedicated Tesla charging circuit.
- Charging speed depends on several factors: Battery size, charger type, and circuit capacity all affect your charge time.
- Professional installation is recommended: Always hire a licensed electrician for safe and code-compliant home charging setup.
📑 Table of Contents
- How Many Amps Does It Take to Charge a Tesla at Home?
- What Does Amperage Mean for Tesla Charging?
- How Many Amps Does It Take to Charge a Tesla at Home?
- Level 1 vs Level 2 Charging: What Is the Difference?
- Setting Up a Home Charging Station for Your Tesla
- Factors That Affect Tesla Charging Speed
- Tips to Optimize Your Tesla Charging at Home
- Common Mistakes When Charging a Tesla at Home
- Expert Insights on Home Tesla Charging
- Quick Tips for Fast Home Charging
- Conclusion
- Frequently Asked Questions
How Many Amps Does It Take to Charge a Tesla at Home?
If you own a Tesla or are thinking about buying one, you have probably wondered about the charging process. Specifically, how many amps does it take to charge a Tesla at home? This is one of the most common questions new and future Tesla owners ask. And it makes sense. After all, you want to know how long it takes, what equipment you need, and whether your home can handle it.
The short answer is that most Tesla home charging setups use between 30 and 48 amps on a 240-volt circuit. But the full picture involves a few more details. Your charging speed depends on the type of charger, your electrical panel, and even the model of Tesla you drive. This guide breaks everything down in plain language. You will learn exactly what amps mean for your Tesla, how to set up home charging, and how to get the best results.
What Does Amperage Mean for Tesla Charging?
Before diving into numbers, let us talk about what amps actually do. Think of electricity like water flowing through a hose. Amperage is how wide the hose is. More amps means more electricity flows to your car at once. That means faster charging. Voltage is the pressure behind that water. Together, amps and voltage determine your total charging rate in watts.
How Amps and Voltage Work Together
The formula is simple. Watts equals amps multiplied by volts. A standard Level 2 charger running at 48 amps on a 240-volt circuit delivers 11,520 watts. That is plenty of power to charge a Tesla overnight. Most Tesla home charging setups fall within the 30-to-48-amp range. This gives you a comfortable balance between speed and safety.
Your car also has a built-in charger (the onboard charger) that limits how many amps it will pull. Some Tesla models accept up to 48 amps. Others cap out at 32 or 40 amps. So even if your charger can deliver more, your car decides how much it actually uses. This is an important detail when figuring out how many amps does it take to charge a Tesla.
How Many Amps Does It Take to Charge a Tesla at Home?
Now let us get into the real numbers. The amps needed depend mainly on two things: the Tesla charger you use and the specific model you drive. Here is a breakdown of the most common setups.
Standard Home Charging Amps by Tesla Model
Every Tesla comes with a mobile connector as standard. This plugs into a regular household outlet for Level 1 charging. But most owners upgrade to a dedicated Level 2 home charging station. Here are typical amp ranges:
- Tesla Model 3: Accepts up to 48 amps on a NEMA 14-50 outlet with a Tesla Wall Connector. Charges from empty to full in roughly 4 to 8 hours depending on battery size.
- Tesla Model Y: Similar to Model 3. Uses up to 48 amps. Overnight charging works perfectly on a 240-volt circuit.
- Tesla Model S: Larger battery means longer charge time. Typically pulls up to 48 amps. A full charge takes around 8 to 12 hours at home.
- Tesla Model X: Also accepts up to 48 amps. Charging time ranges from 8 to 12 hours overnight on a standard home charging setup.
The Tesla Wall Connector vs Mobile Connector
The Tesla Wall Connector is the company’s dedicated home charger. It supports up to 48 amps and can be hardwired or plugged into a 240-volt circuit. It charges significantly faster than the mobile connector. The mobile connector, which comes with every Tesla, works on a standard 120-volt outlet but delivers much slower charging speed. It usually provides only 10 to 16 amps. That is fine for emergencies but not practical for daily use.
Most Tesla owners find that a Tesla Wall Connector with a dedicated circuit is the sweet spot. It gives you fast, reliable home EV charging without overloading your electrical system.
Level 1 vs Level 2 Charging: What Is the Difference?
Understanding the difference between Level 1 and Level 2 charging is essential when planning your Tesla charging setup. The two use completely different power levels and serve different purposes.
Level 1 Charging
Level 1 charging uses a standard 120-volt household outlet. It typically delivers 10 to 16 amps. This translates to roughly 3 to 5 miles of range per hour of charging. It is painfully slow for daily use. You might wake up after a full night and only gain 20 to 30 miles of range. Level 1 works best for road trips or occasional top-ups when you have no other option.
Level 2 Charging
Level 2 charging requires a 240-volt circuit, similar to what a clothes dryer or oven uses. It delivers 30 to 48 amps and provides 25 to 40 miles of range per hour. This is the standard for home charging stations. With Level 2, you can fully charge most Tesla models overnight. It is the most practical and popular option for daily drivers.
| Feature | Level 1 | Level 2 |
|---|---|---|
| Voltage | 120V | 240V |
| Amps | 10-16A | 30-48A |
| Range Added Per Hour | 3-5 miles | 25-40 miles |
| Full Charge Time | 2-4 days | 4-12 hours |
| Best For | Emergency use | Daily home charging |
Which One Should You Choose?
For home use, Level 2 charging is the clear winner. It is faster, more efficient, and handles the daily demands of a Tesla. Level 1 is really just a backup. If you have the option to install a Level 2 home charger, do it. The difference in charging time is night and day.
Setting Up a Home Charging Station for Your Tesla
Installing a home charging station is one of the best investments you can make as a Tesla owner. But it is not just about buying a charger. You need the right electrical setup. Here is what you need to know about the electrical circuit and installation process.
Electrical Panel Requirements
Most homes built after 2000 have a 200-amp electrical panel. This can easily support a dedicated Tesla charging circuit running at 40 to 48 amps. Older homes with 100-amp panels may also work. But you might need an upgrade to handle the additional load safely. A licensed electrician can assess your panel and recommend the right setup.
Your circuit breaker must match the amperage of your charger. For a 48-amp Tesla Wall Connector, you need a 60-amp breaker. For a 40-amp setup, a 50-amp breaker works. Always match the breaker to the wire gauge and charger specs. This prevents overheating and ensures safe operation.
Outlet Types for Home Charging
The most common outlet for Tesla home charging is the NEMA 14-50. This is the same outlet used by electric dryers and stoves. It supports 240 volts at 50 amps. Another option is the NEMA 6-50, which is slightly less common but still works well. Both deliver the power needed for fast EV charging at home.
Step-by-Step Installation Tips
- Step 1: Have a licensed electrician inspect your electrical panel and determine capacity.
- Step 2: Choose your charger. The Tesla Wall Connector is the top pick for most owners.
- Step 3: Install a dedicated 240-volt circuit with the correct breaker size.
- Step 4: Mount the charger near your parking spot. Keep it within reach of your Tesla.
- Step 5: Connect the charger and test it. Your Tesla should recognize it automatically.
Pro tip: Always pull permits when doing electrical work. Your local building codes require it. And it keeps your home insurance valid. Do not skip this step.
Factors That Affect Tesla Charging Speed
Even with the same charger and circuit, different Teslas charge at different speeds. Several factors come into play. Understanding them helps you set realistic expectations for charging speed at home.
Battery Size and Capacity
Larger batteries take longer to charge. A Tesla Model 3 with a 60 kWh battery charges faster than a Model S with a 100 kWh battery. Even on the same amps and voltage, the bigger battery needs more time to reach full capacity. Think of it like filling a larger bucket with the same hose.
Onboard Charger Limits
Each Tesla model has a maximum onboard charger capacity. This is the maximum number of amps the car will accept. The Model 3 and Model Y can accept up to 48 amps. Older Model S and Model X versions may cap at 40 amps. Check your specific model to know the exact limit. This directly affects how many amps to charge a Tesla in practice.
Ambient Temperature
Cold weather slows down EV charging. Lithium-ion batteries charge slower in low temperatures. If you live in a cold climate, expect slightly longer charging times in winter. Some Teslas precondition the battery before charging to help. But it still takes more time than in warm weather.
State of Charge
Batteries charge fastest between 10% and 80%. After 80%, the rate slows down significantly to protect battery health. This is called trickle charging. So if you are calculating how many amps does it take to charge a Tesla from empty to full, remember the last 20% takes much longer. Plan your charging sessions around this for the best results.
Tips to Optimize Your Tesla Charging at Home
You have your charger installed. You know the amps. Now how do you get the most out of your home charging setup? Here are practical tips that real Tesla owners use.
Schedule Charging During Off-Peak Hours
Many utility companies offer lower electricity rates at night. Schedule your Tesla to charge between 11 PM and 6 AM. You save money on your electric bill. And you wake up every morning with a full battery. Use the Tesla app to set charging schedules easily.
Use the Tesla Wall Connector
The Tesla Wall Connector charges faster than any other home option. It supports up to 48 amps and connects directly to your electrical circuit. It also works with all Tesla models. Third-party Level 2 chargers can work too. But the Tesla Wall Connector offers the best compatibility and performance.
Keep Your Charging Cable Organized
This sounds minor. But a messy cable leads to wear and tear. Use a wall-mounted cable holder. Keep the connector dry and protected. A well-maintained charging setup lasts longer and works reliably every night.
Monitor Your Electrical Load
Do not run heavy appliances on the same circuit while your Tesla charges. Dryers, ovens, and HVAC systems draw a lot of power. A dedicated circuit for your home charging station prevents overloads and tripped breakers. Safety always comes first with home EV charging.
Consider Solar Panels
Pairing your Tesla charger with solar panels is a great move. You charge your car with free energy from the sun. It reduces your carbon footprint. And it slashes your electricity costs over time. Many Tesla owners combine solar power with a Tesla Powerwall for complete energy independence.
Keep Your Tesla Software Updated
Tesla regularly releases over-the-air updates that improve charging efficiency. These updates can optimize how your car communicates with the charger. They may also improve battery management. Always keep your software current for the best charging performance.
Common Mistakes When Charging a Tesla at Home
Even experienced owners make mistakes. Here are a few to avoid when setting up your home charging station.
- Using a Level 1 charger as your daily driver: This is too slow. You will not get enough range for daily driving. Upgrade to Level 2 as soon as possible.
- Overloading a shared circuit: Running your charger on the same circuit as other appliances is dangerous. Always use a dedicated line.
- Ignoring local codes: Electrical work requires permits and inspections. Do not skip this. Hire a professional.
- Choosing the wrong charger: Not all Level 2 chargers are compatible with every Tesla. Check specifications before buying.
- Setting amps too high: More amps does not always mean better. Match the charger amps to your car’s onboard charger limit. Extra amps go to waste.
Expert Insights on Home Tesla Charging
We spoke with a licensed electrician who specializes in EV charging infrastructure. Here is what they want every Tesla owner to know.
“The biggest mistake I see is people underestimating their electrical panel’s capacity,” says the expert. “A 200-amp panel handles a Tesla home charger easily. But a 100-amp panel might need an upgrade. I always recommend a load calculation before installing any charging station. It saves money and prevents safety issues down the road.”
They also recommend the Tesla Wall Connector for most setups. “It is reliable, Wi-Fi enabled, and works with all Teslas. You can adjust the charging rate through the app. That flexibility is huge for managing electrical load at home.”
Quick Tips for Fast Home Charging
- Install a 240-volt circuit: This is the foundation of fast home charging.
- Choose 40-48 amps: This range offers the best balance of speed and safety for most Teslas.
- Charge overnight: Take advantage of off-peak electricity rates.
- Keep your battery between 20% and 80%: This is the optimal range for daily use and faster charging.
- Use the Tesla app: Monitor charging sessions, set schedules, and adjust amp settings remotely.
Conclusion
So how many amps does it take to charge a Tesla at home? For most owners, the answer is 30 to 48 amps on a dedicated 240-volt circuit. A Tesla Wall Connector with a Level 2 home charger gives you the fastest, safest, and most reliable charging speed for daily use. Understanding your vehicle’s onboard charger limits, your home electrical capacity, and the factors that affect charging time empowers you to make smart decisions.
Setting up home EV charging does not have to be intimidating. Start with the right charger. Make sure your electrical panel can handle it. And follow best practices for scheduling and maintenance. You will enjoy quick, efficient charging every single morning. A well-planned Tesla charging setup saves time, money, and hassle. It is one of the best upgrades any Tesla owner can make.
Frequently Asked Questions
How many amps does it take to fully charge a Tesla overnight?
Most Teslas charge fully overnight using a Level 2 charger with 40 to 48 amps on a 240-volt circuit. A Model 3 or Model Y typically reaches full charge in 4 to 8 hours. Larger models like the Model S or Model X may take 8 to 12 hours. This depends on battery size and starting charge level.
Can I charge a Tesla on a 15-amp outlet?
You can, but it is very slow. A standard 120-volt 15-amp outlet provides roughly 1.8 kilowatts. This is Level 1 charging. You would only add about 3 to 5 miles of range per hour. This is fine for emergencies but not practical for daily use. You should upgrade to a Level 2 home charger for regular charging.
Do I need a special outlet to charge a Tesla at home?
Yes, for fast home charging you need a 240-volt outlet. The most common type is a NEMA 14-50 outlet. This is the same outlet used by electric stoves and dryers. A licensed electrician can install this for you. It supports the 30 to 48 amps needed for efficient EV charging at home.
What is the difference between a Tesla Wall Connector and a mobile connector?
The Tesla Wall Connector is a dedicated Level 2 charger for home installation. It delivers up to 48 amps on a 240-volt circuit. The mobile connector comes with your car and plugs into a standard 120-volt outlet. It provides only 10 to 16 amps. The Wall Connector charges your Tesla much faster and is the recommended setup for daily home use.
Will charging my Tesla at home increase my electric bill significantly?
It depends on your electricity rates and how often you charge. Most Tesla owners see a moderate increase in their monthly bill. Charging overnight during off-peak hours helps reduce costs. Adding solar panels can offset the cost significantly. On average, charging a Tesla at home costs a fraction of what you would spend on gasoline. Home charging remains very economical.
How long does it take to charge a Tesla from 0 to 100% at home?
With a Level 2 charger running at 40 to 48 amps, a Tesla Model 3 takes about 4 to 8 hours. A Model S or Model X takes roughly 8 to 12 hours. These times vary based on battery size, ambient temperature, and charging rate. Remember, charging slows down after 80%. So the last 20% takes additional time. Plan your sessions accordingly.