Is It Easy to Replace Struts Yourself Without a Mechanic
Replacing struts yourself is possible for most DIY enthusiasts, but it requires the right tools, safety knowledge, and patience. This guide covers everything from strut removal to reinstallation, helping you decide if a DIY strut replacement is right for your vehicle. You will learn the cost savings, risks, and step-by-step process involved in strut replacement.
Key Takeaways
- DIY strut replacement saves significant money compared to paying a mechanic, but demands proper tools and safety precautions.
- A spring compressor is the most critical tool and the biggest safety risk if used incorrectly.
- Plan for 2 to 4 hours per strut depending on your experience and vehicle type.
- Worn struts cause dangerous driving conditions, including poor handling and longer braking distances.
- Reusing old strut mounts or bearings is a common mistake that leads to premature failure.
- Always torque bolts to factory specifications to avoid safety issues down the road.
📑 Table of Contents
- Is It Easy to Replace Struts Yourself Without a Mechanic?
- Understanding What Struts Do and Why They Wear Out
- Tools and Equipment You Will Need
- Step-by-Step Guide to Replacing Struts Yourself
- Common Mistakes to Avoid During Strut Replacement
- How Much Money Can You Save by Doing It Yourself?
- Safety Considerations When Replacing Struts at Home
- When Should You Call a Mechanic Instead?
- Final Thoughts on DIY Strut Replacement
Is It Easy to Replace Struts Yourself Without a Mechanic?
Replacing struts is one of the more advanced DIY car repair jobs you can tackle at home. It is not as simple as swapping out a wiper blade or a headlight bulb. But it is also not impossible if you have basic mechanical skills and the right equipment.
The real question is whether you should do it yourself. The answer depends on your comfort level with heavy-duty tools, your understanding of suspension safety, and how much you value saving money. A single strut assembly can cost several hundred dollars at a shop. Replace all four, and the bill can easily exceed a thousand dollars. Doing it yourself cuts that cost dramatically.
However, strut replacement involves working with compressed springs, which store a lot of energy. If something goes wrong during the process, the consequences can be serious. This is why many drivers hesitate. They wonder if the risk is worth the savings.
This guide walks you through every step of the process. You will learn what tools you need, how long the job takes, and the common mistakes to avoid. By the end, you will have a clear picture of whether replacing struts yourself is the right move for you.
Many people ask, “Can I replace my throttle body myself?” and find it manageable. Strut replacement is a bigger job, but the same DIY spirit applies. The key is preparation and respect for the tools involved.
Understanding What Struts Do and Why They Wear Out
The Role of Struts in Your Vehicle
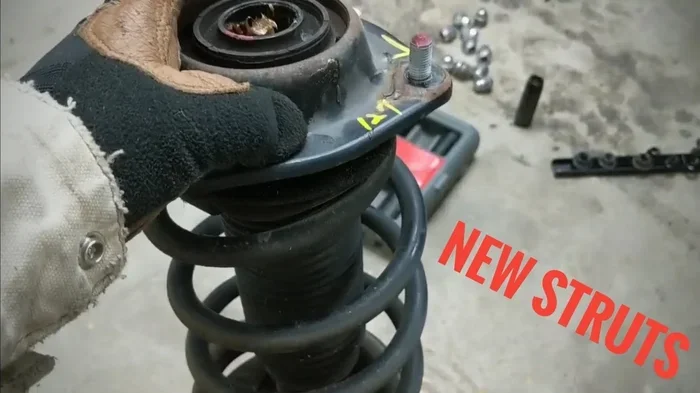
Struts are a vital part of your car’s suspension system. They combine a shock absorber and a coil spring into one unit. Together, they absorb road bumps and keep your tires planted on the ground.
Without working struts, your car would bounce uncontrollably over every pothole and crack in the road. Your steering would feel loose, and your braking distance would increase significantly. Struts also support the weight of your vehicle, which makes them work harder than most people realize.
Unlike some car parts that last the lifetime of the vehicle, struts have a finite lifespan. Most manufacturers recommend replacing them every 50,000 to 100,000 miles. Driving on rough roads or carrying heavy loads can shorten that timeline.
Signs Your Struts Are Worn Out
Knowing the warning signs helps you catch strut problems early. Here are the most common symptoms of worn struts:
- Nose diving when braking – the front of the car dips sharply when you stop.
- Excessive bouncing – the car continues to oscillate after hitting a bump.
- Uneven tire wear – tires develop bald spots or cupping patterns.
- Bottoming out – the suspension hits the ground on dips or speed bumps.
- Leaking fluid – oil residue around the strut body indicates a seal failure.
- Poor handling – the car feels unstable, especially at highway speeds.
If you notice any of these signs, do not ignore them. Driving on worn struts compromises your safety. It also wears out your tires faster, which adds to the overall cost.
Tools and Equipment You Will Need
Having the right tools makes all the difference when replacing struts yourself. Using improper tools not only makes the job harder but can also be dangerous.
Essential Tools for Strut Replacement
- Spring compressor – this is the most important and most dangerous tool. You need a reliable, rated compressor designed for your vehicle.
- Car jack and jack stands – never work under a car supported only by a jack. Use quality jack stands rated for your vehicle’s weight.
- Socket set and wrenches – a comprehensive set covering metric and standard sizes.
- Torque wrench – essential for tightening bolts to the correct specifications.
- Penetrating oil – rusted bolts can be stubborn. PB Blaster or a similar product helps loosen them.
- Strut spring tool or hook set – helps compress and manipulate spring coils safely.
- Safety glasses and gloves – protect yourself from debris and sharp edges.
Some people ask, “Do you need a tool to change windshield wipers?” and the answer is usually no. But strut replacement is a different story. You absolutely need a spring compressor. There is no safe shortcut around this tool.
Where to Rent or Buy Tools
If you do not own a spring compressor, consider renting one from an auto parts store. Many stores like AutoZone or O’Reilly offer rental programs. The cost is usually between $30 and $80 per day. This is a fraction of what you would pay a mechanic.
Alternatively, some local workshops will rent out their compressor for a small fee. Call around in your area to find the best option. Just make sure the compressor is rated for your vehicle’s spring pressure.
Step-by-Step Guide to Replacing Struts Yourself
Now let us walk through the actual process. This is a simplified overview. Always refer to your vehicle’s service manual for specific instructions.
Step 1: Prepare the Vehicle
Start by parking on a flat, level surface. Engage the parking brake and place wheel chocks behind the rear tires. Loosen the lug nuts on the front wheels before you jack up the car. This prevents the wheels from spinning while the car is in the air.
Jack up the front of the vehicle and secure it on jack stands. Never work under a car that is only supported by a hydraulic jack. The risk of collapse is real and dangerous.
Step 2: Remove the Wheel
Remove the lug nuts completely and take off the front wheel. Set it aside in a safe place. This gives you access to the strut assembly and the brake components.
Step 3: Disconnect the Brake Line and ABS Sensor
Before removing the strut, disconnect the brake line bracket and the ABS speed sensor if they are in the way. Use care not to damage the brake line. If the brake line fitting is stuck, apply penetrating oil and let it sit for a few minutes.
Step 4: Remove the Strut Mount and Top Nut
Open the hood and locate the strut tower mount. Remove the three bolts that secure the mount to the strut tower. Then, use your socket to remove the top nut holding the strut to the steering knuckle.
This is where things get tricky. The strut assembly is under tension from the coil spring. You must use the spring compressor to safely release this tension before removing any components.
Step 5: Compress the Spring and Remove the Strut
Attach the spring compressor to the coil spring following the manufacturer’s instructions. Tighten it evenly on both sides. Slowly compress the spring until the tension is released enough to safely remove the top mount and lower strut components.
Once compressed, remove the strut from the vehicle. Take note of how everything was positioned so you can reinstall the new strut correctly.
Step 6: Disassemble and Reassemble the New Strut
On a clean work surface, disassemble the old strut. Transfer the strut mount, bearing, and any rubber bushings to the new strut assembly. This step is critical because reusing old mounts causes noise and premature wear.
Some people choose to buy a complete strut assembly that comes pre-assembled with the spring. This eliminates the dangerous spring compression step entirely. Complete assemblies cost more but are much safer and easier to install.
Step 7: Install the New Strut
Reverse the removal process to install the new strut. Start by mounting the strut to the steering knuckle and tightening the top nut. Then, carefully release the spring compressor. Make sure the spring seats properly in the strut and mount.
Reinstall the strut tower mount bolts, brake line bracket, and ABS sensor. Torque all bolts to the factory specifications listed in your service manual.
Step 8: Reinstall the Wheel and Test Drive
Put the wheel back on and hand-tighten the lug nuts. Lower the car off the jack stands. Then, use a torque wrench to tighten the lug nuts to the proper specification in a star pattern.
Take the car for a test drive. Listen for any unusual noises. Pay attention to how the car handles over bumps and during braking. If something feels off, double-check your work before driving long distances.
It is worth noting that many people ask, “How long does it take to fit a new bumper?” and expect a quick job. Strut replacement is more involved and typically takes longer. Plan for at least two hours per strut if you are experienced, and longer if it is your first time.
Common Mistakes to Avoid During Strut Replacement
Even experienced DIYers make mistakes. Here are the most common errors people make when replacing struts themselves:
- Skipping the torque wrench – over-tightening or under-tightening bolts can cause serious problems. A torque wrench is not optional.
- Reusing old strut mounts – worn mounts cause clunking noises and reduce ride quality. Always install new mounts.
- Not compressing the spring evenly – an unevenly compressed spring can slip off the compressor, which is extremely dangerous.
- Forgetting to disconnect the ABS sensor – this can trigger warning lights and affect braking performance.
- Not replacing struts in pairs – always replace struts on the same axle together. Mixing old and new struts causes uneven handling.
- Rushing the process – strut replacement requires patience. Rushing leads to mistakes and potential injury.
How Much Money Can You Save by Doing It Yourself?
The cost savings from DIY strut replacement can be substantial. A single strut assembly typically costs between $150 and $350 for parts alone. A mechanic will charge $200 to $400 for labor on top of that. So one strut replacement at a shop can run $350 to $750.
If you need all four struts replaced, the shop cost can exceed $2,000. Doing it yourself cuts that to roughly $600 to $1,400 in parts, depending on the quality of the assemblies you choose.
Of course, you need to factor in the cost of tools. A quality spring compressor costs between $50 and $150 to rent or buy. Add in the cost of new strut mounts, bearings, and hardware, and your total DIY cost will be higher. But it is still significantly less than a full shop job.
Compare this to something like replacing a headlight bulb. You can replace just one headlight in minutes with no special tools. Strut replacement is a completely different level of complexity. Respect that difference when deciding whether to DIY.
Safety Considerations When Replacing Struts at Home
Safety must be your top priority when replacing struts. The compressed spring stores a tremendous amount of energy. If the spring compressor fails or is not attached correctly, the spring can launch with tremendous force.
Always wear safety glasses when working with a spring compressor. Keep your face away from the spring during compression and decompression. Work in a well-ventilated area and make sure no one else is standing near the vehicle during the process.
Use jack stands rated for your vehicle’s weight. Place them on solid, level ground. Never rely on a concrete surface that might be uneven or cracked. A few extra minutes of setup can prevent a catastrophic accident.
If you are not comfortable with any part of the process, it is perfectly okay to seek professional help. There is no shame in acknowledging the limits of your skills. Your safety is worth more than any savings.
When Should You Call a Mechanic Instead?
There are situations where calling a professional is the smarter choice. Here are some signs that you should leave strut replacement to the experts:
- You do not have access to a spring compressor and do not want to rent one.
- Your vehicle has a complex suspension setup that requires specialized tools or knowledge.
- You have never done suspension work before and feel unsure about the process.
- The struts are rusted or seized and require extra effort to remove safely.
- You do not have a proper workspace with a level floor and adequate lighting.
Many people ask, “Can you take a Toyota to any Toyota dealership?” and the answer is yes. Similarly, any qualified mechanic can handle strut replacement. If you are unsure, find a reputable shop and get a quote. Sometimes the peace of mind is worth the extra cost.
Final Thoughts on DIY Strut Replacement
Replacing struts yourself is a rewarding project that can save you hundreds of dollars. It requires the right tools, patience, and a healthy respect for the risks involved. If you follow the steps outlined in this guide and take safety seriously, you can complete the job successfully.
Start with one strut if it is your first time. This gives you hands-on experience without committing to a full set replacement. Once you see how the process works, the second strut will go much faster.
Remember that vehicle maintenance is about more than just saving money. It is about understanding your car and taking ownership of its upkeep. Every DIY job you complete builds your confidence and skills for future projects.
Whether you decide to tackle strut replacement yourself or leave it to a professional, the most important thing is that your car is safe and roadworthy. Do not delay replacing worn struts. Your safety and the safety of others on the road depend on it.
For those who enjoy hands-on car care, DIY projects like this are incredibly satisfying. You save money, learn valuable skills, and gain a deeper understanding of how your vehicle works. That is a win-win in anyone’s book.
Just as with any car maintenance task, preparation is everything. Research your specific vehicle model, gather your tools, and set aside enough time. Rushing through a strut replacement is a recipe for mistakes and potential injury.
In the end, the question “Is it easy to replace struts yourself?” has a nuanced answer. It is not easy in the sense that it is quick and simple. But it is achievable with the right preparation, tools, and mindset. Thousands of DIYers do it successfully every year. With the right guidance, you can too.
Frequently Asked Questions
Can I replace just one strut, or do I need to replace them in pairs?
It is strongly recommended to replace struts in pairs on the same axle. Mixing old and new struts leads to uneven handling, poor ride quality, and accelerated wear on the new strut. If only one strut is worn, the other is likely close behind and should be replaced soon.
How long does it take to replace struts yourself?
For an experienced DIYer, expect to spend two to four hours per strut. For a first-time project, plan for five to six hours per strut. Having a second person to help with the spring compressor and holding components in place can significantly reduce the time.
Do I need a spring compressor to replace struts?
Yes, a spring compressor is essential for safely removing and reinstalling the coil spring. Without it, you cannot access the strut components. If you are uncomfortable using a spring compressor, consider purchasing a complete strut assembly that comes pre-assembled with the spring already installed.
How much does it cost to replace struts at a mechanic?
A single strut replacement at a shop typically costs between $350 and $750, including parts and labor. Replacing all four struts can cost $1,200 to $2,500 or more, depending on your vehicle make and model. DIY replacement cuts the cost significantly, as you only pay for parts and any tool rentals.
What happens if I drive on worn struts for too long?
Driving on worn struts is dangerous. It leads to poor handling, longer braking distances, and increased tire wear. In extreme cases, a strut can fail completely, causing loss of vehicle control. Replace worn struts as soon as you notice the warning signs.
Is strut replacement covered by a vehicle warranty?
It depends on your warranty. Most factory warranties do not cover struts as routine wear items. However, if a strut defect is present, it may be covered under the powertrain or suspension warranty. Check your warranty documentation or contact your dealer for specific coverage details.
=== CONCLUSION ===
Replacing struts yourself without a mechanic is absolutely doable if you have the right tools, a safe workspace, and the patience to follow each step carefully. The process is not simple, but it is manageable for most people who are willing to invest the time and effort. The savings alone make it worthwhile for many vehicle owners.
Remember to prioritize safety above all else. Use a quality spring compressor, work on a stable surface, and torque every bolt to specification. Do not skip steps or take shortcuts. Your safety and the safety of your passengers depend on a job done right.
Whether you are a seasoned DIYer or a beginner looking to expand your skills, strut replacement is a project that builds confidence and saves real money. Start with one strut, take your time, and enjoy the satisfaction of doing the work yourself.