Harley-Davidson Bulb Replacement Chart Made Simple
The Harley-Davidson Bulb Replacement Chart helps you find the exact bulb for your bike’s headlights, taillights, and turn signals. We break down the chart by model year and type, so you can replace bulbs fast and safely. This guide also covers LED upgrades, common mistakes, and maintenance tips to keep your ride shining.
Every Harley-Davidson rider knows the thrill of a night ride. But a burned-out bulb can kill that mood fast. Whether you need a new headlight bulb, a taillight bulb, or a turn signal bulb, finding the right part should be easy. That is where the Harley-Davidson Bulb Replacement Chart comes in.
This chart is your quick guide to the exact bulb size for every Harley model and year. It saves you time, money, and guesswork. Instead of digging through old manuals, you just look up your bike. In this article, we walk you through the chart, explain each bulb type, and show you how to replace them safely. We also cover LED upgrades, common mistakes, and simple maintenance tips. By the end, you will feel confident handling any bulb swap on your motorcycle.
So grab your owner’s manual or your bike’s model year, and let us get you back on the road with full lighting. A bulb replacement guide like this one turns a chore into a quick, satisfying job.
Key Takeaways
- Use the right bulb size: Matching the correct bulb model like H4, 1157, or 7507 prevents electrical issues.
- Check your model year: Bulb types changed across Harley-Davidson families from Dyna to Street.
- Consider LED upgrades: LED bulbs last longer and draw less power, but may need resistors.
- Follow the step-by-step guide: Simple steps like removing the seat and accessing the socket keep you safe.
- Avoid common mistakes: Never touch halogen bulbs with bare hands, and always test before reassembly.
- Keep spares on hand: Stocking a few common bulbs saves time and money on the road.
📑 Table of Contents
Understanding Your Harley-Davidson Lighting System
Before you open the Harley-Davidson Bulb Replacement Chart, it helps to know what lights are on your bike. A modern Harley has several lighting systems that all need the right bulb. Each bulb has a specific size, shape, and socket type. Using the wrong one can cause poor light output or even damage the wiring.
Why Lighting Matters on a Motorcycle
Good lighting keeps you safe. A bright headlight bulb helps you see the road at night. A strong taillight bulb and brake light bulb make you visible to other drivers. Turn signal bulbs let people know when you are turning. Even the instrument cluster bulb helps you read your speed and RPMs. When any of these fail, you lose visibility or safety. That is why a bulb replacement guide is so important for every rider.
The Different Types of Bulbs You Will Encounter
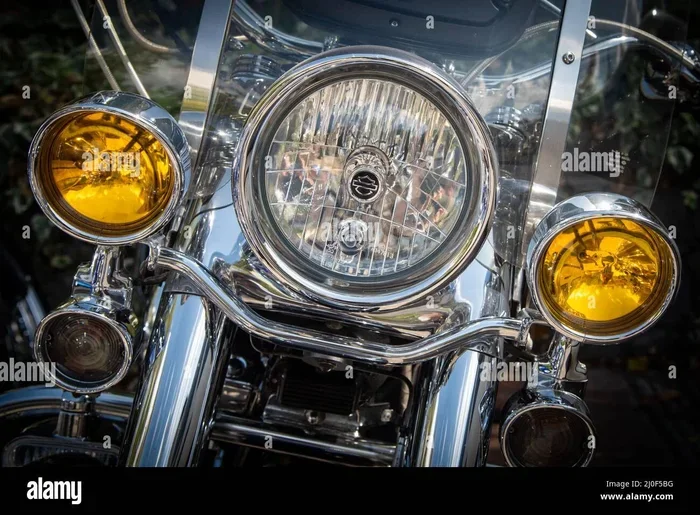
Harleys use a few common bulb types. Most headlight systems use a halogen bulb or an LED bulb. Taillights often use a single filament bulb like the 1157 or 7507. Turn signals may use a wedge base or a bayonet base. The instrument panel usually needs a tiny wedge bulb. Each bulb has a specific bulb size and socket type. The Harley-Davidson Bulb Replacement Chart lists all of these so you never mix them up.
- Headlight bulb: Usually H4, H7, or 60/55W halogen. Some newer models use LED projectors.
- Taillight and brake light bulb: Often a 1157 or 7507 dual filament bulb. The brake light uses the brighter filament.
- Turn signal bulb: Can be 1156, 7507, or a wedge type depending on the model.
- Instrument cluster bulb: Small wedge bulbs, often 194 or W5W.
- License plate light: Usually a small single filament bulb like 194 or 600.
The Ultimate Harley-Davidson Bulb Replacement Chart
The heart of this guide is the Harley-Davidson Bulb Replacement Chart. It breaks down the correct bulb for each model family. I have organized it by the main Harley families: Dyna, Softail, Touring, Street, and Sportster. The chart covers headlight, taillight, turn signal, brake light, and instrument bulbs. Always double-check your exact model year because Harley sometimes changed bulbs mid-year.
Headlight Bulb Sizes by Model Family
The headlight bulb is the most important light on your bike. The Harley-Davidson Bulb Replacement Chart shows the common sizes used across families. Older Dyna models from the 1990s often used H4 bulbs. Newer Softails and Touring bikes may use H7 or even LED projector units. The Sportster line has its own unique headlight setup. Always match the bulb size and socket type exactly.
| Model Family | Model Years | Headlight Bulb | Bulb Type | Wattage |
|---|---|---|---|---|
| Dyna | 1991–2017 | H4 | Halogen | 60/55W |
| Softail | 2000–2017 | H4 | Halogen | 60/55W |
| Touring (Road King, Street Glide, etc.) | 2014–2023 | H7 | Halogen | 55W |
| Street | 2014–2020 | H4 | Halogen | 60/55W |
| Sportster | 1986–2022 | H4 | Halogen | 60/55W |
Taillight and Brake Light Bulbs
The taillight and brake light bulb keeps you visible from behind. Most Harleys use a dual filament bulb like the 1157 or 7507. The 1157 has two filaments: one for the taillight and one for the brake light. The Harley-Davidson Bulb Replacement Chart tells you which one fits your bike. Some newer models use a separate bulb for the brake light, often a 1156 or 1157A. Always check the bulb size and the filament type before you buy.
Turn Signal and Instrument Panel Bulbs
Turn signals on older Harleys often use a 1156 or 7507 bulb. Newer models may use a wedge base bulb like the 1157B. The instrument panel uses tiny wedge bulbs, usually 194 or W5W. The Harley-Davidson Bulb Replacement Chart lists these small bulbs clearly. I always keep a few spares of these in my saddlebag because they burn out often.
Step-by-Step Bulb Replacement Guide
Replacing a bulb on a Harley is easier than most people think. You do not need special tools or a mechanic. Just follow this bulb replacement guide and you will be done in minutes. I will walk you through the process for headlights, taillights, and turn signals.
What You Will Need Before You Start
Gather a few simple items first. You will need the correct replacement bulb from the Harley-Davidson Bulb Replacement Chart. A clean cloth or gloves are essential for halogen bulbs. You may want a bulb tester to check the socket. A small screwdriver or Phillips head will help remove covers. Dielectric grease is a great addition to protect the socket from corrosion.
- New bulb matched to your model year.
- Clean gloves or a soft cloth.
- Bulb tester (optional but helpful).
- Small screwdriver set.
- Dielectric grease for socket protection.
Replacing a Headlight Bulb
Start by turning off the ignition. On most Harleys, you remove the seat or the nose cone to access the headlight bucket. Unplug the wiring harness from the back of the bulb. Release the spring clip or bayonet holder. Pull the old bulb straight out. Do not touch the glass of a halogen bulb with your bare fingers. Oils from your skin create hot spots that shorten the bulb life. Use gloves or a clean cloth. Insert the new bulb, secure the holder, and plug the harness back in. Test the high beam and low beam before you reassemble.
Replacing a Taillight or Brake Light Bulb
For the taillight, you usually remove the seat or a panel on the left side. Find the bulb socket and twist it counterclockwise. Pull the socket out and replace the bulb. Make sure the new bulb has the correct bulb size and filament type. A dual filament 1157 works for many models. Push the socket back in and test the lights.
Replacing Turn Signal Bulbs
Turn signal bulbs are often accessible under the front fender or behind the headlight. Remove the fasteners and gently pull the signal housing. The bulb pulls straight out or twists depending on the base. The Harley-Davidson Bulb Replacement Chart tells you the exact type. Install the new bulb and test the blink rate before you put everything back together.
Quick Tips for a Smooth Job
Here are a few quick tips that make bulb replacement easier. Always work with the bike off and the key removed. Clean the bulb socket with a cloth before inserting the new bulb. Apply a thin layer of dielectric grease to the socket contacts. This prevents corrosion and makes future changes simpler. Never force a bulb into the socket. If it does not fit, check the bulb size again. Finally, test every light function before you ride away.
Common Mistakes When Replacing Bulbs
Even simple jobs have pitfalls. Avoiding these common mistakes saves time and prevents damage. I see riders make these errors all the time.
- Touching the halogen bulb glass: The oils from your skin create a hot spot. The bulb can burn out quickly. Always use gloves or a clean cloth.
- Using the wrong bulb size: A bulb that is too big or too small will not fit. It can damage the socket or the wiring. Always refer to the Harley-Davidson Bulb Replacement Chart.
- Forgetting to test before reassembly: If you put everything back together and the bulb does not work, you have to tear it apart again. Test the new bulb with the harness plugged in first.
- Ignoring socket corrosion: A greenish or white buildup on the socket can cause poor contact. Clean it with electrical contact cleaner before installing the new bulb.
- Mixing up filament types: A single filament bulb will not work in a dual filament socket. Check the bulb size and the filament designation like 1157 or 1156.
Upgrading to LED Bulbs: What You Need to Know
Many riders want to upgrade from a standard halogen bulb to an LED bulb. LEDs are brighter, last longer, and draw less power. But they are not a simple plug-and-play on every Harley. The Harley-Davidson Bulb Replacement Chart helps you find the right LED bulb size, but you must also consider the electrical system.
Benefits of LED Bulbs for Harley-Davidson
An LED headlight bulb gives a crisp white beam that improves night visibility. A LED taillight bulb lights up instantly, which helps drivers behind you react faster. Turn signal LEDs are very bright and energy efficient. The main advantage is longevity. A quality LED bulb can last 30,000 hours or more. That is years of riding without a change.
Do You Need a Resistor?
Some LED bulbs draw very little current. Your Harley’s flasher relay may sense a low load and cause the turn signals to blink fast. This is called hyperflashing. To fix this, you may need to add a resistor to the circuit. The Harley-Davidson Bulb Replacement Chart often notes when a resistor is needed. Always check the LED bulb specifications and your model year before buying.
Expert Insights on LED Compatibility
I asked a longtime Harley technician about LED upgrades. He says, “Always match the LED bulb’s base type to the original socket. A wedge base LED will not fit a bayonet socket. Also, check the beam pattern. Some LED bulbs throw light in a scattered pattern that does not focus well in the headlight bucket. Choose an LED bulb with a designed reflector or projector match.” His advice is to test the LED bulb on a bench before installing it on the bike. Use a battery and a bulb tester to confirm the beam pattern and brightness.
Maintaining Your Harley-Davidson Lighting System
Replacing a bulb is just one part of keeping your lights working. Regular maintenance extends the life of every bulb and socket. A few simple habits make a big difference.
Regular Bulb Checks
Once a month, walk around your bike and test every light. Turn on the headlights, tap the turn signal lever, and press the brake pedal. Ask a friend to check the taillights and brake lights. A bulb tester can quickly check if a bulb is still good. Catching a weak bulb early saves you from a surprise failure on the road.
Cleaning and Protecting Sockets
Moisture and road grime can cause corrosion inside the bulb socket. Use a clean cloth and a little electrical contact cleaner to wipe the socket contacts. Apply a thin layer of dielectric grease after cleaning. This seals out moisture and prevents oxidation. A clean socket ensures good electrical contact and a long bulb life.
When to Replace the Whole Socket or Wiring Harness
If a socket is melted or cracked, no new bulb will fix it. The Harley-Davidson Bulb Replacement Chart does not cover damaged sockets. In that case, replace the socket or the entire wiring harness. Look for signs like melted plastic, bare wires, or corroded connectors. A professional mechanic can help with harness replacements if you are not comfortable with wiring.
Key Takeaways
- Always use the correct bulb size: The Harley-Davidson Bulb Replacement Chart gives you the exact H4, 1157, or 7507 for your model.
- Match the bulb type to your needs: Halogen bulbs are standard and affordable. LED bulbs offer brightness and longevity but may need a resistor.
- Follow the step-by-step process: Work safely, use gloves, test before reassembly, and apply dielectric grease for protection.
- Avoid common pitfalls: Never touch halogen glass, never force a bulb, and never skip the socket check.
- Keep maintenance simple: Regular bulb checks and socket cleaning prevent most lighting issues.
Conclusion
The Harley-Davidson Bulb Replacement Chart is the best tool you can have for keeping your bike lit correctly. It removes the guesswork and gives you the exact bulb size for every light on your Harley. Whether you ride a Dyna, Softail, Touring model, Street, or Sportster, this chart covers you. With the right bulb, a few simple tools, and a little patience, you can replace any bulb in under thirty minutes.
Remember to follow the safety steps, avoid common mistakes, and consider an LED upgrade if you want better visibility and longer life. A well-maintained lighting system keeps you safe and makes your Harley look its best. Use this guide every time you need a new bulb, and you will always have the right part at hand. Ride safe, and enjoy the light.
Frequently Asked Questions
What bulb does a 2018 Harley-Davidson Street Glide use for the headlight?
The 2018 Street Glide uses an H7 halogen bulb for the headlight. You can find this in the Harley-Davidson Bulb Replacement Chart under the Touring family. Always check your owner’s manual for any mid-year changes.
Can I put an LED bulb in my Harley’s headlight without changing anything else?
In most cases, yes, you can swap a halogen headlight bulb for an LED one with the same base. However, some LED bulbs may need a resistor to prevent hyperflashing in the turn signals. The Harley-Davidson Bulb Replacement Chart often notes if a resistor is required for LED upgrades.
How do I know if my turn signal relay is bad or if I just need a new bulb?
First, check the bulb itself. A burned-out filament is the most common cause of a fast-blinking turn signal. If the bulb is good, the relay may be faulty. Use a bulb tester to confirm power at the socket. If the socket has power and the bulb is good, replace the relay.
What is the difference between a 1157 and a 1156 bulb?
A 1157 bulb has two filaments: one for the taillight and one for the brake light. A 1156 bulb has only the single brake light filament. The Harley-Davidson Bulb Replacement Chart tells you which one your model needs. Using a 1156 where a 1157 is required will leave you without a taillight.
Should I use dielectric grease on every new bulb?
Yes, applying a thin layer of dielectric grease to the bulb socket contacts is a great habit. It prevents corrosion, seals out moisture, and makes future bulb changes easier. Just avoid getting grease on the glass or the filament of the bulb itself.
Where can I find a printable Harley-Davidson Bulb Replacement Chart?
Many Harley-Davidson dealer websites and aftermarket parts sites offer a printable bulb replacement guide in PDF format. You can also find the chart in your owner’s manual. I recommend saving a digital copy on your phone for quick access at the parts store.