Why Is My Sun Visor Floppy and How to Fix It Today
A sun visor floppy problem is frustrating and blocks your view while driving. The most common causes are broken clips, worn hinges, or weakened internal springs. You can often fix this issue at home with simple tools and a few dollars. This guide walks you through every cause, fix, and prevention tip in plain language. By the end, you will know exactly how to restore your visor to full strength.
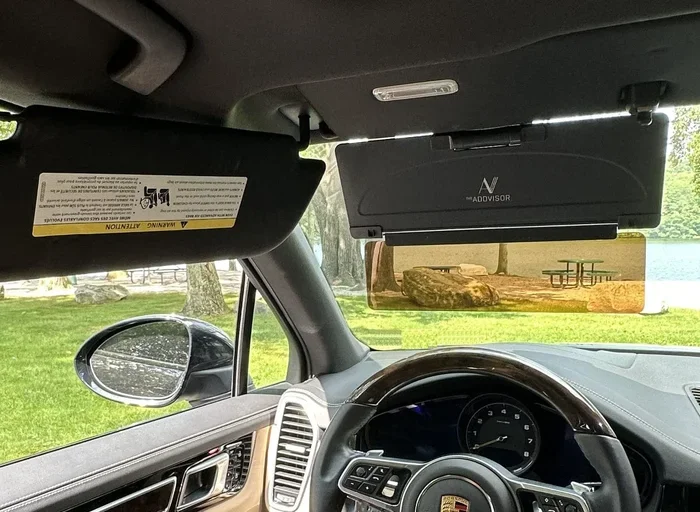
Have you ever noticed your sun visor floppy while driving down the road? It droops, it swivels where it should not, and it just will not stay put. A floppy sun visor is more than a minor annoyance. It blocks your view of the road and creates a safety hazard every time you get behind the wheel.
The good news is that fixing this problem is usually simple and inexpensive. You do not need to be a mechanic or visit an expensive auto shop. With the right guidance, you can diagnose the issue and apply the fix yourself. This article covers every reason your visor might be floppy, step-by-step solutions, and tips to keep it sturdy for years to come.
Key Takeaways
- Broken clips and hinges are the top reasons a sun visor goes floppy over time.
- Simple DIY fixes like replacing clips or adding support can solve most problems in minutes.
- Regular maintenance keeps your visor mechanism working smoothly for years.
- Replacement parts are affordable and widely available for most vehicle models.
- Knowing when to replace versus repair saves you time and money in the long run.
- Preventive tips like gentle handling and periodic checks extend visor lifespan significantly.
📑 Table of Contents
- What Causes a Sun Visor to Go Floppy
- How to Diagnose the Problem
- Easy Fixes for a Floppy Sun Visor
- When to Replace Versus Repair
- Preventing Future Sun Visor Problems
- Quick Tips for Maintaining Your Visor
- How the Visor Mechanism Works
- Common Mistakes People Make When Fixing a Floppy Visor
- Where to Find Replacement Parts
- Conclusion
What Causes a Sun Visor to Go Floppy
A sun visor floppy situation does not happen overnight. It builds up slowly from everyday use. Understanding the root cause is the first step toward a proper fix. Let us look at the most common reasons your car sun visor loses its rigidity.
Worn Out Clips and Hinges
The clips that hold your visor to the roof rail take a beating over time. Every time you flip the visor up or down, those clips flex. After months or years of use, the plastic becomes loose or cracks. A floppy visor often traces back to worn clips that no longer grip the roof rail tightly.
Hinges suffer the same fate. The metal or plastic pivot points wear down, creating wobble. When the hinge loosens, the visor sags under its own weight. This is especially common in older vehicles where the visor mechanism has endured years of daily use.
Broken or Weak Internal Springs
Many sun visors contain small springs that help them stay in position. These springs apply tension to keep the visor firm against the roof. When a spring breaks or loses its tension, the visor immediately becomes floppy.
You might notice the visor swings freely when you tap it. That is a telltale sign of a failed internal spring. The spring might be a small coil spring or a tension strip, depending on your vehicle model.
Damaged Visor Arm or Bracket
The visor arm connects the visor to the swivel mount on the roof. Over time, this arm can bend, crack, or break. A damaged visor bracket means the visor has no structural support. It hangs loosely and flops around whenever you drive over a bump or turn a corner.
In some vehicles, the bracket is a plastic piece that snaps into place. In others, it uses screws or bolts. Regardless of the design, any damage to the arm or bracket leads to a sun visor floppy condition.
Age and General Wear
Everything in a car ages. The plastic in your visor becomes brittle. The foam padding compresses and loses shape. The swivel joint collects dust and grime, which increases friction and wear. A floppy sun visor in a vehicle with high mileage is almost expected rather than unusual.
Heat also plays a role. Your dashboard and roof area get hot in the summer. UV rays and constant temperature changes weaken plastic components over time. This is why older cars parked in sunny climates tend to have more visor issues.
How to Diagnose the Problem
Before you grab tools, take a moment to diagnose what is wrong. A proper diagnosis saves time and ensures you apply the right fix. Here is how to check your sun visor step by step.
Step 1: Check the Clip Grip
Flip the visor down and look at the clip where it attaches to the roof rail. Gently try to wiggle the visor side to side. If there is significant play or movement, the clip is worn. A healthy clip should hold the visor firmly in place with no wobble.
Next, flip the visor up and check the same clip from the other angle. A visor clip that looks cracked, bent, or stretched needs replacement. You can often see the damage with a flashlight and a close look.
Step 2: Test the Swivel Joint
The swivel joint is where the visor rotates on the roof. Grab the visor and try rotating it slowly by hand. It should move smoothly but with some resistance. If it spins freely with no tension, the internal spring is likely gone.
Also check for any clicking or grinding sounds. These sounds indicate wear in the swivel mechanism. A visor swivel that feels loose or gritty needs attention before the visor will stay firm again.
Step 3: Inspect the Visor Arm and Bracket
Look closely at the metal or plastic arm that connects the visor to the mount. Run your fingers along it and check for cracks, bends, or breaks. Even a small crack in the visor arm can cause the whole visor to flop around.
Check the visor bracket on the roof side too. Make sure all screws are tight. If a screw is missing or stripped, that is likely your culprit. Tighten or replace the screw and test the visor again.
Step 4: Check for Spring Tension
Some visors have visible springs near the swivel joint. Look for any spring that appears broken, stretched out, or missing entirely. If you do not see a spring at all, it may have fallen out or snapped. A sun visor floppy condition with no spring tension almost always points to a broken or absent spring.
Easy Fixes for a Floppy Sun Visor
Now that you know what is wrong, let us fix it. These solutions range from zero-cost adjustments to simple part replacements. Most fixes take less than 15 minutes and require basic tools you already have at home.
Fix 1: Tighten or Replace the Visor Clip
If the clip is the problem, start here. Most visor clips are held by a small screw or snap-fit design. Use a screwdriver to remove the old clip and inspect the roof rail for damage too.
Buy a replacement clip that matches your vehicle model. Auto parts stores carry universal clips that work for most cars. Snap or screw the new clip into place and test the visor. This simple fix often solves the entire sun visor floppy problem in under five minutes.
Quick Tip: Apply a small amount of silicone lubricant to the clip before reinstalling. This helps the clip grip better and reduces wear on future use.
Fix 2: Replace the Swivel Spring or Tension Strip
If your visor lacks spring tension, you need to replace the spring or tension strip. First, remove the visor from the roof by unhooking the clip or unscrewing the mount. Carefully open up the swivel housing to access the spring.
Take the old spring to an auto parts store to find a matching replacement. Alternatively, search online for your specific vehicle year and model. Install the new spring following the same path the old one took. Reassemble the visor and test it.
This fix takes a little more patience but costs only a few dollars for the spring. It transforms a floppy visor into a firm, reliable sun visor once again.
Fix 3: Repair or Replace the Visor Arm
A cracked or bent visor arm needs either repair or full replacement. For minor cracks, you can use a strong plastic adhesive to bond the pieces together. Let it cure for at least 24 hours before reusing the visor.
For a completely broken arm, replacement is the better option. Remove the old arm by unscrewing the mounting bolts. Install the new arm and secure it tightly. Make sure the visor bracket on the roof side is also in good condition before reattaching.
Common Mistake: Do not overtighten the screws on the bracket. Over-tightening can strip the threads or crack the plastic mounting point. Tighten just until firm and snug.
Fix 4: Add a DIY Support or Shim
If you need a temporary fix or cannot find replacement parts right away, try a DIY support. Small adhesive-backed foam pads or rubber shims can fill gaps and add grip to a loose clip.
Place a thin shim between the clip and the roof rail to take up slack. This is not a permanent solution, but it keeps the visor functional while you source the proper replacement part. It is a great quick fix for a sun visor floppy situation when you are in a pinch.
Fix 5: Full Visor Replacement
Sometimes the visor is beyond repair. If the plastic is severely cracked, the foam is completely deteriorated, or multiple components are damaged, a full sun visor replacement makes the most sense.
Replacement visors are affordable, typically ranging from $15 to $40 depending on your vehicle. You can find them at auto parts stores or online. The installation process usually involves removing a few screws and unhooking the swivel mount. It is a straightforward job that most car owners can handle in under 30 minutes.
When to Replace Versus Repair
Knowing when to repair and when to replace saves you time and frustration. Here is a simple guide to help you decide.
Choose Repair When
- The visor body is still in good condition with no major cracks.
- Only one component is broken, such as the clip or spring.
- The replacement part is easy to find and affordable.
- The visor is less than 10 years old and the damage is recent.
Choose Replacement When
- The visor has multiple cracks or broken sections.
- The foam padding is compressed beyond recovery.
- The swivel mechanism is completely seized or damaged.
- Replacement parts are no longer available for your vehicle model.
A sun visor replacement is a worthwhile investment when the visor has seen better days. A new visor restores both function and appearance to your car interior.
Preventing Future Sun Visor Problems
Once you fix the sun visor floppy issue, you want to keep it that way. Prevention is simple and only takes a few habits.
Handle the Visor Gently
Avoid slamming the visor up or down. The clips and hinges were designed for smooth, gentle movement. Rough handling accelerates wear and shortens the life of every component. Treat your sun visor with care and it will serve you longer.
Clean the Swivel Joint Regularly
Dust and grime build up in the swivel joint over time. Use a soft brush or compressed air to clean the joint every few months. A clean joint moves smoothly and experiences less friction. This simple habit goes a long way toward preventing a floppy visor.
Check Clips and Screws Periodically
Make it a habit to check your visor clips and screws every few months. Tighten any loose screws and replace any clips that show signs of wear. Catching small problems early prevents them from becoming big, expensive ones.
Protect the Visor from Direct Sunlight When Parked
Excessive UV exposure weakens plastic over time. When parked for long periods, consider using a windshield sun shade. This reduces the heat and UV rays that reach your dashboard and roof area. Your car interior parts will last longer as a result.
Quick Tips for Maintaining Your Visor
- Wipe down the visor monthly with a damp cloth to remove dust and oils from your hair.
- Inspect the clip tension every time you clean your car interior.
- Keep spare clips in your glove box so you can fix a loose visor on the spot.
- Use a microfiber cloth when cleaning the visor surface to avoid scratches.
- Lubricate the swivel joint once a year with a silicone-based spray for smooth operation.
- Avoid hanging heavy items on the visor, as this puts unnecessary stress on the clips and arm.
- Check the visor mirror hinge too, since the additional weight can contribute to floppiness.
These small habits add up to a significant difference. A well-maintained sun visor stays firm, functions properly, and provides reliable sun glare protection every time you drive.
How the Visor Mechanism Works
Understanding how your sun visor works helps you appreciate why it goes floppy and how to fix it. The basic visor mechanism consists of a few key parts working together.
The visor attaches to a swivel mount on the roof pillar. This mount allows the visor to rotate from the side window position to the windshield position. A spring or tension strip inside the mount keeps the visor at the angle you set it to. The clip at the top of the visor hooks onto the roof rail to prevent it from sliding down.
When any of these components fail, the whole system breaks down. The visor loses its ability to hold position and becomes floppy. A sun visor floppy problem is really just one or more of these small parts wearing out. Fix the broken part, and the visor works like new again.
Common Mistakes People Make When Fixing a Floppy Visor
Many people make avoidable mistakes when trying to fix their sun visor floppy problem. Here are the most common ones to watch out for.
Using the Wrong Replacement Clip
Not all visor clips are the same. Different vehicle models use different clip designs. Buying a generic clip without checking compatibility often leads to a poor fit. Always verify the clip matches your specific vehicle make, model, and year before purchasing.
Over-Tightening Screws
It is tempting to crank down on screws to stop the wobble. But over-tightening strips the threads or cracks the plastic. Hand-tighten screws firmly and stop when you feel resistance. A snug fit is all you need.
Ignoring the Root Cause
Sometimes people apply a quick fix without addressing the real problem. For example, tightening a loose clip when the actual issue is a broken spring. Always diagnose the full problem before starting repairs. A floppy sun visor might have multiple contributing factors.
Using Super Glue on Plastic Parts
Super glue might seem like a quick fix for a cracked arm or bracket. But it creates a brittle bond that fails under stress. Use a proper plastic adhesive designed for automotive applications. It flexes with the part and holds up much better over time.
Where to Find Replacement Parts
Finding the right parts for your sun visor is easier than you might think. Here are the best sources for sun visor replacement components.
- Auto parts stores like AutoZone, O’Reilly, or NAPA carry universal visor clips and arms.
- Online retailers such as Amazon and eBay offer OEM and aftermarket visor parts for nearly every vehicle.
- Dealer service departments can order OEM parts directly from the manufacturer if you need a factory-quality replacement.
- Junkyards and salvage yards are excellent sources for used visors and components at a fraction of the cost.
- Automotive forums specific to your vehicle model often have members selling or giving away spare parts.
Before ordering any part, note your vehicle make, model, year, and trim level. This information ensures you get the right visor bracket, clip, or arm for a perfect fit.
Conclusion
A sun visor floppy problem is annoying but completely fixable. The most common causes are worn clips, broken springs, damaged arms, or loose hinges. You can diagnose the issue yourself with a quick inspection and apply the right fix at home.
Most fixes require nothing more than a screwdriver, a replacement clip, and about 15 minutes of your time. For more serious damage, a full sun visor replacement is affordable and straightforward. Prevention through gentle handling and regular maintenance keeps your visor in great shape for years to come.
Do not let a floppy visor compromise your safety or driving comfort any longer. Use the tips in this guide to fix the problem today. Your sun visor will provide reliable sun glare protection and a clear view of the road ahead.
Frequently Asked Questions
Why does my sun visor keep falling down?
The most common reason is a worn or broken visor clip. The clip hooks onto the roof rail and holds the visor in place. When the clip weakens or cracks, it can no longer grip properly. Replacing the clip is usually a quick and inexpensive fix that solves the problem immediately.
Can I use a generic visor clip for my car?
Universal visor clips are available and work for many vehicles, but they do not always fit perfectly. It is best to check your vehicle make, model, and year before purchasing. A clip that matches your specific car ensures a secure fit and prevents the visor from going floppy again.
How much does it cost to replace a sun visor?
A replacement sun visor typically costs between $15 and $40 for the part alone. If you install it yourself, there is no labor cost. Some auto parts stores also offer free installation with a purchase. Overall, it is one of the most affordable car interior repairs you can do.
Is it safe to drive with a floppy sun visor?
A floppy visor can block your view of the road or mirrors, which creates a safety risk. It can also swing into your face while driving and distract you. It is best to fix the issue promptly. Most fixes are simple and take less than 15 minutes to complete.
What tools do I need to fix a floppy sun visor?
You typically need a Phillips or flat-head screwdriver, a replacement clip or spring, and optionally a small wrench for bracket screws. A flashlight helps you inspect the visor mechanism in dim lighting. Most fixes require nothing more than these basic household tools.
How can I prevent my sun visor from going floppy in the future?
Handle the visor gently when flipping it up and down. Clean the swivel joint periodically to remove dust and grime. Check the clips and screws every few months and tighten anything that feels loose. Applying silicone lubricant to the clip once or twice a year also helps maintain a firm grip and extends the life of your sun visor significantly.