How to Recharge the AC on a GMC Sierra in 5 Easy Steps
Recharging the AC on your GMC Sierra is a simple DIY task that saves time and money. This guide walks you through all 5 steps, from gathering tools to testing cool air output. You will learn how to check pressure, add refrigerant safely, and keep your truck cooling strong all year long.
There is nothing worse than climbing into your GMC Sierra on a scorching summer day and hitting the AC button only to get warm air blowing back at you. It happens to the best of us. The good news is that you do not need to rush to the shop or spend a fortune on a mechanic. With the right tools and a little know-how, you can recharge the AC on your GMC Sierra right from your own driveway.
This guide breaks the entire process down into 5 clear, easy-to-follow steps. Whether you are a first-time DIYer or a seasoned truck owner, you will find practical tips and honest advice here. We will cover everything from understanding how your cooling system works to picking the right refrigerant and testing the final output. By the end, you will feel confident tackling this job yourself.
Let us be real for a moment. Your truck’s air conditioning system is not magic. It relies on a closed loop of refrigerant, a compressor, and several key components working together in harmony. When any part of that loop loses refrigerant, the whole system suffers. The result is weak cooling, warm air from the vents, or a completely dead AC. Recharging the system simply means topping off the refrigerant so your GMC Sierra AC can do its job again.
Key Takeaways
- Know Your System: Understanding how the AC compressor and refrigerant cycle works helps you recharge with confidence.
- Right Tools Matter: A quality recharge kit, AC pressure gauge, and safety gear make the job easier and safer.
- Follow the Steps: Each of the 5 steps builds on the last, so do not skip or rush through any phase.
- Safety First: Always wear gloves and eye protection when handling refrigerant and working under the hood.
- Preventive Care: Regular cabin filter changes and seasonal checks keep your GMC Sierra AC running at peak performance.
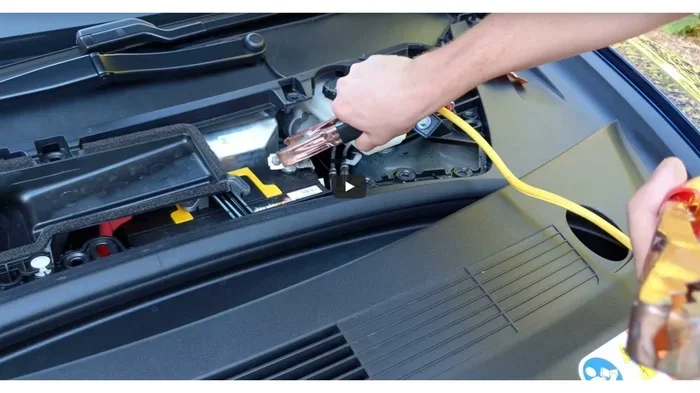
- Warning Lights: If your dashboard shows a warning, a bad battery could sometimes mimic AC issues, so check both.
- Reset After Service: After completing maintenance, you may need to reset warning lights, just like you would after an oil change.
📑 Table of Contents
- Understanding How the GMC Sierra AC System Works
- Tools and Materials You Will Need
- Step 1: Prepare Your Vehicle and Locate the Service Port
- Step 2: Connect the Recharge Kit and Check Pressure
- Step 3: Add Refrigerant and Recharge the System
- Step 4: Test the AC and Maintain Long-Lasting Performance
- Conclusion
Understanding How the GMC Sierra AC System Works
Before you grab any tools, it helps to understand what is happening inside your truck’s cooling system. Think of it like a circle of life for cold air. The refrigerant moves through different parts of the system, changing from a gas to a liquid and back again. Each change of state is what creates the cold air that blows through your dashboard vents.
The Role of the AC Compressor
The AC compressor is the heart of the system. It pumps refrigerant through the loop and pressurizes it. When the compressor engages, you may hear a slight clicking sound from the engine bay. That is the AC clutch locking onto the compressor pulley. If the clutch is not engaging, your compressor is not pumping, and no cooling happens. A low refrigerant level is one of the most common reasons the clutch will not engage.
How Refrigerant Circulates Through the System
Here is the simple cycle in plain terms:
- Compression: The compressor squeezes the refrigerant gas, turning it into a high-pressure, hot gas.
- Condensation: That hot gas flows through the AC condenser, which is located in front of the radiator. Air flowing over the condenser cools the gas into a high-pressure liquid.
- Expansion: The liquid refrigerant passes through an expansion valve or orifice tube, which drops the pressure suddenly. This causes the refrigerant to cool dramatically.
- Evaporation: The cold, low-pressure liquid flows through the evaporator core inside your dashboard. A blower fan pushes cabin air over the evaporator, and that is the cold air you feel at the air vents.
When any part of this thermal cycle is compromised, your cooling performance drops. A small refrigerant leak can cause the system to lose enough charge that the AC barely blows cool air, if any at all.
Common Signs Your AC Needs a Recharge
How do you know it is time to recharge? Watch for these telltale signs:
- The air from the vents feels warm or only slightly cool, even on max AC.
- The AC clutch cycles on and off rapidly or does not engage at all.
- You notice a faint oily residue near any AC hoses or connections under the hood.
- The cooling used to be strong but has gradually gotten weaker over weeks or months.
- Your cabin filter is clean, but airflow still feels weak and warm.
If you are experiencing any of these, a refrigerant recharge is likely in order. Before you do anything though, make sure you have the right supplies.
Tools and Materials You Will Need
One of the best things about recharging your own AC is that you do not need a garage full of expensive equipment. A basic recharge kit from any auto parts store will get the job done for most GMC Sierra models. Here is what you should have on hand before you start.
Choosing the Right Recharge Kit
Most recharge kits come with everything included: a can of refrigerant, a gauge hose, and sometimes a leak sealer additive. When shopping, look for a kit that matches the refrigerant type your truck uses. Most older GMC Sierras use R-134a refrigerant. Newer models from around 2021 onward may use R-1234yf, so check your owner’s manual or the label under the hood to be sure.
Here are the key items to look for in a kit:
- A built-in AC pressure gauge so you can monitor system pressure as you add refrigerant.
- An accurate fill hose with a trigger or valve for controlled dispensing.
- Enough refrigerant to top off the system (usually one 12-ounce can for a minor top-off, two for a full recharge).
- Optional but helpful: a thermometer to measure the temperature drop at the vent.
Safety Gear and Precautions
Refrigerant is not something you want to handle carelessly. Always wear safety glasses and work gloves. The refrigerant can cause frostbite on contact with skin because it expands and drops in temperature rapidly when released. Work in a well-ventilated area, and never smoke near the engine bay while handling refrigerant. Keep the can upright at all times during the recharge process.
Step 1: Prepare Your Vehicle and Locate the Service Port
Now it is time to get your hands dirty. This first step is all about setup. Taking a few minutes to prepare properly will make the rest of the process smooth and safe.
Parking and Engine Setup
Park your GMC Sierra on a flat, level surface. Turn off the engine and let it cool for at least 10 minutes. You want the engine bay to be cool to the touch so you can work comfortably. Engage the parking brake and pop the hood. If your truck has a wrench light or any warning indicator on the dashboard, now is a good time to note what it says. Sometimes electrical issues, like a weak battery, can affect AC performance, so it is worth checking that your battery is in good shape before proceeding.
Finding the Low-Pressure Service Port on Your GMC Sierra
The low-pressure service port is where you will connect the recharge hose. On most GMC Sierra models, it is located on the lower part of the AC system, usually on the left side of the engine bay near the firewall. Look for a small fitting with a plastic cap labeled “L” or “LOW.” It has a larger diameter fitting than the high-pressure port, which is labeled “H.”
Here is a quick way to find it:
- Open the hood and locate the AC lines running from the compressor.
- Follow the larger rubber hose toward the firewall.
- Look for the Schrader valve with a cap marked “L” or “LOW.”
- Remove the cap and set it aside safely.
Before connecting anything, use a clean rag to wipe around the port. You want to keep dirt and debris out of the system. A little prevention goes a long way toward avoiding contamination that could damage the AC compressor or clog the expansion valve.
Step 2: Connect the Recharge Kit and Check Pressure
With the service port exposed, you are ready to hook up the recharge kit. This step gives you a clear picture of how much refrigerant your system is currently low on.
Attaching the Recharge Hose
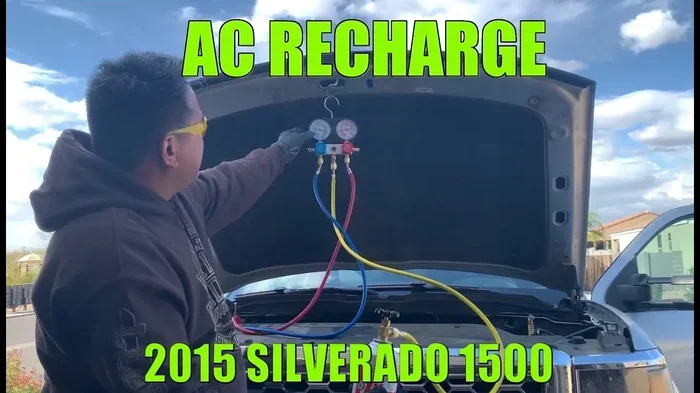
Take the hose from your recharge kit and attach it to the low-pressure service port. Push the connector firmly onto the valve until you feel it click into place. Make sure the connection is snug. A loose fitting can cause refrigerant to leak out during the process, which wastes product and makes it harder to get an accurate reading.
Once connected, the gauge on the hose or can will begin to display the current system pressure. If the gauge reads zero or very low, your system is significantly low on refrigerant. A normal reading for an inactive system (engine off) is typically between 40 and 50 PSI at standard room temperature. If the pressure is in that range or higher, you may not need a full recharge, just a small top-off.
Interpreting the Pressure Readings
Understanding what the gauge tells you is critical. Here is a simple way to think about it:
- Very low or zero pressure: The system is nearly empty and needs a full recharge.
- Low pressure (below 40 PSI): The system needs a moderate top-off.
- Normal pressure (40-50 PSI): A small amount of refrigerant may be all that is needed.
- High pressure: The system may be overcharged or the ambient temperature is very high. Do not add refrigerant in this case.
If you see very high pressure or no pressure at all, it may be a sign of a larger leak or a stuck compressor. In those cases, it is best to consult a professional mechanic rather than forcing more refrigerant into the system.
Step 3: Add Refrigerant and Recharge the System
This is the moment you have been waiting for. Adding refrigerant is straightforward, but you need to be patient and methodical. Rushing this step can lead to overcharging, which is just as harmful as undercharging.
Adding R-134a Refrigerant Safely
Turn the can of refrigerant upside down if your kit instructions call for it. This allows liquid refrigerant to flow through the hose more smoothly. Start squeezing the trigger or valve on the recharge hose in short bursts. Add refrigerant in small increments, pausing every 5 to 10 seconds to let the pressure stabilize.
Watch the gauge closely as you add refrigerant. The pressure should rise gradually. If it starts climbing quickly, slow down or stop. You do not want to overfill the system. Overcharging can cause the AC to blow warm air, put extra strain on the AC compressor, and potentially damage seals or hoses.
As a general guideline, most GMC Sierra models take between 2 and 3 pounds of refrigerant for a full recharge. Your recharge kit should have guidelines printed on the can or packaging. If you are doing a top-off, add only enough to bring the pressure into the normal range.
How Much Refrigerant Does Your GMC Sierra Need
The exact amount varies by model year and engine configuration. Here is a rough reference:
- 5.3L V8 models: Typically 2.5 to 3.0 pounds for a full charge.
- 6.2L V8 models: Usually 2.5 to 3.0 pounds.
- 4.3L V6 models: Generally 2.0 to 2.5 pounds.
- 2.7L Turbo models: Around 2.0 to 2.5 pounds.
Always refer to your owner’s manual for the exact specification. These numbers are approximate and can vary based on ambient temperature and system condition.
Step 4: Test the AC and Maintain Long-Lasting Performance
You have added the refrigerant. Now comes the satisfying part: testing the system and feeling that cold air blast through the vents.
Running the System and Checking Output
Start the engine and turn the AC to maximum cooling with the blower on high. Let the system run for at least 5 to 10 minutes. After a few minutes, check the temperature at the dashboard vents. You should feel a noticeable drop in air temperature. On a hot day, the air coming from the vents should be between 35 and 45 degrees Fahrenheit, depending on outside conditions.
If the air still feels warm, give the system another few minutes. Sometimes it takes a cycle or two for the refrigerant to fully circulate. If the air remains warm after 10 minutes, you may need to add a bit more refrigerant. Recheck the pressure gauge and add small amounts as needed.
Resetting Warning Lights After Maintenance
After completing your AC recharge, you may notice that a warning light is still illuminated on the dashboard. This is normal after any maintenance work. Similar to how you would reset the light after an oil change, your GMC Sierra may need a reset after AC service. In most cases, simply turning the ignition off and back on will clear the warning. If the light persists, check your owner’s manual for the specific reset procedure for your model year.
Preventive Tips for Your GMC Sierra AC
Keeping your AC in top shape does not stop at recharging. Here are a few simple habits that extend the life of your cooling system:
- Replace your cabin filter every 15,000 to 20,000 miles or as recommended in the owner’s manual.
- Run the AC for at least 10 minutes every week, even in winter. This keeps the seals lubricated and prevents them from drying out.
- Check for visible leaks around hoses and connections at least twice a year.
- Have the AC condenser cleaned of debris, bugs, and dirt at every oil change.
- If you notice any unusual noises from the compressor, have it inspected promptly.
These small habits can prevent costly repairs and keep your GMC Sierra AC blowing cold for years to come.
Conclusion
How to recharge the AC on a GMC Sierra is a skill that every truck owner should have in their toolbox. It saves money, builds confidence, and keeps you cool on the hottest days of the year. By following these 5 steps, you can diagnose low refrigerant, connect a recharge kit, add the right amount of refrigerant, and test your system for peak performance.
Remember to always work safely, use the correct refrigerant type, and take your time. Do not rush through the pressure checks or overfill the system. A careful, methodical approach delivers the best results. If at any point you feel unsure or the system is not responding as expected, do not hesitate to visit a qualified mechanic. They have professional-grade tools that can detect even tiny leaks and perform a full cooling system flush if needed.
With a fully recharged AC system, your GMC Sierra will be ready to handle whatever the summer throws at you. Stay cool out there, and enjoy the drive.
Frequently Asked Questions
Can I use a DIY recharge kit on my GMC Sierra?
Yes, DIY recharge kits are widely available and work well for most GMC Sierra models. Just make sure you buy the correct refrigerant type for your truck. Always follow the instructions on the kit and never overfill the system.
How often should I recharge my GMC Sierra AC?
Most trucks need a recharge every 2 to 3 years under normal conditions. If you notice warm air sooner, there may be a leak that needs to be repaired before recharging. Regular maintenance helps extend the time between recharges.
What happens if I overcharge the AC system?
Overcharging can cause the AC to blow warm air, put excess pressure on the compressor, and potentially damage seals or hoses. Always monitor the pressure gauge closely and add refrigerant in small amounts.
Is it safe to drive with the AC light on?
In most cases, yes. The AC warning light usually indicates a problem but does not make the truck unsafe to drive. However, if you see multiple warning lights or feel unsure, it is best to have the system checked. Sometimes a bad battery can trigger warning lights that seem related to the AC, so it is worth checking the battery condition too.
Can a clogged cabin filter affect AC performance?
Absolutely. A dirty cabin filter restricts airflow over the evaporator, which reduces cooling performance even if the refrigerant level is correct. Replacing the cabin filter is one of the easiest and most overlooked maintenance tasks for keeping the AC strong.
What refrigerant does a GMC Sierra use?
Most older GMC Sierras use R-134a refrigerant. Newer models may use R-1234yf. Always check your owner’s manual or the label under the hood before purchasing refrigerant to make sure you get the right type.