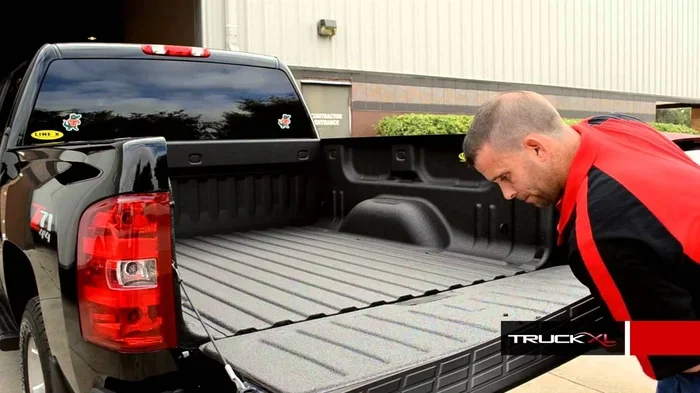
How to Remove Your GMC Tailgate with Backup Camera
Removing a GMC tailgate with a backup camera is a manageable DIY job when you follow the right steps. You will need basic tools, a little patience, and a clear understanding of the electrical connections involved. This guide walks you through every stage, from gathering supplies to safely disconnecting the camera wiring and lifting off the tailgate without causing damage.
Removing a GMC tailgate with backup camera might sound intimidating, but it is one of the more straightforward truck maintenance tasks you can handle at home. Whether you are replacing a damaged tailgate, upgrading the camera system, or just doing some deep cleaning, knowing the proper process makes all the difference. A GMC tailgate on models like the Sierra or Canyon holds a backup camera, wiring harness, and several fasteners that all need careful attention. This guide breaks everything down into simple, easy-to-follow steps so you can get the job done right the first time.
Before you start, it helps to understand what you are dealing with. The tailgate on a GMC truck is more than just a metal panel. It connects to the body through hinges, a latch mechanism, and a bundle of electrical wires that power the backup camera and sometimes the tailgate light bar. If you have ever tried to remove a tailgate without disconnecting the camera first, you know how frustrating a pulled wire can be. Taking the right approach protects both the vehicle and your sanity.
In this article, we cover every detail you need. From the tools you will need to the step-by-step removal process, we have you covered. We also share tips for handling the backup camera wiring safely, common mistakes to avoid, and advice for reinstalling the tailgate so everything works perfectly. Let us get into it.
Key Takeaways
- Know your tools: Having the right socket set, screwdrivers, and trim tools ready saves time and frustration.
- Disconnect the battery first: This keeps you safe and prevents electrical shorts when you remove the backup camera wiring.
- Work slowly on the wiring harness: The backup camera connector is fragile, and rushing can damage it.
- Support the tailgate properly: Use a helper or a jack stand so the tailgate does not fall and cause injury or damage.
- Inspect everything as you go: This is a great time to check hinges, latches, and seals for wear.
- Reassembly is the reverse: Follow the removal steps backward when putting the tailgate back on.
📑 Table of Contents
Why You Might Need to Remove Your GMC Tailgate
There are several reasons a truck owner needs to take off the tailgate. Understanding your goal helps you plan the job better and avoid unnecessary steps. Here are the most common reasons people remove their GMC tailgate:
- Tailgate replacement: Rust, dents, or collision damage sometimes requires a full tailgate swap. Removing the old unit is the first step.
- Backup camera upgrade: You may want to install a higher-resolution camera or a wider-angle lens for better rear visibility.
- Deep cleaning or restoration: Over time, grime builds up around the tailgate seals and hinges. Full removal allows thorough cleaning.
- Electrical repairs: If the backup camera flickers or stops working, you might need to access the wiring behind the tailgate.
- Bed liner or accessory installation: Some bed accessories require tailgate removal for proper fitment.
No matter the reason, the removal process follows the same basic workflow. The key difference is what you do after the tailgate is off. For a camera upgrade, you will want to carefully label every wire before disconnecting anything. For a simple tailgate replacement, you can focus more on the mechanical fasteners and less on the electronics.
Tools and Materials You Will Need
Gathering everything before you start is one of the best ways to make this job smooth. You do not need anything exotic, but having the right tools on hand prevents delays. Here is what we recommend:
Essential Tools
- Socket set (metric and standard, depending on your model year)
- Torx bit set (many GMC tailgate fasteners use Torx heads)
- Phillips and flathead screwdrivers
- Pliers and wire cutters
- Trim removal tools (plastic pry tools to avoid scratching)
- A helper or tailgate jack (the tailgate is heavy and awkward)
- Multimeter (useful for testing the backup camera wiring)
Materials and Supplies
- Electrical tape or wire connectors
- Dielectric grease (for protecting electrical connections)
- Shop towels or a soft blanket (to lay the tailgate on)
- Zip ties (for organizing wires during removal)
- Anti-seize lubricant (for hinge bolts during reassembly)
Having a tailgate jack or a second person is especially important. The GMC tailgate weighs around 40 to 60 pounds depending on the model, and it is not easy to hold while disconnecting wiring. If you have ever worked with a 6.5 foot truck bed, you know how tight the space can be. A jack takes the strain off your back and keeps the tailgate stable while you work.
Understanding the Backup Camera Wiring
The backup camera on a GMC tailgate connects through a wiring harness that runs from the rear of the vehicle up into the tailgate panel. Before you remove anything, it helps to understand how this system works. The camera gets its power through the reverse light circuit. When you shift into reverse, the system powers on and sends a video signal to the infotainment screen.
Key Wiring Components
- Camera connector: A small plug that attaches to the back of the camera lens. This is usually held in place by a clip or a small screw.
- Wiring harness: A bundle of wires that runs along the inside of the tailgate and through the body of the truck.
- Reverse light circuit: The power source for the camera. It activates only when the vehicle is in reverse.
- Ground wire: Ensures the camera has a proper electrical ground to function correctly.
When you are removing the tailgate, the most delicate part is disconnecting the camera connector. These plugs are not built to be yanked apart. Use gentle pressure and wiggle the connector slightly while pulling. If it feels stuck, stop and check for a locking tab. Forcing it can break the connector and leave you with a non-working backup camera after reinstallation.
Some GMC models route the camera wiring through the tailgate hinge area. This means you may need to release a few clips or fasteners near the hinges before the harness can slide free. Take your time here and use trim removal tools to avoid cracking any plastic clips. If you damage a clip, it can cause rattles or water leaks around the tailgate later.
Step-by-Step Tailgate Removal Process
Now that you have your tools ready and you understand the wiring, it is time to remove the tailgate. Follow these steps in order for the best results.
Step 1: Disconnect the Battery
Safety comes first. Before you touch any electrical connections, disconnect the negative terminal on the truck battery. This prevents any chance of a short circuit while you are working with the backup camera wiring. Use a socket wrench to loosen the negative cable and pull it off the terminal. Tuck the cable away from the battery so it does not accidentally touch the terminal again.
Step 2: Remove the Tailgate Latch
The tailgate latch is the mechanism that keeps the gate securely closed. Most GMC trucks have a latch that is accessible from the inside of the truck bed. You may need to remove a plastic cover or trim piece to reach the latch bolts. Use your socket set to unbolt the latch. Once the latch is removed, the tailgate will no longer be locked in place, but it is still attached by the hinges and wiring.
Step 3: Disconnect the Backup Camera Wiring
This is the most important step when your tailgate has a backup camera. Locate the wiring harness connector at the base of the tailgate. Gently squeeze the locking tabs and pull the connector straight out. Do not yank it. Once disconnected, use a zip tie to secure the wiring harness out of the way so it does not get pinched or torn during the next steps.
If your truck has a camera mount bracket, there may be one or two bolts holding the camera to the tailgate. Remove these bolts carefully and set them aside in a safe spot. You will need them when you reinstall the camera or the new tailgate.
Step 4: Remove the Hinge Bolts
The tailgate is attached to the truck body through two or three hinge points. Using your socket set, remove the bolts at each hinge. You will need a helper for this step because the tailgate will start to feel loose and heavy. Support the tailgate as you remove the last hinge bolt to prevent it from swinging open suddenly.
As you remove each bolt, place it in a small container or zip-lock bag. Labeling the bolts can help during reinstallation because some hinge bolts have different lengths. Losing a bolt means a trip to the parts store, and nobody wants that.
Step 5: Lower and Remove the Tailgate
With all the bolts removed and the wiring disconnected, you can now lower the tailgate. Have your helper support the tailgate while you guide it downward. Lay the tailgate on a soft blanket or shop towels to prevent scratching the surface. The tailgate is a large, awkward piece, so be mindful of your back and your surroundings.
At this point, you have successfully removed the GMC tailgate with backup camera. The tailgate is now free and you can proceed with whatever repair, upgrade, or cleaning you planned.
Common Mistakes to Avoid
Even experienced DIYers make mistakes during tailgate removal. Learning from other people’s errors can save you time and money. Here are the most common pitfalls:
- Forgetting to disconnect the battery: This is the number one mistake. Working on electrical connections with the battery still connected risks shorting out the camera or other electronics.
- Rushing the camera connector: The backup camera plug is small and fragile. Yanking it apart can damage the pins or break the housing. Take your time and be gentle.
- Not labeling wires and bolts: During reinstallation, it is easy to forget which wire goes where. Use tape and a marker to label everything before you disconnect it.
- Skipping the hinge bolt inspection: While the tailgate is off, inspect the hinge bolts for rust or wear. Replacing worn bolts during this process is much easier than doing it later.
- Dropping the tailgate: A falling tailgate can bend, crack, or damage the wiring harness. Always have a helper and use proper support.
One mistake that catches people off guard is not accounting for the tailgate trim pieces. Many GMC models have plastic trim around the tailgate edges that clips on and off. If you try to remove the tailgate without first taking off this trim, you risk cracking it. Use plastic trim tools to pop the clips gently and set the trim aside safely.
Reinstalling the GMC Tailgate
Once your work is complete, putting the tailgate back on is simply the reverse of removal. Here is a quick overview to make sure you do not miss anything.
Reassembly Checklist
- Position the tailgate and have your helper hold it steady.
- Reinstall the hinge bolts and hand-tighten them first.
- Reconnect the backup camera wiring harness by pressing the connector firmly until it clicks.
- Reattach the camera mount bracket if you removed it.
- Reinstall the tailgate latch and secure it with bolts.
- Reconnect the battery negative terminal.
- Test the backup camera by shifting into reverse.
After reinstalling, take the truck for a quick test. Put the vehicle in reverse and confirm the backup camera displays correctly on the infotainment screen. Check the tailgate operation by opening and closing it a few times. Listen for any unusual noises that might indicate a loose hinge or misaligned latch.
If the backup camera does not power on after reinstallation, double-check the wiring connector. A loose connection is the most common cause. You can also use a multimeter to test for power at the camera connector when the vehicle is in reverse. This quick check can save you from chasing phantom electrical problems later.
When you are finished, take a moment to admire your work. Removing and reinstalling a GMC tailgate with backup camera is a satisfying job that builds your confidence as a truck owner. It also gives you a deeper understanding of your vehicle, which pays off the next time something needs fixing.
Maintenance Tips After Tailgate Removal
With the tailgate off, you have a great opportunity to do some maintenance that is hard to access otherwise. Here are a few things worth doing while you have the tailgate removed:
- Clean the hinge pins: Wipe them down and apply a light coat of grease to prevent rust and ensure smooth operation.
- Inspect the tailgate seals: The rubber seals around the tailgate edge keep water out of the truck bed. Replace any that are cracked or brittle.
- Check the latch mechanism: Look for wear or damage on the latch and striker plate. Lubricate moving parts with white lithium grease.
- Examine the wiring harness: Look for frayed wires, pinched sections, or corroded connectors. Replace any damaged sections before reinstalling.
- Clean the camera lens area: Wipe the backup camera lens and surrounding area with a soft cloth to ensure clear video quality.
These small tasks take just a few extra minutes but can make a big difference in how your tailgate performs and how long it lasts. Think of the tailgate removal as an opportunity rather than just a task.
Final Thoughts
Removing a GMC tailgate with backup camera is a task that most truck owners can handle with basic tools and a little patience. The key is to take it step by step, disconnect the battery first, handle the wiring harness gently, and never rush the process. Whether you are replacing a damaged tailgate, upgrading your camera system, or just doing some maintenance, following the steps in this guide will help you get it done safely and correctly.
Remember to keep all your bolts and connectors organized, support the tailgate properly during removal, and take the time to inspect related components while everything is apart. A little extra care during this job pays off with a smoother ride, better rear visibility, and a tailgate that works like new for years to come.
If you found this guide helpful, you might also be interested in learning about how long it takes to fit a new bumper on your truck, since both jobs involve similar body panel removal techniques and electrical disconnections. Understanding the full scope of truck body work helps you tackle bigger projects with confidence. Happy wrenching.
Frequently Asked Questions
Can I remove the GMC tailgate without disconnecting the backup camera?
You can, but it is not recommended. The backup camera wiring runs through the tailgate and into the truck body. Removing the tailgate without disconnecting the camera risks pulling and damaging the wires. Always disconnect the wiring harness before lifting off the tailgate to protect the electrical system.
How long does it take to remove a GMC tailgate with a backup camera?
For most DIYers, the process takes about 45 minutes to an hour and a half. Your time may vary depending on your experience level, the model year of your truck, and whether you encounter any rusted or stuck fasteners. Having all your tools ready before you start helps keep the job moving quickly.
Do I need a special tool to remove the tailgate hinges?
Most GMC tailgate hinges use standard socket bolts that can be removed with a regular socket set and ratchet. Some models may use Torx or star-head bolts, so check your specific truck before you start. A Torx bit set is a worthwhile investment for any GMC owner.
Will removing the tailgate void my GMC warranty?
Removing the tailgate itself does not typically void the warranty. However, if any damage occurs during the removal process and that damage leads to a broader issue, the manufacturer may deny a related claim. Always follow proper procedures and keep track of any parts you remove.
Can I drive my truck without the tailgate installed?
Driving without a tailgate is not recommended. The tailgate provides structural support to the rear of the truck and protects the truck bed. Without it, cargo is exposed, and the vehicle may handle differently. If you must drive temporarily, secure any cargo carefully and drive cautiously.
How do I prevent rust on the tailgate hinges after reinstallation?
Apply a thin layer of anti-seize lubricant or white lithium grease to the hinge pins before reinstalling the tailgate. This creates a barrier against moisture and prevents rust buildup. Regularly inspect the hinges during routine truck maintenance and reapply grease if needed.