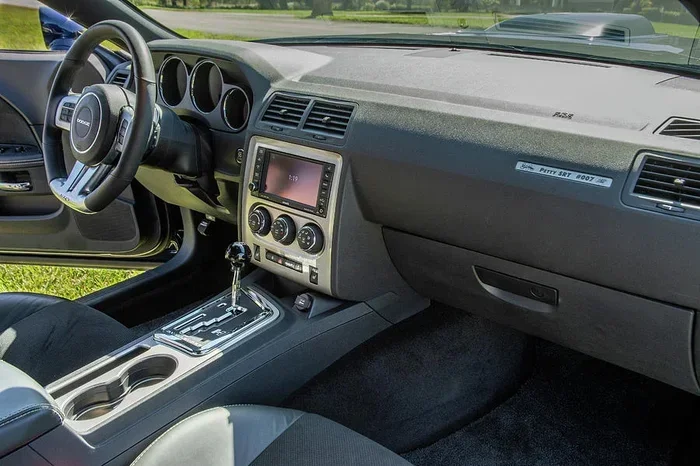
How to Reset the Check Engine Light on a Dodge Challenger
Resetting the check engine light on a Dodge Challenger is simpler than most drivers think. Whether you use an OBD-II scanner, disconnect the battery, or visit an auto parts store, this guide walks you through every method. We cover the common causes behind the light and help you decide which reset method works best for your vehicle.
There is something unsettling about seeing a warning light pop up on your Dodge Challenger dashboard. The bright glow of the engine icon can send any car owner into a spiral of worry. You wonder what went wrong. You wonder if it is expensive. You wonder if you should even keep driving.
The good news is that a check engine light does not always mean disaster. In many cases, the fix is quick and affordable. Sometimes it is as simple as tightening your fuel cap. Other times, you need a bit more troubleshooting. Either way, knowing how to reset the check engine light on a Dodge Challenger gives you confidence and saves time.
This guide covers every method you can use. We explain the tools you need, the common causes behind the light, and the steps to follow. By the end, you will know exactly what to do the next time that little icon shows up on your dash.
Key Takeaways
- Multiple Reset Methods: You can reset the light using an OBD-II scanner, by disconnecting the battery, or by visiting an auto parts store for a free scan.
- Common Causes Matter: A loose gas cap, faulty oxygen sensor, or worn spark plugs are the top reasons the light comes on in a Dodge Challenger.
- Drive Cycle Resets Work: Completing a drive cycle after resetting helps the onboard computer relearn engine parameters and confirm the fix.
- Know the Difference: The check engine light and maintenance required light serve different purposes and need different approaches.
- Safety First: Always diagnose the root cause before resetting. Driving with the light on for too long can cause further damage.
📑 Table of Contents
- What Does the Check Engine Light Mean on a Dodge Challenger?
- Common Causes of the Check Engine Light on a Dodge Challenger
- How to Reset the Check Engine Light on a Dodge Challenger
- Can You Still Drive With the Check Engine Light On?
- How to Prevent the Check Engine Light from Coming Back
- Expert Tips for Dodge Challenger Owners
- When to See a Professional Mechanic
- Final Thoughts
What Does the Check Engine Light Mean on a Dodge Challenger?
The check engine light, also called the Malfunction Indicator Lamp (MIL), is part of your vehicle’s onboard diagnostics system. It is designed to alert you when something in the engine or emission system is not working correctly. The light can appear in different colors depending on your model year. Most Dodge Challengers show it as a yellow or amber engine shape.
When the light comes on, your vehicle’s powertrain control module (PCM) stores a diagnostic trouble code (DTC). This code tells you exactly what triggered the warning. Without reading the code, you are essentially guessing. That is why using a proper diagnostic tool is so important.
When the Light Is Solid vs. Flashing
The behavior of the light matters a lot. A solid check engine light usually means a non-emergency issue. You should get it checked soon but you do not need to pull over immediately. A flashing light, however, signals a more serious problem. It often means the engine is misfiring, which can damage the catalytic converter. If your light is flashing, reduce your speed and visit a mechanic right away.
Common Causes of the Check Engine Light on a Dodge Challenger
Before you learn how to reset the light, it helps to understand why it turned on in the first place. The Dodge Challenger is a powerful machine, and several components can trigger the warning. Here are the most common culprits.
Loose or Faulty Gas Cap
This is the number one reason the check engine light comes on. The fuel system in your Challenger relies on pressure to operate efficiently. If your gas cap is loose, cracked, or missing, fuel vapors escape. The system detects this leak and triggers the light. The fix is simple: tighten the cap or replace it. After a few drive cycles, the light may turn off on its own.
Oxygen Sensor Issues
The oxygen sensor measures unburned oxygen in your exhaust. It helps the engine control module adjust the fuel-to-air mixture. Over time, these sensors can degrade or fail. A bad oxygen sensor reduces fuel economy and increases emissions. It is a common issue on older Dodge Challengers, especially those with higher mileage.
Catalytic Converter Problems
The catalytic converter converts harmful gases into less harmful emissions. When it fails, the check engine light comes on. Catalytic converter issues can be expensive to repair. That is why you should never ignore the light. Early detection often means a cheaper fix.
Mass Airflow Sensor Malfunction
The mass airflow sensor tells the engine how much air is entering the combustion chamber. When this sensor gets dirty or fails, the engine runs rich or lean. You may notice rough idling, stalling, or reduced power. Cleaning or replacing the sensor usually resolves the issue and turns off the light.
Spark Plug or Ignition Coil Problems
Worn spark plugs or faulty ignition coils cause misfires. A misfire means the engine is not firing properly in one or more cylinders. This not only triggers the check engine light but also hurts your fuel economy and performance. Regular maintenance, including spark plug replacement, keeps these issues at bay.
How to Reset the Check Engine Light on a Dodge Challenger
Now that you understand the common causes, let us get into the actual reset methods. There are several ways to clear the light on a Dodge Challenger. Some require tools, while others need no equipment at all. Choose the method that fits your situation and comfort level.
Method 1: Use an OBD-II Scanner
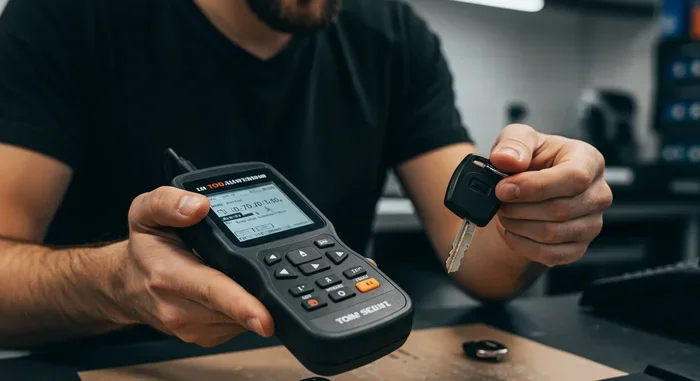
An OBD-II scanner is the most reliable way to reset the check engine light. This device plugs directly into your vehicle’s diagnostic port. The port on a Dodge Challenger is usually located under the dashboard on the driver side. Here is how to do it step by step.
First, turn off your engine and locate the OBD-II port. Plug the scanner into the port. Turn the ignition to the “on” position without starting the engine. Follow the on-screen prompts on the scanner to read the stored codes. Write down the codes so you can look them up later. Once you have the codes, navigate to the “Clear Codes” or “Erase” option on the scanner. Confirm the action. The check engine light should turn off immediately.
Using a scanner has a big advantage. You get to see what caused the light in the first place. This knowledge helps you fix the real problem instead of just masking the symptom. Many affordable OBD-II scanners are available online and at auto parts stores.
Method 2: Disconnect the Battery
Some drivers prefer the battery disconnect method. This approach resets the entire electrical system, including the PCM. To do this, turn off your Challenger and open the hood. Locate the negative battery terminal. Use a wrench to loosen the cable and remove it from the terminal. Wait at least 15 minutes. This gives the system time to fully discharge and reset. After the waiting period, reconnect the negative cable and tighten it. Start the engine and check if the light is off.
Keep in mind that disconnecting the battery also erases other settings. Your radio presets, power window calibration, and clock may need to be reset. Also, this method does not fix the underlying problem. If the root cause persists, the light will come back.
Some drivers ask, can you reset the check engine light without disconnecting the battery? The answer is yes, and using an OBD-II scanner is the best way to do it.
Method 3: Visit an Auto Parts Store
Many auto parts stores offer free diagnostic scanning. Stores like AutoZone, O’Reilly, and Advance Auto Parts will read your codes and clear the light for you at no cost. This is a great option if you do not own a scanner. Just drive your Dodge Challenger to the store, and their staff will handle the rest. They can also give you advice on what the codes mean and what repairs you might need.
Method 4: Complete a Drive Cycle
A drive cycle is a specific series of driving conditions that allows the PCM to relearn and recalibrate. After you clear the codes, the system needs to run through its self-tests. A typical drive cycle involves starting the cold engine, idling for a few minutes, driving at moderate speeds on the highway, and then returning to city driving. Once the drive cycle completes, the system checks all parameters. If the issue is resolved, the light stays off.
Every vehicle has a slightly different drive cycle procedure. You can find the specific cycle for your Dodge Challenger in the owner manual or online forums dedicated to Dodge enthusiasts.
Can You Still Drive With the Check Engine Light On?
This is one of the most common questions drivers ask. The answer depends on the severity of the issue. If the light is solid and you notice no performance problems, you can usually drive a short distance. However, you should get the vehicle inspected as soon as possible.
If you are wondering whether it is safe to drive a longer distance, consider this. Can I drive 50 miles with the check engine light on? In many cases, yes. But that depends entirely on what triggered the light in the first place. A loose gas cap is nothing to worry about. A flashing light or symptoms like stalling, shaking, or loss of power are a different story. In those cases, stop driving and call for assistance.
Driving with the check engine light on for an extended period can cause additional damage. The emission system may not function properly. Fuel efficiency drops. And in worst-case scenarios, you risk damaging the catalytic converter, which is an expensive repair. Always prioritize getting the light diagnosed and addressed promptly.
How to Prevent the Check Engine Light from Coming Back
Resetting the light is only half the battle. The real goal is to keep it from coming back. Here are practical steps you can take to maintain your Dodge Challenger and prevent future warnings.
- Check Your Gas Cap Regularly: Make sure it clicks tightly after every fill-up. Replace it if it looks worn or cracked. A proper seal keeps the fuel system pressurized and prevents evaporation leaks.
- Follow the Maintenance Schedule: Stick to the recommended service intervals for your Challenger. Regular oil changes, spark plug replacements, and air filter changes keep the engine running smoothly.
- Use Quality Fuel: Low-quality or contaminated fuel can cause a range of issues. Fill up at reputable stations to protect your engine and emission components.
- Address Warning Signs Early: If you notice rough idling, reduced power, or unusual sounds, do not wait. Early diagnosis prevents small problems from becoming big repairs.
- Keep Your Scanner Handy: Owning a basic OBD-II scanner at home puts you in control. You can check codes anytime and catch issues before the light even comes on.
Expert Tips for Dodge Challenger Owners
As a Dodge Challenger owner, you take pride in your vehicle. It is a performance car that demands attention and care. Here are some expert tips that go beyond the basics.
First, always keep your owner manual accessible. It contains model-specific information about diagnostic procedures, drive cycles, and maintenance schedules. Second, join online communities. Dodge Challenger forums are full of experienced owners who share real-world advice and troubleshooting tips. Third, invest in quality parts. Whether you are replacing an oxygen sensor or spark plugs, OEM or high-quality aftermarket parts ensure long-term reliability.
Also, remember that the check engine light and the maintenance required light are different. The maintenance required light is a service interval reminder. It does not indicate a mechanical problem. Understanding this difference helps you respond appropriately and avoid unnecessary panic.
When to See a Professional Mechanic
There are times when DIY fixes are not enough. If you have reset the light and it comes back within a few days, there is an underlying issue you need to address. Similarly, if you see the light flashing, experience significant performance loss, or notice strange noises, it is time to see a professional. A certified mechanic has the tools and expertise to diagnose complex problems. They can also perform advanced tests that go beyond what a basic scanner offers.
For Dodge Challenger owners, finding a mechanic who knows this specific vehicle makes a big difference. Look for shops that specialize in American muscle cars or Dodge vehicles. They will have the right experience and equipment to get the job done right.
Final Thoughts
The check engine light on your Dodge Challenger is a tool, not a threat. It is designed to help you catch problems early before they become expensive repairs. By understanding what triggers the light and knowing how to reset it, you take control of your vehicle’s health. Use an OBD-II scanner for the most accurate results. Address the root cause of any codes. And follow a regular maintenance schedule to keep your Challenger running strong for years to come. The next time that little engine icon lights up, you will know exactly what to do.
Frequently Asked Questions
What is the easiest way to reset the check engine light on a Dodge Challenger?
The easiest way is to use an OBD-II scanner. You plug it into the diagnostic port under your dashboard, read the codes, and use the scanner to clear them. This method takes just a few minutes and gives you the added benefit of knowing what triggered the light.
Will disconnecting the battery reset the check engine light on my Dodge Challenger?
Yes, disconnecting the negative battery terminal for 15 to 30 minutes will reset the check engine light. However, this method also erases other electronic settings in your vehicle. It does not fix the underlying problem either, so the light may return if the issue persists.
Can I drive my Dodge Challenger with the check engine light on?
If the light is solid and you notice no performance issues, you can usually drive a short distance. However, you should get the vehicle diagnosed as soon as possible. A flashing light or any performance symptoms mean you should stop driving and seek help immediately.
How much does it cost to reset the check engine light?
If you use an OBD-II scanner yourself, the cost is zero after the initial purchase of the scanner. Many auto parts stores also offer free scanning and code clearing. Professional mechanic fees for diagnostics typically range from $75 to $150 depending on your location.
Why did my check engine light come back after I reset it?
The light comes back because the underlying problem was not fixed. The PCM stores new codes once it detects the same issue again. You need to address the root cause, whether it is a loose gas cap, faulty sensor, or another component, before resetting the light permanently.
How long does it take for the check engine light to turn off after resetting?
If the issue is resolved, the light should stay off immediately after clearing the codes. However, the system needs to complete its drive cycle to confirm everything is working properly. This process can take anywhere from a few days to a week of normal driving.