How to Adjust Headlights on a Mazda 6 for Better Visibility
Learning how to adjust headlights on a Mazda 6 is a simple DIY task that can dramatically improve your night driving safety. Proper headlight alignment ensures your beams hit the road at the correct angle, reducing glare for other drivers and giving you a clearer view of the road ahead. This guide walks you through every step, from gathering the right tools to fine-tuning the aim of your Mazda 6 headlights like a pro.
Driving at night with misaligned headlights is more than just an inconvenience. It can seriously compromise your safety and the safety of everyone else on the road. If you own a Mazda 6 and have noticed that your beams are pointing too high, too low, or angled to one side, it is time to take action. This guide will show you exactly how to adjust headlights on a Mazda 6 in the comfort of your own garage. You do not need expensive equipment or advanced mechanical skills. With a few basic tools and a little patience, you can restore proper headlight alignment and enjoy a much safer driving experience.
Headlights play a vital role in night driving. They illuminate the road ahead and help you spot obstacles, pedestrians, and curves in the darkness. When they are out of alignment, your visibility drops significantly. You might also blind other drivers, which can lead to dangerous situations. Over time, headlights can shift due to normal wear and tear, rough roads, or even minor accidents. The good news is that adjusting headlight beam on a Mazda 6 is a straightforward process that most car owners can handle themselves. Let us walk through it together.
Key Takeaways
- Proper headlight alignment is critical: Misaligned headlights reduce visibility and can blind oncoming traffic, creating dangerous driving conditions.
- You only need basic tools: A screwdriver, measuring tape, and a flat wall are all you need to adjust your Mazda 6 headlights at home.
- Follow the factory markings: Your Mazda 6 has built-in alignment marks that make the process straightforward and accurate.
- Check both height and horizontal aim: Adjusting both vertical and horizontal angles ensures the best beam pattern for safe driving.
- Regular maintenance matters: Headlights can shift over time due to bumps, vibrations, and wear, so periodic checks keep them properly aimed.
- Know when to call a pro: If your headlights still seem off after adjustment, there may be a deeper issue like a broken headlight leveling sensor or damaged housing.
📑 Table of Contents
- Why Proper Headlight Alignment Matters on a Mazda 6
- Tools You Will Need for Headlight Adjustment
- Step-by-Step Guide to Adjusting Headlights on a Mazda 6
- Common Headlight Alignment Problems and How to Fix Them
- Maintaining Your Mazda 6 Headlights for Long-Term Performance
- When to Seek Professional Help for Headlight Adjustment
- Conclusion
Why Proper Headlight Alignment Matters on a Mazda 6
Many drivers overlook their headlights until something goes wrong. But proper headlight alignment is one of the most important aspects of vehicle maintenance. On the Mazda 6, the headlights are designed to project light at a very specific angle. This angle is carefully calculated to give you the best view of the road without blinding other drivers.
When your headlights are misaligned, several problems can occur. First, your visibility drops. You may not see obstacles, road signs, or pedestrians until it is too late. Second, your beams might shine directly into the eyes of oncoming drivers, causing temporary blindness and increasing the risk of accidents. Third, misaligned headlights can cause uneven lighting on the road, leaving dark spots that hide potential hazards.
There are different types of headlight systems on the Mazda 6. Some models use low beam headlights with projector lenses, while others use reflector-style housings. Regardless of the type, the principle of adjustment remains the same. You need to make sure the beam hits the road at the correct height and angle. This is where knowing how to adjust headlights on a Mazda 6 becomes incredibly valuable.
Another factor to consider is the headlight leveling sensor. Some Mazda 6 models come equipped with automatic headlight leveling systems. These sensors adjust the headlight angle based on the vehicle’s load. If this sensor fails or gets dirty, your headlights may sit at the wrong angle even if the adjustment screws are set correctly. Keeping your headlight leveling system in good working order is just as important as the manual adjustment itself.
The Safety Impact of Misaligned Headlights
Let us talk numbers. Studies show that properly aligned headlights can improve night visibility by up to 30%. That is a huge difference when you are driving on dark highways or rural roads. Misaligned headlights, on the other hand, can reduce your seeing distance by a significant margin. At 60 miles per hour, your Mazda 6 travels about 88 feet per second. If your headlights are pointed the wrong way, you might not see an obstacle until you are too close to stop safely.
Beyond safety, there is also a legal aspect. Most states and countries require that headlights be properly aimed. If your headlights fail a vehicle inspection because they are misaligned, you could face fines or be told to get them fixed before you can register your car. Taking a few minutes to adjust your Mazda 6 headlights can save you time, money, and stress down the road.
Tools You Will Need for Headlight Adjustment
Before you start, gather everything you need. Having the right tools on hand makes the process much smoother and faster. You do not need anything fancy or expensive. Here is a simple list of what you will need:
- Flat-head screwdriver or Phillips-head screwdriver (depending on your Mazda 6 model year)
- Measuring tape or a ruler
- Masking tape or painter’s tape
- A flat, level wall or a garage door
- A friend to help you test the beam while you adjust
- A flashlight or phone light for checking the alignment marks
Most Mazda 6 models use a simple screw-and-bracket system for headlight adjustment. The headlight adjustment screws are typically located on the back or top of the headlight housing. Some models have both a vertical adjustment screw and a horizontal adjustment screw. These screws let you fine-tune the angle of the beam with precision.
It is also a good idea to have your owner’s manual handy. The manual will show you the exact location of the adjustment screws for your specific Mazda 6 model year. It may also include factory-recommended settings for headlight height and angle. Having this information at your fingertips makes the whole process much easier and more accurate.
Optional but Helpful Tools
While the basic tools listed above will get the job done, there are a few optional items that can make the process even smoother. A headlight aim gauge is a tool that attaches to the headlight and shows you the exact beam angle. These gauges are inexpensive and can be very helpful if you want professional-level precision. Another useful tool is a headlight alignment tool, which provides reference marks on the wall to help you aim the beams correctly.
Some owners also like to use a headlight leveling tool, which is a small device that mounts to the headlight and measures the beam height. These tools are especially useful if your Mazda 6 has a headlight leveling sensor that needs to be calibrated after adjustment. While not strictly necessary, these tools can save you time and frustration, especially if you are new to headlight adjustment.
Before you begin, make sure your Mazda 6 is parked on a flat, level surface. The vehicle should be unloaded or carry only the driver. Tire pressure should be at the recommended level. All these factors affect how the headlights sit and aim, so getting them right before you start will lead to much better results.
Step-by-Step Guide to Adjusting Headlights on a Mazda 6
Now that you have your tools ready, let us get into the actual adjustment process. Follow these steps carefully, and you will have your Mazda 6 headlights properly aimed in no time.
Step 1: Park Your Mazda 6 Correctly
Start by parking your Mazda 6 about 25 feet away from a flat wall or garage door. The surface needs to be level and flat. If you park on a slope, the results will be inaccurate. Make sure the vehicle is facing the wall straight on, not at an angle. Turn off the engine and engage the parking brake.
Next, open the exterior bonnet to access the back of the headlight housing. If you are not sure how to do this, check out our guide on how to open an exterior bonnet for detailed instructions. The bonnet release lever is usually located inside the cabin, near the driver’s side footwell.
Step 2: Locate the Headlight Adjustment Screws
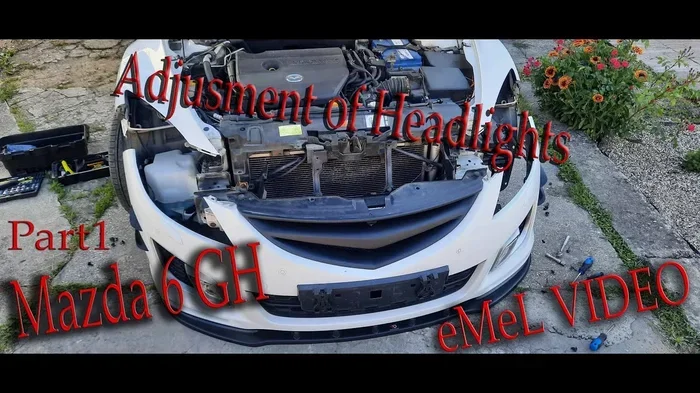
Once the bonnet is open, look at the back of each headlight housing. You will see one or two screws. These are the headlight adjustment screws. The vertical adjustment screw controls the up-and-down angle of the beam. The horizontal adjustment screw controls the left-and-right angle. On some Mazda 6 models, both screws are located on the top or back of the housing. On others, one screw may be on the side.
Use your flashlight to get a clear view of the screws. They are usually marked with plastic covers or tabs in different colors to help you identify which one controls vertical and which controls horizontal adjustment. If your Mazda 6 does not have color-coded tabs, consult your owner’s manual to confirm which screw does what.
Step 3: Mark the Current Headlight Position
Before you make any adjustments, it helps to mark the current position of the headlights on the wall. Have a friend turn on the low beam headlights while you stand back and observe where the beams hit the wall. Use masking tape to mark the center of each beam on the wall.
This gives you a reference point. After you adjust the screws, you can compare the new beam position to the original marks and see exactly how much the headlights have moved. This simple step makes the adjustment process much more precise and less guesswork.
Proper measuring positioning at this stage is key. Take your time and make sure your tape marks are accurate. If the marks are off by even a small amount, your final adjustment will be less precise.
Step 4: Adjust the Vertical Aim
Now it is time to start adjusting. Begin with the vertical adjustment screw. Use your screwdriver to turn the screw clockwise or counterclockwise. Turning the screw will move the headlight beam up or down.
The goal is to align the beam with the factory-recommended height. On most Mazda 6 models, the center of the low beam should be at or slightly below the center of the headlight housing when measured from the ground. A good rule of thumb is to aim the beam so that the center of the light hits the wall at a height that matches the center of the headlight housing minus about 2 inches.
Turn the screw slowly and make small adjustments. After each turn, step back and observe how the beam has changed on the wall. It is much better to make several small adjustments than one large turn that overshoots the target.
Step 5: Adjust the Horizontal Aim
Once the vertical aim is set, move on to the horizontal adjustment. The goal here is to center the beam so it points straight ahead. The beam should be aimed slightly to the right (passenger side in left-hand drive countries) to illuminate the road without blinding oncoming traffic.
Turn the horizontal adjustment screw carefully. Again, small turns are the key. After each adjustment, have your friend turn the headlights on and off so you can observe the beam position on the wall. Compare the new position to your tape marks from Step 3.
When the beam is properly centered, tighten the adjustment screws gently. Do not overtighten, as this can damage the housing or strip the threads. Once both screws are snug, double-check both the vertical and horizontal aim one more time.
Step 6: Test the Headlights on the Road
After you have finished the adjustment, it is time to test the headlights on an actual road. Drive your Mazda 6 on a dark road at night and observe how the beams illuminate the road ahead. Pay attention to the following:
- Do the headlights provide clear, even lighting without dark spots?
- Are you able to see the road clearly up to the distance your headlights reach?
- Are you blinding any oncoming drivers?
- Does the beam pattern look symmetrical on both sides?
If everything looks good, you are done. If not, go back and make small refinements. Headlight adjustment is often a process of fine-tuning, and it may take a few tries to get it perfect.
Common Headlight Alignment Problems and How to Fix Them
Even with careful adjustment, you may run into some common issues. Here are the most frequent problems and how to address them:
Headlights Pointing Too High
This is one of the most common problems. Headlights that point too high can blind oncoming drivers and may even fail a vehicle inspection. The fix is simple: turn the vertical adjustment screw counterclockwise to lower the beam. Make small adjustments and check the position on the wall after each turn.
Headlights Pointing Too Low
If your headlights are aimed too low, you will not see the road ahead clearly, especially on dark highways. Turn the vertical adjustment screw clockwise to raise the beam. Be careful not to overcorrect, as headlights that are too high can also cause problems.
Headlights Aimed to One Side
If one headlight is aimed to the left or right of the other, use the horizontal adjustment screw to correct it. You want both beams to be symmetrical and aimed in the same direction. If the difference is significant, check whether the headlight housing has been damaged or loosened from a bump or accident.
One Headlight Brighter Than the Other
Sometimes the issue is not alignment but brightness. If one headlight is noticeably dimmer than the other, the bulb may be failing or the lens may be cloudy. Consider replacing the bulb or performing a headlight restoration to improve clarity and brightness.
Headlights That Keep Shifting
If your headlights keep drifting out of alignment even after you have adjusted them, there may be a deeper problem. The headlight housing could be loose, the mounting brackets could be worn, or the headlight leveling sensor could be malfunctioning. In these cases, it is best to have a professional inspect the system.
Maintaining Your Mazda 6 Headlights for Long-Term Performance
Once you have adjusted your headlights, you want to keep them in great shape. Regular maintenance helps your headlights stay properly aimed and provides consistent visibility night after night.
Start by keeping the headlight lenses clean. Over time, the plastic lenses can become cloudy, yellowed, or covered in road grime. This reduces the amount of light that passes through and can make your headlights appear dim even if the bulbs are working fine. Use a headlight restoration kit or a gentle cleaner to keep the lenses clear. If you are dealing with stubborn buildup on the lens, learn how to remove difficult things from your auto glass for safe and effective cleaning methods.
Check your headlight bulbs regularly. Most headlight bulbs last between 500 and 1,000 hours of use, but they can fail sooner if exposed to moisture or vibration. Replace bulbs in pairs to ensure both headlights have the same brightness and color temperature. This also helps maintain a balanced beam pattern.
Inspect the headlight housing for cracks or damage. Even a small crack can let moisture inside the housing, which can fog the lens and reduce light output. If you notice any damage, have it repaired promptly to prevent further issues. Also, check the wiring and connectors for corrosion or loose connections.
Finally, make it a habit to check your headlight alignment every few months or after any major impact, such as hitting a pothole or curb. Headlights can shift surprisingly easily, and catching the problem early makes it much easier to fix. A quick check with your Mazda 6 parked against a wall can save you from dangerous night driving conditions.
When to Seek Professional Help for Headlight Adjustment
While adjusting headlights on a Mazda 6 is a task most owners can handle themselves, there are situations where professional help is the better choice. If you have tried adjusting the headlights and the beams still do not aim correctly, there may be a mechanical issue. A broken headlight leveling motor, a damaged housing, or a faulty sensor can all prevent proper alignment no matter how carefully you adjust the screws.
If your Mazda 6 has automatic headlight leveling, a professional mechanic can diagnose and repair the system. They have specialized tools and diagnostic equipment that can pinpoint the exact cause of the problem. This is especially important if the headlight leveling sensor needs to be replaced or recalibrated.
Another reason to seek professional help is if you are uncomfortable working on your car. There is no shame in that. A mechanic or dealership service center can adjust your headlights quickly and accurately for a reasonable fee. The most important thing is that your headlights are properly aimed for safe driving.
After any headlight adjustment, whether DIY or professional, consider having your vehicle inspected to make sure everything is in order. A quick check-up can catch other potential issues before they become costly repairs. And if you ever need to replace headlight bulbs or housings, make sure to use parts that are compatible with your specific Mazda 6 model year.
Conclusion
Knowing how to adjust headlights on a Mazda 6 is a valuable skill that every owner should have. Proper headlight alignment improves your visibility, keeps you safe on the road, and ensures you are not blinding other drivers. With just a few basic tools and a little patience, you can adjust your Mazda 6 headlights in under an hour and enjoy a much better driving experience at night.
Remember to take your time, make small adjustments, and always test your results on the road. If you run into any problems or are unsure about any step, do not hesitate to consult your owner’s manual or seek professional help. Your headlights are one of the most important safety features on your car, and keeping them properly aimed is one of the simplest and most impactful things you can do as a Mazda 6 owner.
Take action today. Pull your Mazda 6 up to a wall, gather your tools, and give your headlights the adjustment they deserve. You will be amazed at the difference it makes the next time you drive at night. Safe travels and clear roads ahead.
Frequently Asked Questions
How do I know if my Mazda 6 headlights need adjustment?
If you notice that your beams are pointing too high, too low, or uneven compared to each other, it is time to adjust them. You can also park facing a wall and check where the beams hit. If the center of the light is not at the expected height, your headlights need realignment.
Can I adjust my Mazda 6 headlights without any special tools?
Yes, you can. Most Mazda 6 models only require a screwdriver and a flat wall to adjust the headlights. A measuring tape and masking tape are helpful but not strictly necessary. The process is designed to be simple enough for any car owner.
How often should I check my Mazda 6 headlight alignment?
It is a good idea to check your headlight alignment every 6 months or after any significant impact, such as hitting a pothole or getting into a minor accident. Regular checks ensure your headlights stay properly aimed for safe driving.
What should I do if my Mazda 6 has automatic headlight leveling?
If your Mazda 6 has an automatic leveling system, check that the headlight leveling sensor is working properly before adjusting the headlights manually. If the sensor is faulty, it can prevent the headlights from sitting at the correct height even after manual adjustment.
Why is one of my Mazda 6 headlights brighter than the other?
This is usually caused by a bulb that is nearing the end of its life or a cloudy lens on one side. Replace the bulb if needed, or clean the lens to restore brightness. If both bulbs and lenses are in good condition, check the alignment of the dimmer headlight.
Is it illegal to drive with misaligned headlights?
Yes, in most places, driving with misaligned headlights is illegal and can result in fines or failed vehicle inspections. Properly aimed headlights are a safety requirement, and adjusting them is a quick and easy way to stay compliant with the law.