How Do You Touch Up a Small Spot on a Car the Right Way
Touching up a spot on a car is one of the easiest ways to protect your vehicle from rust and further damage. Whether you are dealing with a small chip from a rock, a shallow scratch, or a fresh paint blemish, a proper touch up a spot on a car repair can save you hundreds of dollars. This guide walks you through every step, from finding the right paint code to applying the final clear coat. By the end, you will know exactly how to make your car look factory fresh again.
Every car owner knows that sinking feeling. You are walking to your vehicle and notice a fresh chip or scratch. Maybe it was a pebble on the highway. Maybe it was a shopping cart in the parking lot. Whatever the cause, that tiny spot can turn into a big problem fast if you ignore it.
Touching up a spot on a car is not just about looks. It is about protection. When the clear coat and base paint get damaged, the bare metal underneath is exposed to moisture, salt, and road debris. Within days, that small spot can start to rust. And rust spreads fast. A simple touch up a spot on a car repair can prevent years of expensive body work down the road.
The good news? You do not need to be a mechanic or a professional painter to fix it. With the right tools, a little patience, and this guide, you can make that spot disappear. We will walk you through every single step. From finding your paint code to applying the final clear coat, you will have everything you need to know.
Key Takeaways
- Act fast: The sooner you fix a spot, the better. Exposed metal can rust within days.
- Find your paint code: Using the correct color match is the single most important step in a successful touch up a spot on a car repair.
- Prep matters: Cleaning, sanding, and priming properly ensures the paint adheres and lasts.
- Less is more: Apply thin layers of paint and clear coat rather than one thick coat for a smoother finish.
- Buff and blend: Final polishing makes the repair nearly invisible and restores the glossy look.
- Avoid common mistakes: Skipping primer, applying too much paint, or touching up in direct sunlight all lead to poor results.
- Know when to call a pro: Deep scratches, large damaged areas, or damage near trim may need professional attention.
📑 Table of Contents
- Why Touching Up a Spot on a Car Matters
- Gather Your Tools and Supplies
- How to Find Your Car Paint Code
- Step-by-Step: How to Touch Up a Spot on a Car
- Common Mistakes to Avoid
- When to Call a Professional
- How Long Does a Touch Up Repair Last?
- Comparison: DIY Touch Up vs. Professional Repair
- Final Thoughts
Why Touching Up a Spot on a Car Matters
Some people think a small chip is no big deal. They ignore it. They tell themselves it is just cosmetic. But that mindset can cost a lot of money over time. Here is why addressing paint damage quickly is so important.
Prevents Rust and Corrosion
Your car’s paint is more than just a color. It is a protective barrier. The base coat gives the color. The clear coat adds shine and shields the paint underneath. When that clear coat gets chipped or scratched, the metal is left exposed. Moisture from rain, snow, and even humidity can reach the bare metal. Once rust starts, it eats through the panel. What began as a tiny spot can become a structural issue. Touching up a spot on a car right away seals the metal and keeps rust at bay.
Maintains Resale Value
Whether you plan to sell your car soon or keep it for years, paint condition matters. Buyers and appraisers notice damage. A car with well-maintained paint looks newer and is worth more. A car with visible chips and rust spots loses value fast. A simple touch up a spot on a car repair helps preserve your investment.
Stops Damage from Spreading
One small chip can become a larger problem. Road debris keeps hitting the same area. Salt and chemicals wear the spot down further. UV rays fade the surrounding paint. By fixing the damage early, you stop the chain reaction of deterioration. A small repair today prevents a large repair tomorrow.
Gather Your Tools and Supplies
Before you start, make sure you have everything you need. Trying to fix a spot on a car mid-repair because you are missing a supply will only frustrate you. Here is a complete checklist of what you need.
Essential Supplies
- Automotive touch up paint: This is the most important item. You need paint that matches your car’s exact color code.
- Clear coat: This protects the paint and gives it that glossy factory finish.
- Primer: Especially important if the spot reaches bare metal. Primer helps paint stick and prevents rust.
- Sandpaper (1500 and 2000 grit): Used for smoothing the damaged area before painting.
- Rubbing compound and polishing compound: These blend the repair into the surrounding paint.
- Microfiber cloths: For cleaning and buffing the area.
- Tack cloth: A sticky cloth that picks up dust and debris before painting.
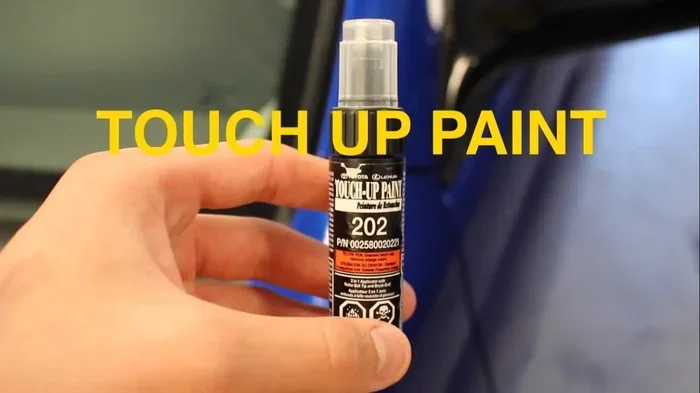
- Paint applicator brush or pen: Most touch up kits include a fine brush or pen-style applicator.
- Masking tape and paper: To protect surrounding paint from overspray.
Recommended Tools
- Touch up paint kit: Many aftermarket kits include everything in one box. These are great for beginners.
- LED flashlight: Helps you see the full extent of the damage.
- Dental pick or toothpick: Useful for applying paint to tiny spots with precision.
- Soft microfiber towel: For gentle cleaning and drying.
- Spray bottle with water: For wet sanding during the prep process.
How to Find Your Car Paint Code
Finding the correct paint code is the foundation of a successful touch up a spot on a car repair. If you use the wrong color, the repair will stand out even more than the original chip. Here is how to find it.
Check the Driver’s Side Door Jamb
The most common place for your paint code is on a sticker inside the driver’s door jamb. Open the door and look for a metal plate or sticker. It will list your vehicle’s manufacturing details, including the paint code. It is often labeled as “Exterior Color Code” or simply “Paint Code.”
Check the Owner’s Manual or Online
If you cannot find the sticker, your owner’s manual may list the paint code. You can also search online using your car’s year, make, model, and trim level. Most paint suppliers and dealerships can look it up for you. Some even let you enter your VIN (Vehicle Identification Number) to find the exact code.
Order the Correct Paint
Once you have the code, order automotive touch up paint that matches. You can buy it from your dealership, auto parts stores, or online retailers. Make sure it is specifically formulated for your car’s make and model. Some brands offer spray cans, while others provide brush-on pens. For a small spot, a brush-on pen works best.
Step-by-Step: How to Touch Up a Spot on a Car
Now for the part you have been waiting for. Here is the full process for fixing a spot on your car. Follow each step carefully, and you will get professional-looking results.
Step 1: Clean the Damaged Area
Start by washing the area around the spot. Use warm water and mild car soap. Remove all dirt, grease, and debris. A clean surface is critical for paint adhesion. After washing, dry the area thoroughly with a microfiber cloth. Then wipe it down with a tack cloth to pick up any remaining dust particles.
Step 2: Sand the Damaged Area
If the spot has any rough edges or flaking paint, gently sand it smooth. Use 1500-grit sandpaper for light sanding. Wet the sandpaper with water to prevent scratching. Sand in a circular motion until the edges are smooth. Switch to 2000-grit sandpaper for a finer finish. The goal is to create a smooth surface for the paint to bond to. Do not sand into the surrounding good paint.
Step 3: Apply Primer (If Needed)
If the damage reaches bare metal, you must apply primer before paint. Primer creates a protective layer and helps the touch up paint adhere properly. Apply a thin, even coat with the applicator brush. Let it dry completely. Most primers dry within 15 to 30 minutes, but check the product instructions for exact timing.
Step 4: Apply the Touch Up Paint
This is the most important step. Dip the brush or pen applicator into the touch up paint. Apply the paint in thin, even layers. Do not glob it on. One thick coat will drip, bubble, and look terrible. Instead, apply three to four thin coats. Let each coat dry for 10 to 15 minutes before applying the next. Build up the paint slowly until it fills the spot level with the surrounding surface.
Quick Tip: Use a toothpick or dental pick for very small spots. It gives you more control and prevents paint from spreading to areas you do not want it.
Step 5: Apply Clear Coat
Once the paint is dry and level, apply a clear coat. This adds protection and gives the repair its glossy finish. Apply one to two thin coats of clear coat, waiting 10 to 15 minutes between coats. The clear coat should extend slightly beyond the painted area to blend smoothly with the surrounding paint.
Step 6: Let It Cure
Patience is key here. Let the repair cure for at least 48 hours before touching it. Some clear coats take up to a week to fully harden. During this time, keep the car out of direct sunlight and away from rain. UV rays and moisture can damage the fresh repair.
Step 7: Buff and Blend
After the repair has fully cured, it is time to blend it in. Apply a small amount of rubbing compound to a microfiber cloth. Gently buff the repaired area in circular motions. This removes any haze and smooths the transition between the new paint and the old paint. Follow up with a polishing compound for extra shine. Finish with a clean microfiber cloth to reveal the glossy finish.
Common Mistakes to Avoid
Even with the best intentions, people make mistakes when touching up a spot on a car. Avoid these common errors for a better result.
Skipping the Primer
If the spot reaches bare metal, skipping primer is the fastest way to get a failed repair. The paint will not stick properly, and it will peel off within weeks. Always use primer on exposed metal.
Applying Too Much Paint
Thick paint looks obvious. It creates bumps and drips that are hard to fix. Thin layers are always better. Build up slowly and let each layer dry completely before adding the next.
Touching Up in Direct Sunlight
Painting in direct sunlight causes the paint to dry too fast. It can lead to bubbling, cracking, and poor adhesion. Always work in a shaded area or indoors if possible.
Using the Wrong Paint Color
Do not guess the color. Do not use a generic “close enough” match. Always find your exact paint code and order the correct paint. A mismatched spot will be more noticeable than the original chip.
Not Buffing After the Repair
Many people stop after the clear coat dries. But without buffing and blending, the repair will look like a raised bump. The final buffing step is what makes the repair nearly invisible.
When to Call a Professional
Not every spot needs a DIY fix. Some damage is better left to the professionals. Here are situations where you should consider calling an auto body shop.
- Deep scratches that reach the primer or metal: These need professional-grade repair and color matching.
- Large areas of damage: If the spot is bigger than a quarter, a professional will get a better result.
- Damage near trim or seams: Painting near plastic trim requires special techniques to avoid overspray.
- Rust that has already formed: If rust has eaten into the metal, you need more than a touch up. A professional can assess the damage and recommend the right repair.
- Damage on a luxury or rare car: High-end vehicles often require specialized paint systems that are hard to match at home.
A professional paint job will cost more upfront. But for complex damage, it is worth the investment. A bad DIY repair can actually decrease your car’s value and lead to more expensive fixes later.
How Long Does a Touch Up Repair Last?
A properly done touch up a spot on a car repair can last for years. The longevity depends on several factors, including the quality of your supplies, how well you prep the surface, and how much sun and weather exposure the car gets.
Most DIY touch up repairs last anywhere from two to five years. Some last even longer if the car is kept in a garage and protected from harsh conditions. The key is to take your time and follow each step carefully. Rushing through the process is the number one reason repairs fail early.
Expert Insight: According to automotive body shop professionals, the most durable DIY touch ups come from using a multi-step process. Clean, sand, prime, paint in thin layers, clear coat, and buff. Skipping any of these steps weakens the repair. Each step serves a purpose, and together they create a long-lasting fix.
Comparison: DIY Touch Up vs. Professional Repair
Wondering whether to fix the spot yourself or pay a professional? Here is a quick comparison to help you decide.
| Factor | DIY Touch Up | Professional Repair |
|---|---|---|
| Cost | $10 to $30 | $150 to $500+ |
| Time | 1 to 2 hours | 1 to 3 days |
| Skill Level Needed | Beginner-friendly | Professional expertise |
| Best For | Small chips, light scratches, fresh spots | Deep scratches, large damage, rust damage |
| Durability | 2 to 5 years with proper care | 5 to 10+ years |
| Color Match Accuracy | Good with correct paint code | Excellent with computer matching |
| Tools Required | Basic touch up kit | Professional spray equipment |
For most small spots, a DIY repair is the smart choice. It is fast, affordable, and highly effective when done correctly. Save the professional repairs for bigger or more complex damage.
Final Thoughts
Touching up a spot on a car is one of the simplest and most rewarding maintenance tasks you can do. It takes less than an hour, costs very little, and protects your car from rust and further damage. The key is to act quickly, use the right supplies, and follow each step carefully.
Do not let a small chip turn into a rusted panel. Grab your touch up paint kit, find your paint code, and fix that spot today. Your car will look better, last longer, and hold its value. A little effort now saves a lot of money and headaches later. You have got this, and your car will thank you for it.
Frequently Asked Questions
Can I use a regular paint pen from a hardware store to touch up a spot on my car?
It is not recommended. Hardware store paint pens are not formulated for automotive use. They do not match your car’s exact color, and they lack the durability of proper automotive touch up paint. Always use a paint product designed specifically for cars, and make sure it matches your vehicle’s paint code.
How long should I wait before washing my car after a touch up repair?
Wait at least 48 to 72 hours before washing the repaired area. The paint and clear coat need time to fully cure. Washing too soon can damage the fresh repair, cause water spots, or peel the paint. If possible, avoid washing the entire car for at least a week to be safe.
Will the touch up paint fade over time compared to my car’s original paint?
Yes, touch up paint can fade slightly faster than factory paint because it lacks the UV protection of the original clear coat. However, if you keep the car waxed and parked out of direct sunlight when possible, the repair will hold up well for years. Waxing the repaired area regularly helps protect the touch up paint.
Is it better to use a brush or a spray can for touch up a spot on a car?
For small spots, a brush or pen-style applicator is much better. It gives you precise control and prevents overspray on surrounding paint. Spray cans work well for larger areas but are harder to control on small spots. Stick with a brush-on pen for spot repairs and use spray only for bigger sections.
What should I do if the spot has already started to rust before I fix it?
Remove the rust first before applying any paint. Use fine sandpaper or a rust remover tool to gently sand away the rust. Apply a rust converter or primer designed for metal protection before painting. Once the rust is gone and the primer is dry, proceed with the normal touch up process of painting and clear coating.
Can I drive my car immediately after touching up a spot?
Yes, you can drive the car right away. The paint will be dry to the touch within an hour or so. However, you should avoid car washes, heavy rain, and direct sunlight for at least 48 hours. The clear coat needs time to fully harden, and exposing it to water or heat too soon can compromise the repair.
=== CONCLUSION ===
Touching up a spot on a car is a simple repair that anyone can do at home. With the right paint code, a few basic supplies, and a little patience, you can fix chips, scratches, and small rust spots before they become big problems. Follow the steps in this guide carefully, avoid the common mistakes, and your car will look as good as new. Do not wait until the spot gets worse. Grab your touch up kit today and give your car the protection it deserves.