How to Reset Brake Pad Sensor on BMW Step by Step Guide
Resetting the brake pad sensor on your BMW is a simple DIY job that saves time and money. This guide walks you through every step clearly, from locating the sensor to confirming the reset worked. You will learn what tools you need, common mistakes to avoid, and expert tips that make the process smooth and stress-free.
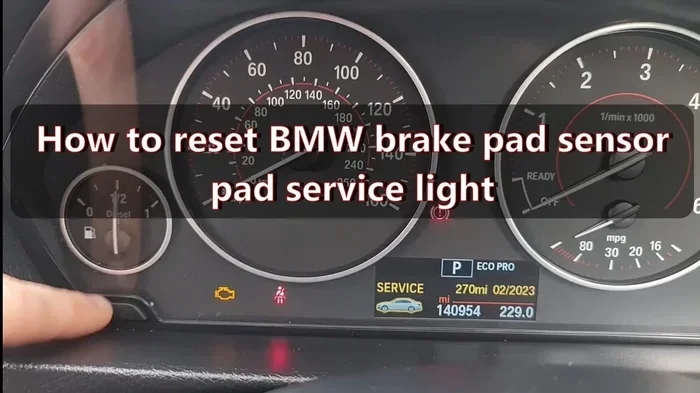
Dealing with a brake pad warning light on your BMW can feel stressful. You are driving along, and suddenly that little red or yellow light pops up on your dashboard. It is annoying, but it is also important. The brake pad sensor on your BMW is designed to tell you when your pads are worn down and need replacing. Once you swap out the old pads for new ones, the sensor still thinks the old pads are in place. That is where resetting comes in.
Many BMW owners worry that resetting the brake pad sensor is a complicated dealer-only job. The truth is, it is much simpler than most people think. With the right tools and a little patience, you can handle this task at home. This guide gives you every step you need, from start to finish. You will learn what tools to grab, how to find the sensor, and how to clear the warning light properly.
We will also cover common mistakes that trip people up, so you do not have to learn the hard way. Whether you drive a BMW 3 Series, 5 Series, X3, or X5, the process is similar across most models. Let us dive in and get your brake sensor back to where it belongs.
Key Takeaways
- Easy DIY Fix: You can reset the brake pad sensor on most BMW models at home with basic tools.
- Saves Money: Avoid costly trips to the dealer by handling the reset yourself in under 30 minutes.
- Right Tools Matter: An OBD scanner or BMW-specific diagnostic tool makes the process much simpler.
- Safety First: Always disconnect the battery and let the car cool before starting any brake work.
- Common Mistakes Happen: Skipping the calibration step or using the wrong tools can cause errors.
- Know When to Seek Help: Some BMW models with advanced electronic systems may need a dealer visit.
📑 Table of Contents
- Understanding the BMW Brake Pad Sensor
- Tools and Materials You Will Need
- Step-by-Step Guide to Resetting the Brake Pad Sensor
- Common Mistakes to Avoid When Resetting the Sensor
- When to Seek Professional Help
- BMW Brake Pad Sensor Reset: Model-Specific Tips
- Maintenance Tips to Keep Your Brake System Healthy
- Final Thoughts
Understanding the BMW Brake Pad Sensor
Before you reset anything, it helps to understand what the sensor does and why it exists. The brake pad sensor is a small device mounted near the brake caliper. Its job is to monitor the thickness of your brake pads. When the pads wear down to a dangerous level, the sensor triggers a warning on your dashboard.
How the Sensor Works
The sensor is usually a thin wire or contact point that sits against the brake pad. As the pad wears thinner over time, the sensor eventually makes contact with the rotor or caliper. This completes an electrical circuit, which sends a signal to your BMW’s computer. The computer then lights up the brake warning on your dashboard.
Once you install new brake pads, the sensor no longer touches the rotor because the new pads are thicker. However, the BMW computer still stores the old worn-pad data. That is why the light stays on even after fresh pads are in place. You need to reset the sensor to tell the car that new pads are installed.
Why You Should Never Ignore the Warning
Some owners see the brake warning light and simply ignore it. That is a bad idea. Worn brake pads reduce your stopping power. They also damage your brake rotors, which are much more expensive to replace. The brake pad sensor exists to protect you and your wallet. Always take the warning seriously and address it quickly.
If you are unsure whether your pads need replacing or if the light is a false alarm, you can check the pad thickness through the wheel spokes. If the pad material looks thin, less than a quarter inch, it is time for a replacement. If you want to learn more about handling brake repairs yourself, check out our guide on can I change the brake pads myself for helpful tips.
Tools and Materials You Will Need
One of the best things about resetting a BMW brake pad sensor is that you do not need fancy equipment. A few basic tools will get the job done. Here is what you should gather before you start.
- OBD-II Scanner or BMW Diagnostic Tool: A basic OBD-II scanner works for most BMW models. For newer models, a BMW-specific tool like ISTA may be needed.
- Socket Set: A standard set of metric sockets in various sizes.
- Jack and Jack Stands: You need to lift the car safely to access the brake components.
- Lug Wrench: To remove the wheels.
- Gloves and Safety Glasses: Protect your hands and eyes from brake dust and debris.
- Clean Rag: For wiping down components and keeping the area clean.
- Dielectric Grease: This helps protect the sensor connector from corrosion.
Having all your tools ready before you start makes the process much smoother. You do not want to stop halfway through because you are missing a socket or a tool. If you are wondering whether you can reset sensor codes without a special tool, check out our article on does disconnecting battery reset codes for more information.
Step-by-Step Guide to Resetting the Brake Pad Sensor
Now that you understand the sensor and have your tools ready, let us walk through the actual reset process. Follow these steps carefully and you will have your BMW’s brake pad warning cleared in no time.
Step 1: Park the Car on a Level Surface
Find a flat, solid surface to work on. A garage floor or driveway works well. Make sure the car is in park (or first gear for manual transmissions) and the parking brake is engaged. Turn off the engine and let the car cool down. Brake components get very hot, and you do not want to burn yourself during this process.
Step 2: Remove the Wheel
Use the lug wrench to loosen the lug nuts on the wheel where you will be working. Do not remove them completely yet. Then, use the jack to lift the car and place a jack stand under the frame for safety. Once the car is secure, remove the lug nuts fully and take the wheel off. This gives you clear access to the brake caliper and sensor.
Step 3: Locate the Brake Pad Sensor
The brake pad sensor is usually located near the brake caliper or along the brake pad bracket. On most BMW models, it is a small electrical connector with a thin wire that runs along the inner brake pad. Look for a clip or clip holder that secures the sensor wire to the caliper bracket. Follow the wire to the connector point.
Take a moment to inspect the sensor wire. Look for any signs of damage, fraying, or corrosion. If the wire looks worn or damaged, you may need to replace the sensor entirely rather than just resetting it.
Step 4: Disconnect the Sensor Connector
Gently unplug the electrical connector from the brake pad sensor. It should click or release with light pressure. Do not pull on the wire itself. Pull on the connector housing only. Once disconnected, you can set the old sensor aside if you are replacing it, or leave it in place if you are only resetting the system.
Step 5: Use the OBD Scanner to Reset the Code
Plug your OBD-II scanner into the diagnostic port under the dashboard. Turn the ignition to the “on” position without starting the engine. The scanner should power up and connect to the BMW’s computer. Navigate to the “Read Fault Codes” or “Clear Codes” section.
Look for any brake-related codes, such as a brake pad wear indicator code. Select the code and choose “Clear” or “Reset.” The scanner will communicate with the BMW’s computer and erase the stored fault data. Once cleared, turn the ignition off and wait about 30 seconds.
For BMW models that require a more advanced reset, you may need to use a BMW-specific diagnostic tool. Some newer BMWs will not clear the brake pad sensor code with a basic OBD scanner alone. In those cases, a dealer-level tool or a professional scan tool is necessary.
Step 6: Reconnect the Sensor (If Replaced)
If you replaced the brake pad sensor, now is the time to plug in the new one. Apply a small amount of dielectric grease to the connector before plugging it in. This protects the connection from moisture and corrosion. Push the connector firmly into place until you hear the click.
Step 7: Reinstall the Wheel
Put the wheel back on and hand-tighten the lug nuts. Lower the car off the jack stands and then use the lug wrench to tighten the nuts in a star pattern. This ensures even pressure and a secure fit.
Step 8: Start the Car and Test the Reset
Get in the car, start the engine, and watch the dashboard. The brake warning light should be off now. If it stays on, double-check that you cleared the correct code. You may also need to drive the car for a few minutes for the system to recalibrate. If the light persists, try the reset again or consult a professional.
If you are curious about whether you can reset warning lights without disconnecting the battery, our article on can you reset the check engine light without disconnecting the battery has useful information that applies to brake sensors too.
Common Mistakes to Avoid When Resetting the Sensor
Even though the reset process is straightforward, mistakes can happen. Here are the most common errors BMW owners make, and how to avoid them.
- Skipping the Inspection: Before resetting, always inspect the new brake pads. Make sure they are the correct type and thickness for your BMW model. Installing the wrong pads can trigger the sensor again.
- Not Clearing All Codes: Sometimes multiple codes are stored. Make sure you clear all brake-related codes, not just the first one that shows up.
- Using the Wrong Scanner: A cheap or incompatible OBD scanner may not communicate properly with your BMW. Invest in a quality scanner that supports BMW models.
- Forgetting to Reconnect the Sensor: After resetting, make sure the sensor connector is properly plugged in. A loose connection will trigger the warning light again.
- Driving Without New Pads: Never reset the sensor without actually installing new brake pads. The sensor exists for safety, and driving on worn pads is dangerous.
- Ignoring Persistent Lights: If the warning light stays on after the reset, do not ignore it. There may be a deeper issue with the brake system that needs professional attention.
One mistake that catches people off guard is trying to drive 50 miles with the check engine light on or a brake warning light on. While some minor issues are safe to drive on briefly, a brake warning is not one of them. Always resolve brake warnings before driving the car. If you want to learn more about how far you can safely drive with warning lights, check out our article on can I still drive with the oil change light on for general guidance on driving with dashboard warnings.
When to Seek Professional Help
Most BMW owners can handle a brake pad sensor reset without any issues. However, there are situations where professional help is the smart choice.
Advanced BMW Models
Newer BMW models with advanced driver assistance systems and electronic brake systems may require dealer-level diagnostics. If you own a recent BMW with features like automatic emergency braking or adaptive cruise control, the brake sensor system is more complex. A basic OBD scanner may not be enough to fully reset the system.
Persistent Warning Lights
If you have reset the sensor and cleared the codes, but the warning light comes back after a short drive, something deeper may be wrong. The sensor itself could be faulty, the wiring could have an issue, or the brake system may have a problem that needs professional diagnosis.
Uncertainty About the Process
There is no shame in calling a mechanic if you are unsure about any step. Brake safety is too important to take lightly. If you feel uncomfortable working on your brakes, a professional can handle the reset quickly and safely.
BMW Brake Pad Sensor Reset: Model-Specific Tips
Different BMW models have slight variations in how the brake pad sensor system works. Here are some quick tips for popular models.
- BMW 3 Series (F30/F31): These models respond well to OBD-II scanner resets. The sensor is easily accessible after removing the rear wheel.
- BMW 5 Series (F10): The 5 Series sometimes stores multiple brake-related codes. Clear all of them for a complete reset.
- BMW X3 (F25): The X3’s sensor is located near the front caliper. Access is straightforward but requires lifting the front of the car.
- BMW X5 (F15): The X5 has a more advanced sensor system. A BMW-specific diagnostic tool like ISTA may be needed for a full reset.
- BMW 1 Series (F20): This compact model uses a simple sensor setup. A basic OBD scanner works perfectly for resets.
Knowing your specific model helps you prepare for any unique challenges. Always refer to your BMW owner’s manual for model-specific guidance on the brake system and sensor location.
Maintenance Tips to Keep Your Brake System Healthy
Resetting the sensor is just one part of brake maintenance. Here are some tips to keep your BMW’s brake system in great shape for the long haul.
- Check Brake Pads Regularly: Inspect your pads every 5,000 to 10,000 miles. Catching wear early prevents damage to rotors.
- Monitor Brake Fluid: Low brake fluid can trigger warnings and affect braking performance. Check the fluid level monthly.
- Listen for Warning Sounds: Squealing or grinding noises when braking are signs that your pads are worn. Do not ignore them.
- Use Quality Brake Parts: OEM or high-quality aftermarket pads and rotors last longer and perform better.
- Keep Sensors Clean: Brake dust can accumulate on the sensor and connector. Clean them during regular maintenance.
Taking care of your brake system proactively means fewer surprise trips to the shop and a safer driving experience. A well-maintained BMW brake system gives you confidence every time you hit the road.
Final Thoughts
Resetting the brake pad sensor on BMW is a task that most car owners can handle with confidence. You now know what the sensor does, what tools you need, and exactly how to walk through the process step by step. The key is to take your time, follow each step carefully, and never skip the safety precautions.
Remember, the brake warning light exists to protect you. Always address it promptly and never drive on worn brake pads. If you run into trouble or the light keeps coming back, do not hesitate to visit a qualified mechanic or BMW dealer.
With the knowledge in this guide, you are well-equipped to handle the reset yourself and save money on dealer visits. Keep your BMW running safely and smoothly, and enjoy the peace of mind that comes with a properly functioning brake system.
Frequently Asked Questions
Can I reset the brake pad sensor without an OBD scanner?
On some older BMW models, you can reset the sensor by disconnecting the battery for about 15 to 30 minutes. However, this method does not work on all models and may clear other stored codes too. For a reliable reset, using an OBD scanner is the best approach.
How often should I replace my BMW brake pads?
BMW brake pads typically last between 30,000 and 70,000 miles, depending on driving habits. City driving with frequent stops wears pads faster. Always check your pad thickness regularly and replace them before they get dangerously thin.
Is it safe to drive with the brake pad warning light on?
No, it is not safe. The warning light means your brake pads are worn and your stopping distance increases. Continuing to drive on worn pads can also damage your rotors, leading to much more expensive repairs. Address the warning immediately.
Can I replace just one brake pad sensor at a time?
Yes, you can replace a single sensor if only one is faulty. However, if you are replacing brake pads on both sides of an axle, it is a good idea to replace both sensors at the same time. This ensures even braking and prevents future issues.
What does it cost to reset a brake pad sensor at a dealer?
Dealers typically charge between $100 and $300 for a brake pad sensor reset, depending on the BMW model and location. Doing it yourself with an OBD scanner costs far less and takes only about 15 to 30 minutes.
Will resetting the brake pad sensor affect my BMW’s warranty?
Resetting the sensor yourself does not void your BMW warranty. However, if the reset is done incorrectly and causes damage to the brake system, it could affect warranty coverage. Always follow proper procedures and use compatible parts.