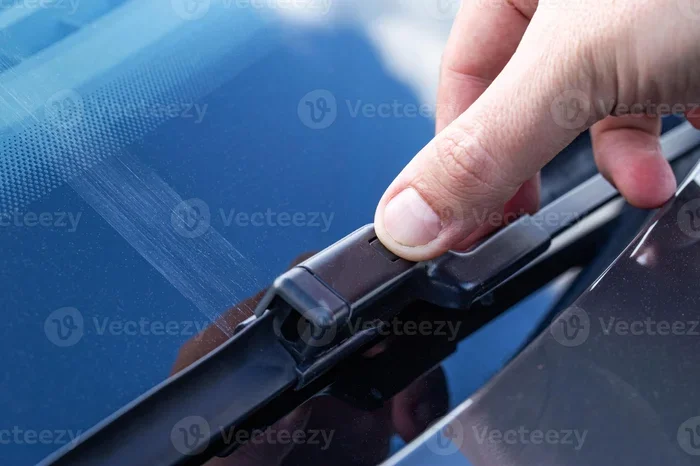
Do You Need a Tool to Change Your Windshield Wipers
Do You Need a Tool to Change Windshield Wipers? The answer is usually no. You can swap out your blades with just your hands in minutes. This quick guide shows you how to do tool-free wiper replacement and avoid common pitfalls.
Do You Need a Tool to Change Windshield Wipers? The answer is almost always no. Changing your wipers is one of the simplest maintenance jobs you can do at home. Many car owners assume they need a special wrench or tool, but that’s rarely the case. In most situations, you can replace your wipers in just a few minutes using nothing but your hands.
This guide will walk you through everything you need to know about tool-free wiper replacement. We’ll cover connector types, blade sizes, and the few instances where a tool might actually help. Your windshield wipers work hard every time it rains or snows. Over time, the rubber deteriorates and leaves streaks. Fresh blades improve visibility and keep you safe. The good news is that swapping them out is a quick DIY task. You don’t need to visit a mechanic or pay for labor. With the right knowledge, you can handle this job in your driveway.
Key Takeaways
- Most wipers need no tools: Modern blades use push-button or bayonet connectors that pop on and off by hand.
- Know your connector type: Bayonet, side-lock, and push-button are the three common tool-free styles.
- Check your blade size first: Measure or consult your owner’s manual to get the right wiper blade size.
- Avoid forcing parts: If a connector resists, don’t bend it—look for a hidden locking clip or adapter.
- Winter wipers may need special adapters: Some heated or beam blades require a specific fitting tool, but it’s often included.
- DIY saves money and time: Changing wipers yourself takes under 10 minutes and costs less than a shop visit.
📑 Table of Contents
- Do You Need a Tool to Change Windshield Wipers? The Short Answer Is No
- How to Identify Your Wiper Connector Type
- Step-by-Step: Changing Wipers Without Any Tools
- Choosing the Right Wiper Blade Size
- Common Mistakes to Avoid
- When Winter Wipers Require a Different Approach
- Benefits of DIY Wiper Replacement
- Maintenance Tips to Extend Wiper Blade Life
- Conclusion
Do You Need a Tool to Change Windshield Wipers? The Short Answer Is No
The vast majority of modern vehicles use a tool-free wiper replacement system. Manufacturers design these connectors so that anyone can change their blades without special equipment. You simply lift the wiper arm away from the windshield, press a button or slide a latch, and the old blade slides off. The new blade clicks right on. This simplicity is intentional. Car companies know that drivers want to do basic maintenance themselves. They also know that easy access to fresh blades encourages regular replacement, which improves safety.
There are a few exceptions. Some older vehicles or specialty models might use a wing nut or a recessed clip that requires a flathead screwdriver or a small wrench. But even these cases are rare. If you own a car made in the last 15 years, the odds are heavily in favor of a tool-free change. The key is knowing which connector style your vehicle uses. Once you identify that, the process becomes second nature.
Why Most Modern Wipers Are Tool-Free
Modern windshield wiper blades use one of three connector systems that require no tools. These designs have become industry standards because they make wiper installation fast and user-friendly. The connectors rely on simple mechanical actions like sliding, twisting, or pressing. You can feel the lock engage with your fingers. This design philosophy aligns with the broader trend of DIY-friendly car maintenance. Manufacturers want drivers to replace blades frequently without visiting a service center.
The three main connector types are bayonet-style, side-lock, and push-button. Each one works differently, but all are tool-free. Bayonet connectors are the most common. They feature a round post that slides into the wiper arm and twists slightly to lock. Side-lock connectors use a small metal tab that you flip open before sliding the blade off. Push-button connectors, found on many newer vehicles, have a small button on the side that you press to release the blade. Once you see how each one works, you’ll never need a tool again for routine blade changes.
When You Might Actually Need a Tool
While most front wipers are tool-free, there are a few situations where a tool can help. Some rear wipers on SUVs and hatchbacks use a different attachment that requires a small flathead screwdriver to release a hidden clip. Older vehicles from the 1990s or earlier might use a wing nut that needs a wrench. Certain European models have a recessed locking mechanism that can be stiff without a flat tool. In these cases, a simple household tool like a flathead screwdriver or a pair of pliers makes the job easier. But even then, you’re not buying a specialized wrench. A basic wiper arm adapter or a common household tool usually does the trick.
It’s also worth noting that some winter wiper blades come with a small fitting tool in the box. This tool helps you press a plastic adapter onto the blade before attaching it to the arm. However, you can usually do this by hand with a little patience. The tool is a convenience, not a requirement. If you lose it, a butter knife or the edge of a credit card can work as a substitute.
How to Identify Your Wiper Connector Type
Before you buy new blades, you need to know which connector your car uses. This step is crucial because using the wrong adapter can damage the wiper arm or the blade. The connector type is printed on the packaging of replacement windshield wiper blades. You can also look at your current blade to see how it attaches to the arm. Taking a quick photo of the connector before you remove the old blade helps you match the new one perfectly.
Bayonet-Style Connectors
The bayonet-style connector is the most common type worldwide. It features a round metal or plastic post that extends from the base of the blade. To remove the old blade, you slide the post out of the wiper arm and give it a quarter-turn counterclockwise. The blade releases immediately. Installing the new blade involves sliding the post into the arm and twisting a quarter-turn clockwise until you feel it lock. This design is incredibly secure and doesn’t require any force. You’ll find bayonet connectors on most Ford, Chevrolet, Toyota, and Honda models.
Side-Lock Connectors
Side-lock connectors are common on many Japanese and European vehicles. They have a small metal or plastic tab on the side of the adapter. To release the blade, you flip this tab up or to the side while pulling the blade away from the arm. The blade slides off smoothly. When installing a new blade, you align the adapter with the arm, push it firmly until it clicks, and then flip the tab back down to lock it. This style is very intuitive and takes just seconds. Look for side-lock connectors on vehicles from Toyota, Nissan, BMW, and Volkswagen.
Push-Button Connectors
Push-button connectors are the newest design and are becoming standard on many late-model vehicles. They feature a small button or lever on the side of the connector. You press the button and pull the blade off the arm. There’s no twisting or flipping involved. Installation is just as simple: you align the blade with the arm, push it firmly until the button clicks into place, and you’re done. These connectors are found on many modern cars from manufacturers like Hyundai, Kia, Tesla, and some BMW models. They are extremely tool-free and very user-friendly.
Step-by-Step: Changing Wipers Without Any Tools
Now that you know your connector type, let’s walk through the actual process. How to change wipers without tools is straightforward. You can complete the entire job in under five minutes. All you need is a clean cloth, your new blades, and a steady hand.
What You’ll Need
- New wiper blades sized for your vehicle
- A clean microfiber cloth
- Gloves (optional, but they keep your hands clean)
- A step stool if the rear wipers are hard to reach
Make sure your car is turned off and the ignition is in the accessory or off position. This prevents the wipers from accidentally activating while your hands are near the wiper arms. If the wipers are frozen to the windshield, do not force them. Wait for them to thaw or use an ice scraper first. Forcing a frozen wiper can damage the motor or the linkage.
Removing Old Blades
- Lift the wiper arm away from the windshield until it stands straight up.
- Locate the connector on the base of the old blade. You’ll see a button, a tab, or a post.
- For a bayonet connector, slide the blade off the arm and give it a quarter-turn counterclockwise.
- For a side-lock connector, flip the tab open and pull the blade straight off.
- For a push-button connector, press the button and pull the blade away.
- Carefully lower the wiper arm back onto the windshield. Never let the arm snap back, as it can crack the glass.
As you remove the old blade, inspect the wiper arm for any built-up grime. Wipe the metal arm with a clean cloth. This ensures a good connection for the new blade. Also, check the rubber on the old blade. If it’s cracked or missing chunks, you’ve found the cause of your streaking.
Installing New Blades
- Unbox the new blade and confirm it matches your vehicle’s connector type.
- Slide the new adapter onto the wiper arm in the same orientation as the old blade.
- For bayonet style, push the adapter onto the arm and twist a quarter-turn clockwise until it locks.
- For side-lock, push the blade on until it clicks, then flip the tab down to secure it.
- For push-button, align the blade and push firmly until the button clicks.
- Gently lower the wiper arm back onto the windshield.
- Repeat the process for the other wiper.
After installation, run the wipers briefly on a clean windshield or a wet glass pane. This tests the connection and removes any protective coating on the new rubber. You should hear a clean sweep with no chatter or skipping. If the new blade sticks or makes noise, lift it off and reseat the connector. Often, a simple reseating solves the problem.
Choosing the Right Wiper Blade Size
Getting the correct wiper blade size is just as important as knowing the connector type. A blade that’s too short won’t clear the windshield properly, and one that’s too long might hit the hood or leave gaps. The right size ensures full coverage and a clean sweep every time.
Finding Your Vehicle’s Size
The easiest way to find your size is to check your owner’s manual. Most manuals list the exact blade length for both the driver and passenger sides. You can also look at the packaging of your old blades—they usually have the size printed on the box. If you’ve lost both, you can measure the old rubber blade from end to end. Alternatively, many online retailers have a lookup tool where you enter your vehicle’s year, make, and model. The system will show you the exact OEM wipers and compatible aftermarket wipers for your car.
Keep in mind that driver and passenger sides often have different sizes. The driver side is usually longer, but not always. Some vehicles use the same size on both sides. Always double-check before you buy. Buying the wrong size is a common mistake that wastes time and money.
Beam Blade vs. Conventional Frame Wiper
When shopping for new blades, you’ll encounter two main types: beam blades and conventional frame wipers. Beam blades, also called bracketless wipers, have a single piece of flexible rubber with no external frame. They contour to the windshield shape more evenly and are less likely to collect ice or debris. Conventional frame wipers have a metal frame with multiple pressure points that press the rubber against the glass. Both types work well, but beam blades are becoming the standard on newer vehicles. They offer a sleek look and often provide better wiping performance in snow and rain. When you choose between them, consider your climate and your vehicle’s recommendations.
Common Mistakes to Avoid
Even a simple job like changing wipers has a few pitfalls. Avoiding these mistakes will save you time and protect your windshield.
Skipping the Locking Clip
Some connectors have a small plastic locking clip that you must flip back into place after installing the new blade. If you forget this step, the blade can vibrate loose while driving. This is a dangerous situation because a loose wiper suddenly flopping onto the windshield can obstruct your view instantly. Always check that the clip is fully engaged before you lower the arm back onto the glass.
Forcing the Connector
If a blade doesn’t slide off easily, don’t use excessive force. Forcing the connector can bend the wiper arm or break the adapter. Instead, double-check that you’ve released any locking tabs or buttons. Sometimes a small retaining clip is hidden under a rubber cover. Gently pry it open with a flathead screwdriver if needed. Patience is your best tool here.
Ignoring the Wiper Arm Condition
The wiper arm itself can wear out over time. If the arm is bent, rusted, or weak, the new blade won’t make proper contact with the glass. You might install a brand-new blade and still get streaking because the arm isn’t applying even pressure. Inspect the arm for any visible damage. If the arm feels loose or doesn’t spring back, it may need replacement. A new blade paired with a damaged arm won’t perform well.
Touching the Rubber with Bare Hands
When handling new blades, try to avoid touching the rubber wiping surface with your bare fingers. The oils from your skin can create a barrier that reduces the blade’s grip and leads to streaking. If you accidentally touch the rubber, wipe it down with a clean cloth dampened with a little windshield washer fluid. This removes the oils and helps the blade glide smoothly.
When Winter Wipers Require a Different Approach
Winter conditions demand special attention. Ice and snow can freeze the wiper blade to the windshield or clog the connector. Using winter wipers can make a big difference in cold climates. These blades have a protective cover that prevents ice buildup and a sturdier rubber compound that stays flexible in freezing temperatures.
Do Winter Blades Need Special Tools?
Most winter wiper blades use the same tool-free connectors as standard blades. You can install them using the same bayonet, side-lock, or push-button methods. However, some winter blades come with a pre-attached adapter that fits over the standard connector. This adapter is often pre-installed on the blade, so you just slide it on as usual. In rare cases, a winter blade might require a small plastic tool to press the adapter onto the arm. This tool is usually included in the box. If it’s missing, a butter knife or the edge of a credit card can serve as a substitute. The process is still straightforward and doesn’t require any specialized equipment.
Heated Wipers and Special Adapters
Heated wiper blades or heated wiper systems use an electrical element to melt ice. These systems often have a unique connector that includes an electrical plug. The connector itself is still tool-free, but the plug must align correctly with the arm’s receptacle. If the plug doesn’t line up, don’t force it. Check that you’ve purchased the correct heated blade for your vehicle. Some heated wipers come with a small installation guide. Following that guide ensures you don’t damage the electrical connection. Overall, even heated wipers follow the same tool-free philosophy that makes DIY replacement so convenient.
Benefits of DIY Wiper Replacement
Changing your own wipers offers several advantages. First, it saves you money. A quick lube or change at a shop can cost $20 to $40, and that’s just for labor. Buying the blades yourself and installing them takes a few minutes and costs a fraction of the price. Second, it saves you time. You don’t have to drive to a shop, wait for an appointment, or sit in a lobby. You can do it in your driveway while listening to your favorite music. Third, it gives you a better understanding of your vehicle. Knowing how your wipers attach makes you more confident about other simple maintenance tasks. This knowledge builds a foundation for car maintenance that keeps your vehicle running smoothly for years.
Another benefit is the ability to choose exactly the blade you want. You’re not limited to whatever the shop stocks. You can pick premium beam blade designs, all-season rubber, or specialized winter blades. You can also buy in bulk and keep spare blades in your garage. This preparedness means you’ll never be caught with worn-out blades right before a road trip.
Maintenance Tips to Extend Wiper Blade Life
Once you’ve installed your new windshield wiper blades, a little regular care can double their lifespan. Clean the blades once a month with a damp cloth and a small amount of vinegar. This removes road grime and windshield residue that can harden the rubber. In winter, lift the blades away from the windshield when snow is forecasted. This prevents them from freezing to the glass and tearing when you turn them on. Also, never use your wipers to scrape ice. Use an ice scraper instead. The wiper motor isn’t designed to push against solid ice, and doing so can burn out the motor or bend the linkage.
Keep your windshield clean too. Dirt and grit act like sandpaper on the blade rubber. A quick rinse at the gas station can make a big difference. Top up your wiper fluid regularly so you can wash away debris while driving. These small habits keep your visibility sharp and your blades performing at their best.
Conclusion
The answer to Do You Need a Tool to Change Windshield Wipers is almost always no. With the right knowledge, you can replace your blades in minutes using nothing but your hands. Modern connectors are designed for simplicity and ease of use. By understanding your connector type and choosing the correct blade size, you can handle this job yourself with confidence. Avoid common mistakes like skipping the locking clip or forcing a stubborn connector. Keep your winter wipers ready for cold weather and maintain your blades with simple cleaning habits. This small DIY task improves your safety, saves you money, and gives you a sense of accomplishment. Next time your wipers start streaking, don’t reach for a toolbox. Just grab a new blade and do it yourself.
Frequently Asked Questions
Can I use any wiper blade size for my car?
No, you must use the exact size recommended for your vehicle. Using the wrong size can leave streaks or cause the blade to hit the hood. Check your owner’s manual or measure the old blade before purchasing.
How often should I replace my windshield wipers?
Most experts recommend replacing wiper blades every 6 to 12 months. If you notice streaking, chattering, or visible cracks in the rubber, it’s time for a new set. Regular replacement keeps your visibility clear and safe.
Are beam blades better than conventional frame wipers?
Beam blades are often better because they have no external frame to collect ice or debris. They conform more evenly to the windshield and provide a cleaner wipe. However, conventional frame wipers are still effective and can be a more affordable option.
What if my wiper arm is rusty or bent?
A damaged wiper arm can prevent a new blade from making proper contact with the glass. Inspect the arm for rust, bends, or looseness. If the arm is compromised, it should be replaced along with the blade to ensure proper wiping performance.
Do I need to turn off my car before changing wipers?
Yes, always turn off the ignition before changing wipers. This prevents the wipers from accidentally activating while your hands are near the wiper arms. It also protects the motor and linkage from damage.
Can I install winter wipers in the summer?
You can, but it’s not recommended. Winter wipers are designed with a protective cover that can obstruct airflow and reduce wiping efficiency in warm weather. Switch back to standard blades when winter ends for optimal performance.