How to Tint a Tesla Model 3 Everything You Need to Know
Tinting your Tesla Model 3 can boost comfort, cut glare, and protect your interior from UV damage. This guide covers every step, from picking the right tint film and understanding legal limits to estimating costs and timelines. Whether you go DIY or hire a pro, you will find clear, practical advice to make the best choice for your vehicle.
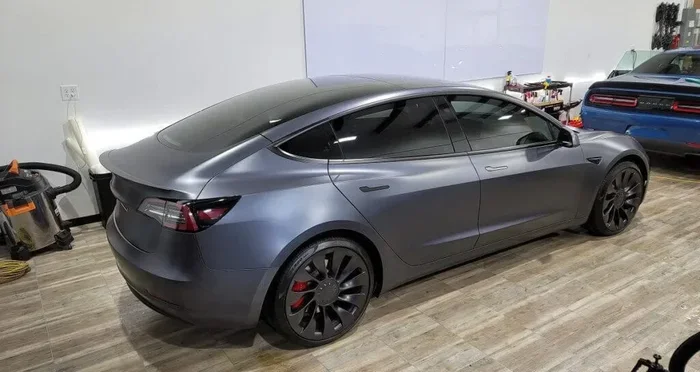
Tinting a Tesla Model 3 is one of the best upgrades you can make for comfort and style. The sleek glass roof and large windows on the Model 3 look stunning, but they also let in a lot of heat and glare. Whether you want to keep your cabin cooler, protect your interior, or add a sleek look, how to tint a Tesla Model 3 is a question many owners ask.
This guide walks you through everything you need to know. From choosing the right film type to understanding legal limits and costs, we cover it all. The process is simpler than most people think, but getting it right takes a bit of know-how. Let us dive in.
Key Takeaways
- Choose the Right Film: Ceramic, carbon, and dyed tints each offer different levels of heat rejection, clarity, and durability for your Tesla Model 3.
- Know the Legal Limits: Each state has its own rules on tint darkness and reflectivity, so always check local laws before installing.
- Professional vs DIY: Professional tinting costs more but delivers a cleaner finish, while DIY saves money but requires patience and skill.
- Plan for Curing Time: Your tint needs time to cure properly, and you should avoid rolling down your windows during this period.
- Interior Protection Matters: Quality tint blocks harmful UV rays that can fade your seats, dashboard, and trim over time.
- Cost Varies Widely: Expect to pay between $200 and $800 depending on the film type, shop quality, and your location.
📑 Table of Contents
- Why Tint Your Tesla Model 3?
- Types of Tint Film for the Tesla Model 3
- Legal Tint Limits for the Tesla Model 3
- How Long Does Tinting Take?
- DIY vs Professional Tinting for the Tesla Model 3
- Step-by-Step Guide to Tinting Your Tesla Model 3
- Common Tinting Mistakes to Avoid
- Cost of Tinting a Tesla Model 3
- How to Maintain Your Tesla Model 3 Tint
- Expert Insights on Tesla Model 3 Tinting
- Final Thoughts
Why Tint Your Tesla Model 3?
Before you pick a film or book an appointment, it helps to understand why tinting matters so much for the Model 3. Tesla vehicles have large glass surfaces, and that is both a design strength and a thermal weakness. The glass roof and big side windows let in plenty of light, but they also admit significant heat and harmful UV rays.
Here are the main reasons Tesla owners tint their vehicles:
- Heat Reduction: A good tint can block up to 70 percent of solar heat, keeping your cabin cooler on hot days.
- UV Protection: Prolonged UV exposure fades your interior over time. Tinting helps preserve your seats, dashboard, and trim.
- Glare Reduction: Driving with the sun in your eyes is dangerous. Tint cuts glare and improves visibility.
- Privacy and Security: Tinted windows make it harder for people to see inside your car, which adds a layer of privacy.
- Aesthetic Appeal: A clean tint gives the Model 3 a polished, finished look that many owners love.
Each of these benefits plays a role in your daily driving experience. Even a light tint makes a noticeable difference in comfort, especially during summer months.
Types of Tint Film for the Tesla Model 3
Not all tint films are the same. The type you choose affects heat rejection, clarity, color shift, and price. Here is a breakdown of the most common options available for Tesla Model 3 window tint.
Ceramic Tint
Ceramic tint is the premium option. It uses nano-ceramic particles to block heat without interfering with electronic signals. This means your GPS, phone connectivity, and autopilot sensors work without any disruption. Ceramic tint offers excellent UV rejection and does not fade over time. It is also the most expensive option, typically costing more than other films.
Carbon Tint
Carbon film is a popular mid-range choice. It provides solid heat rejection and a matte finish that looks very clean on a Tesla. Carbon tint does not contain metal, so it also avoids signal interference. The color remains stable over time, and it offers good durability at a more reasonable price point than ceramic.
Dyed Tint
Dyed tint is the most budget-friendly option. It uses a layer of dye to absorb heat and reduce glare. However, dyed film tends to fade over time and may bubble if not installed properly. It also offers lower heat rejection compared to ceramic or carbon options. For a temporary or cost-conscious solution, dyed tint gets the job done.
Hybrid Tint
Hybrid film combines dyed and metalized layers to offer a balance of performance and price. It provides better heat rejection than dyed tint alone and costs less than full ceramic or carbon. Hybrid tints are a solid middle ground for owners who want good results without the premium price tag.
| Film Type | Heat Rejection | Signal Interference | Durability | Price Range |
|---|---|---|---|---|
| Ceramic | Excellent | None | Very High | $400-$800 |
| Carbon | Good to Excellent | None | High | $250-$500 |
| Hybrid | Good | Minimal | Moderate | $200-$400 |
| Dyed | Fair | None | Low | $100-$200 |
For most Tesla owners, ceramic or carbon tint strikes the best balance of performance and longevity. The initial investment pays off in comfort and interior protection over the life of the vehicle.
Legal Tint Limits for the Tesla Model 3
Tint laws vary by state, and they are not optional. Every state sets its own rules for how dark your tint can be and how reflective it can look. Ignoring these rules can lead to fines, failed inspections, or even requiring you to remove the tint entirely.
Understanding VLT Percentages
Visible Light Transmission, or VLT, measures how much light passes through your tint. A higher VLT means a lighter tint, and a lower VLT means a darker tint. For example, a 70% VLT film lets 70 percent of light through and looks very subtle, while a 5% VLT film is essentially a mirror and blocks almost all light.
Most states require a minimum VLT of 70% on the front windshield and front side windows. Rear windows and the back windshield often allow darker tints. The exact numbers depend on your state, so always check local regulations before you buy film.
Common State Rules
- California: Front side windows must have at least 70% VLT. Rear windows can be any darkness.
- Texas: Front side windows need 25% VLT or more. Rear windows can go as dark as you like.
- New York: Front side windows must be 70% VLT or higher. Rear windows can be darker.
- Florida: Front side windows need 28% VLT or more. Rear windows can be any shade.
The front windshield usually allows a non-reflective tint strip along the top, but most states do not allow full windshield tinting. Always verify the rules in your specific state before proceeding.
How Long Does Tinting Take?
One of the first questions owners ask is how long the process takes. The answer depends on whether you go professional or DIY and the complexity of the job.
A professional shop typically takes two to four hours to tint all the windows of a Tesla Model 3. The large glass roof adds time because it requires precise cutting and careful application. If you choose a busy shop, you may need to wait a day or two for an appointment.
DIY tinting takes significantly longer. First-timers should set aside a full weekend or more. The process involves thorough cleaning, careful measuring, cutting the film, and applying it without bubbles or wrinkles. It is a patient, detail-oriented job. Think of it like fitting a new bumper where precision matters just as much.
Regardless of the route you choose, the curing time is important. Most tints need three to seven days to fully cure, and some high-quality films can take up to 30 days. During this time, avoid rolling down your windows or wiping the inside of the glass.
DIY vs Professional Tinting for the Tesla Model 3
This is one of the biggest decisions you will make. Both options have clear advantages and drawbacks.
DIY Tinting
- Cost Savings: DIY kits range from $100 to $400, which is significantly cheaper than professional installation.
- Flexibility: You can work at your own pace and choose exactly when to start.
- Learning Experience: You gain a practical skill and a deeper understanding of your vehicle.
- Risk of Mistakes: Bubbles, peeling, and uneven application are common for beginners.
- Time Investment: A full DIY job can take a full weekend or longer, especially on your first attempt.
Professional Tinting
- Quality Guarantee: Professional shops use advanced tools and techniques for a bubble-free finish.
- Time Savings: The job is done in a few hours, and you get it back the same day.
- Warranty: Most shops offer a warranty on both the film and the installation work.
- Higher Cost: Professional tinting typically costs $300 to $800 for a full Tesla Model 3.
- Expertise: Experienced installers handle tricky curves and edges with ease.
If you have never tinted a car before, professional installation is the safer choice. The Tesla Model 3 has large curved glass surfaces that are tricky to work with. However, if you are handy and willing to learn, DIY can be a rewarding project.
It is worth noting that the amount of labor involved in car modifications is significant. If you are curious about how much work goes into building a car from scratch, check out how many man hours it takes to build a car for perspective on the effort involved in vehicle production and modification.
Step-by-Step Guide to Tinting Your Tesla Model 3
Whether you go DIY or want to understand what the pros do, here is a step-by-step look at the tinting process.
Step 1: Clean the Windows Thoroughly
Start by cleaning every window inside and out. Use a glass cleaner with no residue, and make sure the surface is completely free of dust, oils, and debris. Any particles left on the glass can show up as bumps under the film. This step takes more time than you might expect, but it is the foundation of a good result.
Step 2: Measure and Cut the Film
Measure each window carefully and add a small margin for trimming. Use a sharp utility knife and a straight edge to cut the film to size. For the Tesla Model 3, pay special attention to the windshield and rear glass, which have unique curves that require precise cutting.
Step 3: Apply the Film
Spray the window with a soapy water solution. Peel the backing off the film and lay it onto the wet glass. Use a squeegee to push out water and air bubbles from the center outward. Work slowly and carefully, especially around corners and edges.
Step 4: Trim the Edges
Once the film is in place, use a razor blade to trim any excess along the edges. Be gentle to avoid scratching the glass. The goal is a clean, tight fit that follows the window contour exactly.
Step 5: Let It Cure
After installation, give the tint time to cure. Avoid rolling down windows, wiping the glass, or exposing the car to direct sunlight for at least three to seven days. The film will clear up and bond properly during this period.
Common Tinting Mistakes to Avoid
Even experienced car owners make mistakes when tinting. Here are the most common ones and how to avoid them.
- Choosing the Wrong VLT: Always check your state laws first. Getting pulled over for illegal tint is an avoidable hassle.
- Skipping the Cleaning Step: Dirty glass leads to bumps and bubbles that ruin the finish.
- Applying in Direct Sunlight: Heat causes the film to dry too fast, making it impossible to reposition.
- Not Using Enough Squeegee Pressure: Water trapped under the film creates bubbles that may never fully disappear.
- Rolling Windows Down Too Soon: Premature window movement can peel the edges before the film has fully cured.
- Buying Cheap Film: Budget tints fade quickly and may turn purple within a year or two.
Avoiding these mistakes saves you time, money, and frustration. Take your time with each step, and do not rush the process.
Cost of Tinting a Tesla Model 3
The cost to tint a Tesla Model 3 depends on the film type, the shop you choose, and your location. Here is a general breakdown:
- Dyed Film: $100 to $200 for a full set of windows.
- Hybrid Film: $200 to $400 for all windows.
- Carbon Film: $250 to $500 for a complete job.
- Ceramic Film: $400 to $800 for premium coverage.
Professional installation adds to the base cost but delivers a much cleaner result. The Tesla Model 3’s large glass surfaces mean more material and more labor compared to smaller vehicles. Think of it this way, the amount of work involved in vehicle modifications is similar to the effort required in factory car production, where every step requires precision and time.
Many shops offer package deals for full-tint jobs, so it is worth asking for a quote before committing. Some high-end shops also provide lifetime warranties on their work, which adds value over time.
How to Maintain Your Tesla Model 3 Tint
Once your tint is installed, proper care keeps it looking great for years. Here are some simple maintenance tips.
- Wait at Least a Week: Do not clean the tinted windows for the first seven days. Let the film cure fully before touching it.
- Use a Soft Cloth: When you do clean the windows, use a microfiber cloth and a gentle, ammonia-free cleaner.
- Avoid Abrasive Tools: Sponges with rough surfaces or scrub brushes can scratch and damage the film.
- Roll Windows Gently: Even after curing, avoid aggressive window rolling, especially in the first few months.
- Park in the Shade: Excessive heat can weaken the adhesive over time. Shaded parking helps preserve the tint.
With proper care, a quality tint can last five to ten years or more. Ceramic and carbon films tend to last the longest and hold their color the best over time.
Expert Insights on Tesla Model 3 Tinting
Professional installers and Tesla enthusiasts share a few insider tips that can make a big difference in your tinting experience.
Tip 1: Choose a Shop That Works on Teslas Regularly. Tesla vehicles have unique window shapes and electronic systems. A shop familiar with Teslas will know how to handle the glass roof and avoid any interference with sensors or autopilot hardware.
Tip 2: Do Not Go Too Dark on the Front Windows. Dark front tints can reduce visibility, especially at night and in poor weather. A 70% to 50% VLT on the front side windows offers a good balance of style and safety.
Tip 3: Consider the Glass Roof Separately. The Tesla Model 3 glass roof is a large, curved surface that requires a skilled installer. Not all tint shops have experience with roof tinting, so ask before booking.
Tip 4: Invest in Quality Film. It is tempting to go with the cheapest option, but lower-quality tints fade, bubble, and peel faster. Spending a bit more on a reputable brand pays off in the long run.
Tip 5: Ask About Warranty Coverage. Good shops stand behind their work. A warranty that covers bubbling, peeling, and fading gives you peace of mind and protects your investment.
Final Thoughts
How to tint a Tesla Model 3 comes down to choosing the right film, knowing the legal limits, and either tackling the job yourself or hiring a trusted professional. The process is straightforward, and the results are well worth the effort. A quality tint improves comfort, protects your interior, and gives your Model 3 a refined, polished look.
Take your time with the research, pick a film that fits your needs and budget, and follow the installation steps carefully. Whether you choose ceramic, carbon, hybrid, or dyed film, the key is to get a clean, bubble-free application that lasts. Your Tesla Model 3 will look and feel better for it every time you get behind the wheel.
Remember to check your local tint laws, maintain your tint properly, and enjoy the benefits of a cooler, more comfortable cabin. Happy tinting!
Frequently Asked Questions
What is the best tint percentage for a Tesla Model 3?
A 50% to 70% VLT tint on the front windows offers the best balance of heat rejection, visibility, and legal compliance. For rear windows and the glass roof, you can go darker depending on your state laws. Most owners prefer a 50% tint for a subtle yet effective upgrade.
Can I tint the windshield of my Tesla Model 3?
Most states allow a non-reflective tint strip along the top of the windshield, typically no wider than six inches. Full windshield tinting is generally not legal. Always check your local regulations before tinting any part of the windshield.
How long does Tesla Model 3 tint take to cure?
Most tints cure within three to seven days, though some high-quality ceramic films can take up to 30 days to fully set. During this curing period, avoid rolling down your windows or wiping the inside of the glass to ensure a clean, long-lasting bond.
Does tinting a Tesla Model 3 affect the glass roof?
The glass roof can be tinted, but it requires a skilled installer due to its large, curved surface. Not all shops offer roof tinting, so confirm with your provider beforehand. Tinting the roof significantly reduces heat buildup inside the cabin.
Is DIY tinting worth it for a Tesla Model 3?
DIY tinting can save you money, but it requires patience, the right tools, and attention to detail. The Model 3’s large glass surfaces are challenging for beginners. If you are not experienced with tinting, professional installation is the safer and more reliable option.
How much does it cost to tint a Tesla Model 3?
The cost ranges from $200 to $800 depending on the film type and whether you choose professional installation. Ceramic tint costs the most but offers the best performance and longevity. Carbon and hybrid tints are great mid-range options that balance quality and price.