Is Changing a Timing Belt a DIY Job Heres the Answer
Changing a timing belt is one of the most complex DIY car repairs you can attempt. It requires precision, specialized tools, and a solid understanding of engine mechanics. While some experienced home mechanics can handle it, a single mistake can cause severe engine damage. This guide breaks down everything you need to know before you start.
Changing a timing belt is one of those car repairs that divides the DIY community. Some seasoned home mechanics welcome the challenge. Others know better than to touch it. The truth is, this job sits somewhere in the middle. It is not the hardest repair you can do on a car. But it is far from simple. One wrong move and you could end up with a destroyed engine. So is changing a timing belt a DIY job? The honest answer depends on your skill level, your tools, and the type of engine you have. In this guide, we walk you through everything you need to know. We cover the risks, the costs, the tools, and the step-by-step process. By the end, you will know exactly whether this is a job for you or a job for a professional.
Let us start with the basics. A timing belt is a toothed rubber belt inside your engine. It keeps the crankshaft and camshaft turning in perfect sync. When the timing is off by even a few degrees, your engine runs poorly. In the worst case, it stops running altogether. And in interference engines, a slipped belt can cause pistons to hit valves. That means bent valves, damaged pistons, and a very expensive repair bill. This is why precision matters so much with this job. It is not like swapping out a brake pad or changing a filter. You are working inside the heart of the engine. The stakes are high. The margin for error is tiny.
Key Takeaways
- Complexity Level: Replacing a timing belt demands advanced mechanical skills and patience.
- Risk of Engine Damage: Even a small error can bend valves and lead to costly repairs.
- Cost Comparison: DIY saves on labor but requires investing in tools and a quality kit.
- Time Investment: A full replacement can take several hours, even for experienced DIYers.
- Interference Engines: These engines are especially vulnerable to timing belt mistakes.
- Professional Help: If you lack experience, hiring a mechanic is the safer choice.
- Preventive Maintenance: Replacing the belt on schedule prevents unexpected breakdowns.
📑 Table of Contents
- What Is a Timing Belt and Why Does It Matter?
- Can You Really Change a Timing Belt Yourself?
- How Long Does a Timing Belt Replacement Take?
- The Risks of DIY Timing Belt Replacement
- How Much Does It Cost to Change a Timing Belt?
- Step-by-Step Guide to Changing a Timing Belt
- When Should You Hire a Professional Instead?
- Common Mistakes to Avoid
- Quick Tips for a Successful DIY Timing Belt Replacement
- Expert Insights on Timing Belt Maintenance
- Conclusion
What Is a Timing Belt and Why Does It Matter?
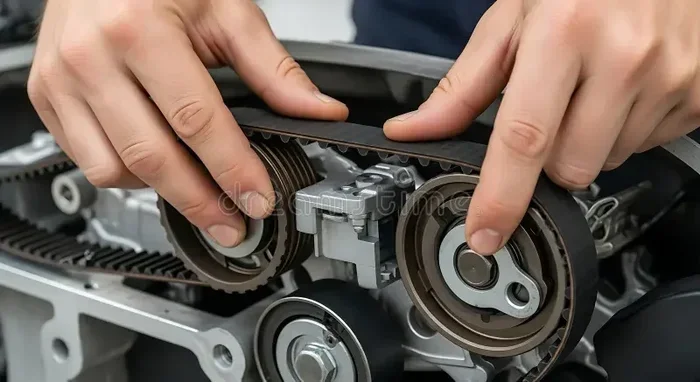
A timing belt is a reinforced rubber belt with teeth. It sits inside the engine and connects the crankshaft to the camshaft. The crankshaft controls the movement of the pistons. The camshaft controls the opening and closing of the valves. These two components must work in perfect harmony. The timing belt makes sure they do. Without it, your engine simply cannot run. Most cars use a timing belt instead of a timing chain. Chains are generally more durable. But belts are quieter and cheaper to replace. Over time, the belt wears out. The teeth can strip. The rubber can crack. This is why manufacturers recommend replacing the belt at specific intervals.
Timing Belt vs Timing Chain
Many people confuse timing belts with timing chains. They serve the same purpose. But they are very different. A timing chain is made of metal links. It is housed inside the engine and lasts much longer. A timing belt is made of rubber with fiberglass reinforcement. It sits outside the engine and needs replacement more often. Chains are generally more durable. But belts are quieter and less expensive to replace. If your car has a belt, you need to stay on top of replacement schedules. If your car has a chain, you still need to watch for signs of wear. Both components are critical to engine operation.
How Often Should You Replace a Timing Belt?
Most manufacturers recommend replacing a timing belt every 60,000 to 100,000 miles. Some cars need it sooner. Some can go a bit longer. The exact interval depends on your vehicle model and engine type. Check your owner manual for the specific recommendation. Do not wait for the belt to show signs of wear. By the time you notice symptoms, it may already be too late. A broken timing belt will leave you stranded. And in interference engines, it can cause catastrophic damage. This is why preventive maintenance matters so much. Replacing the belt on schedule is one of the best things you can do for your engine.
Can You Really Change a Timing Belt Yourself?
The short answer is yes. But the real question is whether you should. Changing a timing belt as a DIY project is not impossible. Plenty of home mechanics have done it successfully. But it is not a beginner-level job. You need a solid understanding of engine mechanics. You need the right tools. And you need the patience to work carefully and methodically. If you have never done engine work before, this is not the place to start. But if you have experience with brake jobs, oil changes, and other repairs, you might be ready to take it on.
Skills You Need for DIY Timing Belt Replacement
Before you attempt this job, honestly assess your skills. Can you identify engine components by name? Do you understand how valve timing works? Can you read a repair manual and follow detailed instructions? These are not rhetorical questions. They are essential prerequisites. You also need good hand-eye coordination and the ability to work in tight spaces. The engine bay of most cars is crowded. You will be reaching into tight spots with small tools. Frustration can lead to mistakes. Mistakes can lead to engine damage. So be honest with yourself about your skill level.
Tools and Equipment You Will Need
You cannot do this job with just a basic socket set. You need specific tools and equipment. Here is a list of what you will typically need:
- Timing belt kit (includes the belt, tensioner, and idler pulleys)
- Torque wrench for precise bolt tightening
- Breaker bar for loosening stubborn bolts
- Timing belt alignment tools (specific to your vehicle)
- Jack and jack stands or a lift
- Socket set and wrenches in various sizes
- Penetrating oil for rusted bolts
- Shop manual or repair guide for your specific vehicle
- Gasket scraper for cleaning mating surfaces
- New coolant if the water pump is driven by the timing belt
The timing belt kit is the most important purchase. It usually includes the belt itself, the tensioner pulley, and the idler pulley. Some kits also include the water pump. Buying a complete kit ensures all the parts are compatible and in good condition. Do not try to reuse old tensioners or idlers. They wear out along with the belt and can fail prematurely.
How Long Does a Timing Belt Replacement Take?
Time is a big factor when deciding whether to DIY this job. A professional mechanic might complete a timing belt replacement in 3 to 6 hours. As a DIYer, expect to spend significantly longer. Your first time could take 6 to 10 hours or more. You will need to remove various components to access the belt. These include the serpentine belt, the water pump, the timing cover, and possibly the valve cover. Each removal step takes time and care. Rushing through the process is the number one cause of mistakes.
Factors That Affect Replacement Time
Several factors influence how long the job takes. The engine layout is a big one. Some engines are easy to access. Others are tightly packed and require removing many components. The vehicle model matters too. Some manufacturers design their engines with DIY access in mind. Others make it as difficult as possible. Your experience level also plays a role. A second or third time is always faster than the first. And do not forget about rusted or stripped bolts. These can turn a 4-hour job into an 8-hour ordeal. Having penetrating oil and patience is essential.
As a point of comparison, consider how long it takes to fit other car components. How Long Does It Take To Fit A New Bumper is a much simpler job that most DIYers can complete in an afternoon. A timing belt replacement is several times more complex. The difference in complexity is significant. This is why many people choose to pay for professional labor. The peace of mind is worth the cost.
The Risks of DIY Timing Belt Replacement
This is the section that matters most. The risks of getting it wrong are real and serious. A timing belt is not like a brake pad. If a brake pad goes in slightly wrong, you might get uneven braking. You can fix that later. If a timing belt goes in wrong, you can destroy your engine in seconds. Here are the main risks you need to understand before you start.
Engine Damage in Interference Engines
Most modern cars use what is called an interference engine. In an interference engine, the pistons and valves share the same space in the cylinder at different times. When the timing is correct, they never collide. But if the timing belt slips or breaks, the pistons and valves can hit each other. This causes bent valves, damaged pistons, and sometimes cracked cylinder heads. The repair cost for this type of damage can easily exceed $2,000 to $4,000. In some cases, the engine needs to be replaced entirely. This is why precision with the timing belt is non-negotiable.
Incorrect Belt Tension
The timing belt must be tensioned correctly. Too loose, and the belt can skip teeth. Too tight, and you can damage the bearings in the tensioner and idler pulleys. The tensioner applies constant pressure to keep the belt at the right tension. If you install a new tensioner incorrectly or reuse an old one, the belt can vibrate, wear unevenly, or fail prematurely. This is why using a new tensioner as part of your timing belt kit is so important.
Misaligned Timing Marks
Every engine has timing marks. These are indicators on the crankshaft and camshaft gears. They must align perfectly when the belt is installed. If even one mark is off by a single tooth, the engine timing will be wrong. The result is poor performance, misfires, and in the worst case, engine damage. Aligning the timing marks is one of the most critical steps in the entire process. Take your time with it. Double-check everything. Do not rush past this step.
Forgetting to Replace Related Components
When you have the timing belt off, you should replace related components at the same time. The water pump is often driven by the timing belt. If you are already in there, replacing the water pump at the same time makes sense. The same goes for the tensioner and idler pulleys. These components work together with the belt. Reusing old parts can lead to premature failure of the new belt. Think of it as an investment in preventing future breakdowns.
How Much Does It Cost to Change a Timing Belt?
Cost is another important factor in the DIY decision. When you factor in all the expenses, DIY can save you a significant amount of money. But you need to understand the full picture.
Professional Repair Costs
Having a mechanic replace your timing belt typically costs between $500 and $1,000. This includes the cost of parts and labor. The parts themselves (the belt, tensioner, idler, and water pump if needed) usually cost between $150 and $300. The rest is labor. Since the job takes several hours, labor costs add up quickly. Mechanics typically charge between $75 and $150 per hour. In some areas, labor rates are even higher.
DIY Costs and Savings
If you DIY the job, you only pay for the parts. A quality timing belt kit costs between $100 and $250. You also need to factor in the cost of any tools you do not already own. A torque wrench, breaker bar, and timing alignment tools can add $50 to $150 if you need to purchase them. But many of these tools are reusable for future repairs. Over time, having a solid tool set pays for itself. The labor savings alone can be $300 to $600 per job. That is a significant amount of money.
It is also worth noting that some repairs take more How Many Man Hours Does It Take To Build A Car than others. The labor component of any engine repair is substantial. By doing it yourself, you eliminate that cost entirely.
Step-by-Step Guide to Changing a Timing Belt
If you have decided to take on this job, here is a general overview of the process. Keep in mind that every vehicle is different. Always consult your specific repair manual before starting. The steps below provide a general framework.
Step 1: Prepare the Vehicle
Disconnect the battery. Remove any components that block access to the timing belt cover. This often includes the serpentine belt, the water pump, and various covers and brackets. Take photos as you go. This will help you remember how everything goes back together.
Step 2: Set the Engine to Top Dead Center
Rotate the crankshaft until the timing marks align. Top dead center is the position where the piston in the first cylinder is at its highest point. This is the reference point for all timing alignment. Use a socket and breaker bar to slowly turn the crankshaft. Watch the marks carefully.
Step 3: Remove the Timing Belt Cover
Unbolt the timing belt cover and remove it. Inspect the condition of the belt, tensioner, and idler pulleys. Look for cracks, worn teeth, and any signs of oil contamination. Oil on a timing belt is a serious problem. It causes the belt to slip and deteriorate faster.
Step 4: Remove the Old Timing Belt
Release the tensioner and remove the old belt. Note the routing path carefully. The belt follows a specific path around the crankshaft pulley, camshaft sprockets, and any other components. Take a photo or draw a diagram before removing the old belt.
Step 5: Inspect and Replace Related Components
Now is the time to replace the tensioner, idler pulleys, and water pump if applicable. Inspect the camshaft and crankshaft seals for leaks. Replace any seals that show signs of wear. This is the perfect time to address any other issues you find while the engine is partially disassembled.
Step 6: Install the New Timing Belt
Route the new belt around all the pulleys and sprockets. Make sure the timing marks remain aligned throughout the process. Once the belt is in place, tighten the tensioner to the manufacturer specification. Use your torque wrench for this step. Do not guess. Over-tightening can damage the tensioner bearing. Under-tightening can cause the belt to slip.
Step 7: Verify the Timing Alignment
Rotate the crankshaft two full revolutions by hand. Check that all timing marks align again. If they do not, you need to start over. Do not start the engine with misaligned timing. This is the step where most DIY mistakes happen. Take your time and be meticulous.
Step 8: Reassemble and Test
Reinstall all the components you removed in reverse order. Refill any fluids you drained. Reconnect the battery. Start the engine and listen for any unusual noises. A rattling or ticking sound could indicate a timing issue. Let the engine run for a few minutes and check for leaks. Take the car for a short test drive and monitor the engine performance.
When Should You Hire a Professional Instead?
There is no shame in hiring a professional for a timing belt replacement. In fact, for many car owners, it is the smartest choice. Here are some situations where you should definitely leave this job to a trained mechanic.
- You have never done engine work before. If your most advanced repair has been an oil change or a brake pad swap, this job is not for you.
- You do not have access to a repair manual. A quality repair manual is essential for this job. Without it, you are guessing.
- Your engine is an interference type. The risk of catastrophic damage is too high for an inexperienced DIYer.
- You do not have the right tools. Timing alignment tools and a torque wrench are not optional. They are required.
- You are short on time. If you need the car back quickly, a professional can usually complete the job in a single day.
- You are unsure about any step. If something does not feel right during the process, stop and consult a professional.
Sometimes the best DIY decision is knowing when not to DIY. A How Long Does A Factory Take To Build A Car is a reminder that precision engine work requires specialized training and equipment. Professional mechanics spend years learning these skills. Their expertise is worth the cost, especially for a repair where mistakes are so expensive.
Common Mistakes to Avoid
Even experienced DIYers make mistakes. But with a timing belt replacement, the mistakes can be costly. Here are the most common errors to avoid.
- Reusing old tensioners and idlers. These wear out with the belt. Always use new components from your kit.
- Misaligning the timing marks. Double-check alignment before and after installing the new belt.
- Over-tightening the tensioner. This can damage bearings and cause premature belt wear.
- Forgetting to replace the water pump. If it is driven by the timing belt, replace it now while you have access.
- Not torquing bolts to specification. Use a torque wrench for every bolt. Guesses lead to stripped threads and loose components.
- Skipping the repair manual. Every engine is different. The manual is your best friend during this job.
- Rushing the reassembly. Take your time putting everything back together. Missing a step can lead to leaks or misalignment.
Quick Tips for a Successful DIY Timing Belt Replacement
Here are some practical tips from experienced DIY mechanics. These small details can make a big difference in the outcome of your repair.
- Always work on a cool engine. Let it sit for several hours before starting. Hot components can cause burns and can warp when you remove bolts.
- Use a magnetic flashlight to see into tight spaces inside the engine bay.
- Label and bag every bolt you remove. Use small containers or zip-lock bags with labels for each component.
- Apply a thin layer of coolant to the new O-rings and seals before installation. This helps them seat properly and prevents leaks.
- Take photos at every stage of disassembly. When you are putting things back together, these photos will be invaluable.
- Use a repair manual specific to your vehicle make, model, and year. Generic guides may not account for engine-specific details.
- Have a friend on standby. A second pair of hands can make a huge difference when holding components in place or turning the crankshaft.
- Do not start the engine until you have verified the timing alignment twice. This single habit can save you thousands of dollars in engine damage.
Expert Insights on Timing Belt Maintenance
Experienced mechanics agree on one thing: do not ignore your timing belt. It is a wear item. It will eventually fail. The question is not if, but when. Staying ahead of the replacement schedule is the key to avoiding costly repairs. Many people wait until they hear a ticking noise or notice rough idling. By that point, the belt may already be damaged. Preventive replacement on schedule is always cheaper than emergency repair after a failure.
Some mechanics also recommend replacing the water pump at the same time as the timing belt, even if it is still working. The reasoning is simple. If the water pump fails soon after the timing belt replacement, you will need to pay for labor again to access the same area. Doing both jobs at once saves money in the long run. It is a smart preventive maintenance strategy that many car owners overlook.
Conclusion
So is changing a timing belt a DIY job? The answer is: it can be, if you have the skills, the tools, and the patience. It is not a job for beginners. The risks are real, and the consequences of mistakes can be severe. But for experienced home mechanics, it is a rewarding and cost-saving repair. The key is preparation. Study your vehicle. Gather the right tools. Follow the repair manual step by step. And never rush the process. If at any point you feel unsure, do not hesitate to consult a professional. A timing belt replacement done right protects your engine and keeps your car running smoothly for miles to come. Whether you DIY or hire a mechanic, the most important thing is that the job gets done correctly and on time.
Frequently Asked Questions
How much does it cost to change a timing belt?
Professional timing belt replacement typically costs between $500 and $1,000, including parts and labor. DIY costs are usually between $100 and $250 for the parts kit. The exact cost depends on your vehicle model and the labor rates in your area.
Can a broken timing belt destroy an engine?
Yes, especially in interference engines. A broken timing belt causes the pistons and valves to collide, which can bend valves, damage pistons, and crack the cylinder head. The repair cost for this type of damage can exceed several thousand dollars.
How long does it take to replace a timing belt?
A professional mechanic usually completes the job in 3 to 6 hours. As a DIYer, expect to spend 6 to 10 hours or more, especially if you are doing it for the first time. The time varies based on engine layout and your experience level.
What happens if the timing belt is off by one tooth?
Even one tooth off can cause serious engine problems. The valve timing will be incorrect, leading to poor performance, misfires, and potential engine damage. Always double-check that all timing marks align perfectly before starting the engine.
Should I replace the water pump with the timing belt?
Yes, if the water pump is driven by the timing belt. Since you already have the belt off and the engine partially disassembled, replacing the water pump at the same time saves you from paying labor again later. It is a smart preventive maintenance decision.
How do I know if my timing belt needs replacing?
Most manufacturers recommend replacement every 60,000 to 100,000 miles. Signs that the belt may need attention include a ticking noise from the engine, rough idling, difficulty starting, or visible cracks on the belt. Do not wait for symptoms. Follow the replacement schedule in your owner manual.