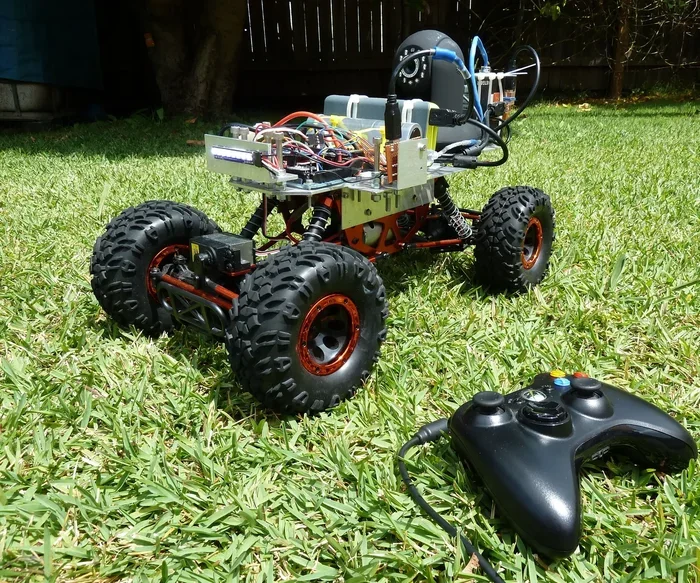
Arduino Remote Control Car Build Step by Step Guide
Learn how to build an arduino remote control car from scratch with this complete step-by-step guide. You’ll discover the essential parts, wiring diagrams, and programming code to create a wireless DIY vehicle. Perfect for beginners, this project combines electronics, coding, and hands-on fun.
Have you ever wanted to build a arduino remote control car from the ground up? It’s a fantastic project that blends coding, electronics, and pure fun. You don’t need to be an engineer to succeed. With a few affordable parts and a little patience, you can have a working vehicle that you control from across the room. This guide walks you through every single step.
Why build an arduino remote control car instead of buying one? Because you learn how it works inside and out. You’ll understand motors, sensors, and wireless signals. You’ll gain skills that apply to countless other DIY electronics projects. Plus, you get a custom toy that you can upgrade however you like. Let’s get started.
Key Takeaways
- Choose the right Arduino board: The Arduino Uno is ideal for beginners, while the Nano saves space.
- A motor driver is essential: The L298N module handles motor power safely.
- Wireless control options: Use an IR remote or an RF module for longer range.
- Start with a simple chassis kit: It saves time and ensures sturdy construction.
- Programming is straightforward: Basic Arduino IDE skills are all you need.
- Upgrade later: Add sensors or Bluetooth for advanced features.
📑 Table of Contents
What Is an Arduino Remote Control Car?
A arduino remote control car is a small vehicle powered by motors and controlled by an Arduino microcontroller. The Arduino acts as the brain. It receives signals from a remote transmitter and tells the motors what to do. Most DIY versions use an infrared (IR) remote or a radio frequency (RF) module for wireless control.
The core components include an Arduino board, a motor driver, two DC motors, a chassis, a battery pack, and a receiver. You can build a basic model in a weekend. Once you master the basics, you can add sensors, lights, or even a smartphone app. The beauty of this project is its simplicity and expandability.
People often ask: is an arduino remote control car hard to build? Not at all. If you can follow a wiring diagram and copy a few lines of code, you can do it. This guide assumes zero prior experience. We’ll explain every connection in plain language.
Parts You’ll Need for Your DIY RC Car
Before you start soldering, gather all the parts. Having everything ready prevents frustrating delays. Here’s a complete list for a standard arduino remote control car.
Core Components
- Arduino Uno or Nano: The Uno is beginner-friendly. The Nano is smaller and great for compact builds.
- L298N Motor Driver: This module handles the high current needed by the motors. Never connect motors directly to the Arduino.
- Two DC Gear Motors: 3V to 6V motors work well for a small car. Look for hobby-grade ones with wheels.
- IR Receiver Module (VS1838B) or RF Receiver: The IR receiver lets you use a common TV remote. The RF module gives you longer range.
- Chassis Kit: A plastic or acrylic chassis with mounting holes saves a lot of time.
- Battery Pack: A 4x AA or 2x 18650 battery holder provides 6V to 7.4V. Use rechargeable batteries for best value.
- Jumper Wires: A set of male-to-male and male-to-female wires is essential for connections.
- IR Remote Control: Any old TV remote can work. You’ll learn how to decode its signals.
Helpful Extras
- Breadboard: For testing circuits before soldering.
- LEDs and Resistors: For headlights or status indicators.
- Switch: A simple toggle switch for power on/off.
- Double-Sided Tape or Screws: To secure components to the chassis.
Quick Tip: Buy a starter kit that includes an Arduino, motor driver, and chassis. These kits often save 20-30% compared to buying parts separately. Look for “Arduino robot car kit” online.
Step-by-Step Assembly Guide
Now comes the fun part. We’ll build the arduino remote control car piece by piece. Follow these steps in order.
Step 1: Prepare the Chassis
Unbox your chassis kit. Attach the two DC motors to the rear wheels using the provided brackets. Secure the wheels with the small nuts that come in the kit. Mount the front caster wheel (the small swivel wheel) at the front. This gives the car a stable base.
Place the Arduino Uno on the chassis platform. Use standoffs or double-sided tape to keep it elevated. The motor driver should sit close to the motors. Keep the battery pack at the bottom for a low center of gravity.
Step 2: Mount the Motors and Wheels
Slide the DC motors into their slots. Tighten the screws firmly. A loose motor will cause the car to veer off course. Attach the wheels and check that they spin freely without rubbing on the chassis.
Common Mistake: Forgetting to leave enough wire length. Motors need to move slightly, so give them slack wire. Use zip ties to manage excess cable.
Step 3: Wire the Motor Driver
The L298N motor driver is the bridge between the Arduino and the motors. Connect the left motor terminals to the OUT1 and OUT2 screw terminals. Connect the right motor to OUT3 and OUT4.
Supply power to the motor driver from the battery pack. Connect the positive wire to the 12V input and the negative wire to GND. The motor driver has a 5V output pin that can power the Arduino later. For now, keep the Arduino powered separately via USB or its own voltage regulator.
Connect the motor driver’s input pins to the Arduino digital pins:
- IN1 connects to Arduino pin 5
- IN2 connects to Arduino pin 6
- IN3 connects to Arduino pin 9
- IN4 connects to Arduino pin 10
These pins control the direction and speed of each motor using PWM signals. You’ll see how this works in the code section.
Step 4: Connect the Arduino and Receiver
Place the IR receiver module on the front of the chassis. It has three pins: VCC, GND, and a signal pin. Connect VCC to the Arduino 5V pin. Connect GND to GND. Connect the signal pin to Arduino digital pin 2.
If you’re using an RF receiver instead, the wiring is similar. The RF module typically has VCC, GND, and a data output pin. Connect that data pin to Arduino pin 2 as well. The RF module allows control from a distance of up to 100 meters, while IR works only line-of-sight.
Expert Insight: Always double-check your ground connections. All components must share a common GND. A missing ground link is the number one cause of a non-working arduino remote control car.
Step 5: Add Power and Final Checks
Connect the battery pack to the motor driver’s power input. Place the switch in line with the positive wire so you can turn the car on and off easily. Before uploading code, do a visual inspection of every wire. Make sure no bare wires are touching each other.
Plug the Arduino into your computer with a USB cable. You’re ready to program.
Programming Your Arduino RC Car
Writing code for an arduino remote control car is easier than you might think. The Arduino IDE is free to download. You’ll write a few functions to read IR signals and control motor speed and direction.
Setting Up the Arduino IDE
Install the Arduino Software from arduino.cc. Connect your Uno or Nano via USB. Select the correct board and port under the Tools menu. If you’re using an IR remote, you’ll need the IRremote library. Open the Library Manager and search for “IRremote” by shirriff. Click Install.
Writing the Control Code
The basic code structure has two main parts. First, you decode the IR signals from your remote. Second, you map those signals to motor actions. Here’s a simplified overview:
- Include the IRremote library.
- Define the IR receiver pin (pin 2).
- Set up motor control pins (5, 6, 9, 10) as outputs.
- In the loop, check for received IR signals.
- Use a switch statement to run different motor functions based on the button pressed.
When you press the up button on your remote, the car moves forward. The down button makes it reverse. Left and right buttons turn the car. The stop button halts all motion. You can find many free code examples online. Copy one, upload it, and test with your specific remote.
Quick Tip: Use the “IRrecvDemo” example sketch to find the hex codes for your remote buttons. Open the Serial Monitor and press each button. Note down the codes. You’ll need them to assign functions in your final code.
Testing the Motor Functions
Upload a simple test sketch first. Make each motor spin forward, backward, and stop. Check that the left motor and right motor respond correctly. If one motor spins the wrong way, simply swap its two wires at the motor driver terminal. This is a quick fix that saves hours of code debugging.
Once the basic movement works, add the IR control. Test each button one at a time. Adjust motor speed by changing the PWM value in the analogWrite function. A value of 200 gives a nice cruising speed for most hobby motors.
Upgrading Your Arduino Remote Control Car
After you have a working arduino remote control car, you can make it your own. Upgrades are what make this project truly special. Here are three popular enhancements.
Adding Sensors
An ultrasonic distance sensor (HC-SR04) can give your car obstacle avoidance. Mount it on the front. The Arduino reads the distance and stops or turns the car when an object is too close. This transforms a simple RC car into a smart robot.
You can also add a line-following sensor array. Place it underneath the car. The sensors detect a black line on a white surface, and the Arduino steers the car to follow the line. This is a great next project after mastering basic remote control.
Building a Smartphone-Controlled Version
Replace the IR receiver with a Bluetooth module like the HC-05 or HC-06. Pair it with your phone. Use a free Arduino Bluetooth controller app to send commands. This gives you a sleek, wireless experience without needing a dedicated remote control. The wiring is slightly different, but the motor driver connections remain the same.
Comparison Table: IR vs Bluetooth Control
| Feature | IR Control | Bluetooth Control |
|---|---|---|
| Range | Up to 5 meters (line of sight) | Up to 10 meters |
| Direction Required | Yes, must point at car | No, works in any direction |
| Cost | Very low (uses existing remote) | Moderate (needs Bluetooth module) |
| Setup Complexity | Simple | Slightly more complex |
| Best For | Indoor use, beginners | Advanced users, outdoor play |
Improving Battery Life
A arduino remote control car can drain batteries quickly if you run the motors at full power all the time. Add a voltage regulator to protect the Arduino from higher battery voltages. Use a larger battery pack (6x AA) for longer run times, but check that your motor driver can handle the current. A 2000mAh 18650 lithium-ion pack is a great balance of size and capacity.
Common Mistake: Using a 9V battery. It looks convenient but it has very low current capacity. The motors will stall and the battery will die in minutes. Always use a battery pack with AA cells or a lithium-ion pack.
Common Mistakes to Avoid
Even the best builders make errors. Knowing what to watch for saves time and frustration.
- Skipping the motor driver: Connecting motors directly to the Arduino pins can fry the board. Motors draw too much current. Always use a driver like the L298N.
- Forgetting to connect GND: Every component needs a shared ground. Without it, signals don’t flow properly.
- Using the wrong pin: Some Arduino pins support PWM (marked with ~), which is needed for speed control. Use pins 5, 6, 9, or 10 for motor control.
- Overloading the power supply: If the battery voltage drops under load, the Arduino may reset. Keep the motor power and logic power separate if possible.
- Not testing incrementally: Build and test one section at a time. Start with just the motors. Then add the IR receiver. Then add the code. This makes troubleshooting easy.
Expert Tips for a Smooth Build
Here are a few pieces of advice from experienced hobbyists that will make your build better.
- Use heat shrink tubing on solder joints: It prevents short circuits and makes your connections durable.
- Label your wires: Use small pieces of tape or colored markers to identify motor left, motor right, power, and ground. This saves confusion later.
- Write your own comments in the code: When you come back to this project months later, you’ll thank yourself for noting what each line does.
- Start with an IR remote: It’s the cheapest and simplest way to get your arduino remote control car moving. You can always upgrade to Bluetooth or radio later.
- Join an online community: Forums like Arduino Forum or Reddit’s r/arduino are full of helpful people. Share your progress and ask questions.
Quick Tip: If your car pulls to one side, check the wheel alignment and the motor speed values. A small difference in PWM duty cycle can correct a slight drift. Set the faster motor to 190 and the slower one to 200, then fine-tune.
Final Thoughts
Building an arduino remote control car is one of the most rewarding beginner projects in the maker world. You take a handful of cheap parts and turn them into a working vehicle that you can drive with a remote. Along the way, you learn about microcontrollers, motor drivers, wireless communication, and programming. These skills open doors to robotics, home automation, and countless other DIY adventures.
Start simple. Follow this guide step by step. Don’t worry if your first attempt isn’t perfect. Every great arduino remote control car builder started with a wobbly prototype that barely moved. The important thing is that you started. Now go build your dream RC car and enjoy the thrill of driving something you created with your own hands.
Frequently Asked Questions
What is the best Arduino board for a remote control car?
The Arduino Uno is the top choice for beginners. It has enough digital pins for motor control and an IR receiver. If you need a smaller board, the Arduino Nano works just as well and fits in tight spaces. The Mega is overkill for a basic RC car unless you plan to add many sensors.
Can I use any TV remote to control my Arduino car?
Most remotes will work, but you need to decode their signals first. Use the IRrecvDemo sketch to read the hex codes from your remote. Once you know the codes, you can assign them to forward, backward, left, right, and stop functions in your code.
How far can I control the Arduino RC car?
With an IR remote, the range is about 5 to 10 meters as long as you point the remote at the car. If you switch to an RF module like the nRF24L01, the range extends to 50 to 100 meters. Bluetooth modules give you around 10 meters without line-of-sight limitations.
Do I need to know how to solder?
Soldering makes connections permanent and reliable, but it’s not strictly required. You can use a breadboard and jumper wires for a temporary build. However, for a durable car that you’ll play with often, soldering the connections is highly recommended. A basic soldering iron costs very little.
How long does it take to build an Arduino remote control car?
A complete beginner can build a basic arduino remote control car in about 3 to 5 hours. This includes assembly, wiring, and uploading the code. If you are already familiar with Arduino, you can finish it in under two hours. Adding sensors or Bluetooth will add another hour or two.
What age is this project suitable for?
Children aged 12 and up can build this project with adult supervision. Younger kids can participate in the assembly and decoration parts. The programming aspect is best suited for teens and adults. It’s a wonderful family project that teaches STEM skills in a hands-on way.