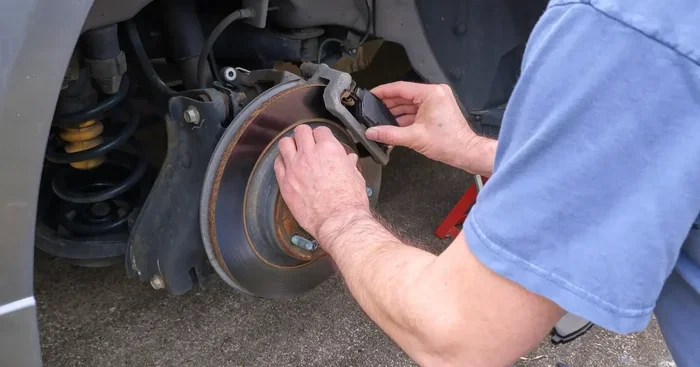
How Long Does It Take to Change Brake Pads at Home
Changing brake pads at home typically takes 30 minutes to 2 hours per axle, depending on your vehicle and experience level. With the right tools and a little patience, most car owners can complete a full brake pad replacement in under an hour. This guide covers everything from the time required and tools needed to step-by-step instructions for a safe DIY brake job.
Changing brake pads at home is one of the most satisfying maintenance jobs you can tackle. It saves money, builds confidence, and keeps your car safe on the road. But the big question everyone asks is: how long does it really take?
The answer depends on a few factors. Your vehicle type matters a lot. A compact sedan with easy access to the brakes is a quick job. A heavy truck or SUV with tight spaces can take longer. Your experience level also plays a role. A first-timer might take two hours. A seasoned DIYer can knock it out in 30 minutes per axle.
On average, plan for about one hour to change brake pads on a single axle. This includes removing the old pads, inspecting the brake rotor and caliper, installing new pads, and doing a quick check before driving. If you are replacing pads on both front and rear axles, double that time. Most people finish a full set in two to three hours.
This guide walks you through the entire process. You will learn the exact time estimates, the tools you need, common mistakes to avoid, and pro tips that make the job faster and safer. Let us get into it.
Key Takeaways
- Average Time: Most drivers can replace brake pads in 30 minutes to 2 hours per axle at home
- Tools Needed: Basic jack, lug wrench, C-clamp or caliper tool, and a torque wrench
- Skill Level: Beginner-friendly with some mechanical aptitude
- Cost Savings: DIY brake pad replacement saves $100 to $300 compared to a shop
- Safety First: Always work on a flat surface and use jack stands
- Brake System Knowledge: Understanding your brake system helps you work faster and safer
- Post-Replacement: Proper break-in and code reset are essential for safe braking
📑 Table of Contents
- How Long Does It Take to Change Brake Pads: Time Breakdown
- Tools and Materials You Will Need
- Step-by-Step Brake Pad Replacement Guide
- How Long Does It Take to Change Brake Pads: Factors That Affect Time
- Common Mistakes to Avoid During Brake Pad Replacement
- How Long Do Brake Pads Last? Understanding Brake Pad Lifespan
- When to See a Professional Instead of DIY
- Key Takeaways
- Conclusion
How Long Does It Take to Change Brake Pads: Time Breakdown
The time it takes to change brake pads varies based on several factors. Here is a realistic breakdown to help you plan your afternoon or weekend project.
Time by Experience Level
- Beginner (first time): 1.5 to 2 hours per axle
- Intermediate (done it once or twice): 45 minutes to 1 hour per axle
- Expert (regular DIY mechanic): 20 to 40 minutes per axle
Time by Vehicle Type
- Compact sedan: 30 to 45 minutes per axle
- Mid-size SUV or truck: 45 minutes to 1.5 hours per axle
- Performance vehicle or heavy-duty truck: 1 to 2 hours per axle
These estimates include the time to lift the car, remove the wheel, pull the caliper, swap the pads, and reassemble everything. They do not include extra time for rusted bolts or stuck calipers. Those surprises can add 30 minutes or more.
Tools and Materials You Will Need
Having everything ready before you start is the best way to keep your time down. Here is a complete list of what you need for a brake pad change.
Essential Tools
- Jack and jack stands or a hydraulic lift
- Lug wrench or impact wrench
- C-clamp or caliper piston tool
- Socket set (metric and standard)
- Torque wrench
- Brake cleaner spray
- Wire brush
- Penetrating oil (for stuck bolts)
Materials
- New brake pads (matched to your vehicle)
- Brake grease (for contact points)
- New brake hardware (clips, shims, bolts)
- Brake fluid (if you need to top off the reservoir)
Pro tip: Buy a brake pad kit that includes hardware. It saves time and ensures you have everything you need. Also, keep a can of brake cleaner nearby. Dirty brakes slow you down and can cause noise issues after installation.
Step-by-Step Brake Pad Replacement Guide
Now let us walk through the actual process. Follow these steps in order, and you will have fresh brake pads in no time.
Step 1: Prep the Vehicle
Park your car on a flat, level surface. Engage the parking brake and put the car in park (or first gear for manuals). Loosen the lug nuts while the car is still on the ground. This prevents the wheel from spinning when you lift it. Then use your jack to raise the vehicle and secure it on jack stands. Never work under a car supported only by a jack.
Step 2: Remove the Wheel
Fully remove the lug nuts and pull the wheel off. Set it aside. You now have full access to the brake caliper and rotor. Take a moment to inspect the brake rotor for grooves, warping, or excessive wear. If the rotor looks damaged, this is a good time to replace it too.
Step 3: Remove the Caliper
Find the two bolts holding the caliper to the mounting bracket. Use your socket wrench to remove them. Carefully lift the caliper off the rotor. Do not let it hang by the rubber brake hose. This can damage the hose. Instead, use a bungee cord or wire to hang the caliper from the suspension.
Step 4: Remove Old Brake Pads
The old brake pads should slide right out of the caliper bracket. Use a flathead screwdriver if they are stuck. Inspect the caliper piston and bracket for rust or debris. Clean everything with brake cleaner and a wire brush. This keeps your new brakes performing at their best.
Step 5: Compress the Caliper Piston
Before you can install the new pads, you need to push the caliper piston back into its bore. Place your C-clamp over the caliper and gently tighten it. Go slow. If the piston does not move easily, check that you are not crossing the threads. Some calipers require a special tool for this step.
Step 6: Install New Brake Pads
Apply a thin layer of brake grease to the contact points on the caliper bracket. This prevents squeaking and ensures smooth pad movement. Insert the new brake pads into the bracket. Make sure the wear sensors are positioned correctly. If your new pads came with hardware (clips, shims, bolts), install those now too.
Step 7: Reassemble the Caliper
Lower the caliper back over the new pads and onto the mounting bracket. Insert and tighten the caliper bolts to the manufacturer torque specifications. Use your torque wrench for this. Over-tightening can strip the threads, and under-tightening can cause the caliper to shift.
Step 8: Put the Wheel Back On
Place the wheel back onto the hub and hand-tighten the lug nuts. Lower the car off the jack stands. Then use your torque wrench to tighten the lug nuts in a star pattern to the proper specification. This ensures even pressure and prevents warping.
Step 9: Check and Test
Before you drive, check the brake fluid reservoir. If the caliper piston was pushed back in significantly, the fluid level may have risen. Top off if needed, but do not overfill. Pump the brake pedal several times to seat the new pads against the rotor. Then take a slow test drive in a safe area to confirm the brakes feel right.
How Long Does It Take to Change Brake Pads: Factors That Affect Time
Several factors can make your brake pad job faster or slower. Understanding these helps you set realistic expectations.
Rusted or Stuck Bolts
This is the number one time killer for DIY brake jobs. If the caliper bolts or slide pins have been sitting for years, they may be seized. Penetrating oil and patience go a long way here. In some cases, you may need to drill out a stripped bolt, which adds significant time.
Brake Caliper Condition
If your caliper is stuck or the piston does not compress easily, you will need to rebuild or replace it. This adds another 30 to 60 minutes to the job. It is smart to inspect the caliper before starting. If it looks rough, consider replacing it at the same time.
Rotor Condition
If your brake rotors are warped or worn below the minimum thickness, you will need to replace or resurface them. Rotor replacement adds about 30 minutes per rotor. Resurfacing requires a trip to a machine shop, which adds days to the timeline.
First-Time Experience
Your first brake pad change will always take longer than subsequent jobs. You will spend time figuring out the process, looking up torque specs, and double-checking your work. That is perfectly normal. After one or two jobs, you will get faster.
Common Mistakes to Avoid During Brake Pad Replacement
Avoiding these mistakes saves time and keeps you safe on the road.
- Skipping the torque wrench: Lug nuts and caliper bolts need proper torque. Guessing leads to loose wheels or damaged threads.
- Forgetting to grease contact points: This causes brake squeal and uneven pad wear.
- Not checking the brake fluid level: Pushing the piston back in raises the fluid level. Overfilling can cause leaks or brake drag.
- Reusing old hardware: Clips and shims wear out. Reusing them can cause noise and poor pad seating.
- Not bedding in new pads: New brake pads need a proper break-in period to transfer material evenly to the rotor. Skip this and you get reduced braking performance and noise.
- Driving immediately without a test: Always pump the brakes and do a slow test before hitting the road at speed.
How Long Do Brake Pads Last? Understanding Brake Pad Lifespan
Knowing how long your new brake pads will last helps you plan future maintenance. Most brake pads last between 25,000 and 70,000 miles. The exact lifespan depends on driving habits, vehicle weight, and pad material.
Factors That Affect Brake Pad Wear
- Driving style: Hard braking wears pads faster
- City vs. highway driving: Stop-and-go traffic wears pads more quickly
- Pad material: Ceramic pads last longer than organic or semi-metallic
- Vehicle weight: Heavier vehicles put more stress on the brake system
- Rotor condition: Warped or worn roters accelerate pad wear
Pay attention to warning signs. A grinding noise means your pads are worn down to the metal backing plate. A squealing sound often indicates the wear indicator is contacting the rotor. If you notice either, replace the pads immediately. Delaying brake pad replacement compromises your safety and can damage the rotors, which are much more expensive to fix.
Some vehicles have a brake pad wear sensor that triggers a dashboard warning light. If your wrench light comes on or you see a brake warning on the dash, do not ignore it. These sensors are designed to alert you when pad thickness reaches a critical level. If you are unsure whether a warning light is related to your brakes, it is worth having a professional check it out.
When to See a Professional Instead of DIY
Changing brake pads at home is rewarding, but not every situation calls for a DIY approach. Here are signs you should take your car to a professional instead.
If your caliper is severely stuck or damaged, a professional has the tools and experience to handle it safely. If you notice your brake system feels spongy or unresponsive after replacing pads, there may be air in the brake lines that requires bleeding. This is a more advanced job that beginners should not attempt alone.
Also, if you have been driving with worn pads for a long time, the rotors may be deeply grooved. In that case, rotor resurfacing or replacement becomes necessary. Some shops can resurface rotors on-site, saving you time compared to doing everything yourself.
Finally, if you are not comfortable working under your car, there is no shame in visiting a trusted mechanic. Brake safety is not something to gamble with. A professional brake pad change typically costs between $150 and $300 per axle, depending on the vehicle and pad type. It is a worthwhile investment for peace of mind.
Key Takeaways
- Time Required: 30 minutes to 2 hours per axle depending on experience and vehicle type
- DIY Saves Money: You save on labor costs, which is the biggest expense at a shop
- Preparation Is Key: Having all tools and materials ready prevents delays
- Inspect Everything: Check rotors, calipers, and hardware while you are in there
- Safety Matters: Always use jack stands, torque wrenches, and follow proper procedures
- Break-In Period: New pads need gentle braking for the first 200 miles to seat properly
- Warning Lights: If your wrench light or brake warning stays on after replacement, check for issues or reset the codes
Conclusion
So, how long does it take to change brake pads at home? For most people, the answer is about one hour per axle. With the right tools, a little preparation, and this guide, you can tackle this common maintenance job confidently. You will save money, learn valuable skills, and keep your car stopping safely.
Start with one axle first if you are nervous. Once you see how straightforward the process is, you will feel empowered to handle both front and rear pads on your own. The satisfaction of completing a brake pad replacement at home is hard to beat.
Remember, brakes are your car’s most important safety system. Take your time, follow the steps carefully, and never rush the job. Your safety and the safety of everyone on the road depend on it.
Frequently Asked Questions
Can I drive my car immediately after changing brake pads?
You should not drive at highway speeds right away. Pump the brake pedal several times before driving to seat the new pads against the rotor. Then take a slow, careful test drive in a safe area. The first 200 miles are a break-in period where you should avoid hard braking to allow the pads to properly seat on the rotors.
How do I reset the brake warning light after replacing pads?
Some vehicles reset automatically after the new pads are installed and the caliper piston is pushed back. For others, you may need to disconnect the battery briefly or use an OBD-II scanner to clear the codes. If your wrench light or brake warning stays on, it could indicate an issue with the new pads or a sensor problem that needs attention.
Can I reuse the old caliper bolts when replacing brake pads?
It is not recommended. Caliper bolts are designed for single use, and reusing them can lead to loosening over time. Always install new hardware that comes with your brake pad kit or purchase new bolts separately. This small cost prevents potential safety issues down the road.
What happens if I skip greasing the brake pad contact points?
Skipping brake grease on contact points often leads to brake squeal and noise. More importantly, it can cause the pads to bind or wear unevenly. A thin layer of brake-specific grease on the contact points ensures smooth pad movement and extends the life of your new pads.
Do I need to bleed my brakes after changing brake pads?
No, changing brake pads alone does not require bleeding the brakes. You only need to bleed the system if you open the brake lines or if the pedal feels spongy after the job. In most pad replacements, the caliper piston is pushed back without opening any lines, so bleeding is not necessary.
How can I tell if my brake pads need replacing?
Listen for grinding or squealing noises when braking. Check your pad thickness through the wheel spokes if possible. Most pads have a wear indicator that contacts the rotor when the pad is too thin, producing a high-pitched squeal. Many vehicles also have a dashboard warning light that activates when brake pad life is critically low.