How to Change a Car Battery Step by Step for Beginners
Changing your car battery is easier than most people think. This step-by-step guide walks you through the entire process safely and confidently. You will learn what tools you need, how to remove the old battery, and how to install a new one correctly. Whether you are a complete beginner or just need a refresher, this guide covers everything you need to know about car battery replacement at home.
Key Takeaways
- Safety first: Always wear gloves and eye protection when working with car batteries.
- Right tools matter: A simple wrench set and baking soda solution are all you need for most jobs.
- Order matters: Always disconnect the negative cable first and reconnect it last.
- Test before you drive: Use a multimeter to confirm the new battery is working properly.
- Recycle responsibly: Never throw old batteries in the trash; take them to a recycling center.
- Maintenance extends life: Cleaning terminals and checking connections regularly keeps your battery healthy.
📑 Table of Contents
- Why Your Car Battery Matters More Than You Think
- Tools and Safety Gear You Will Need
- Step-by-Step Guide to Removing the Old Battery
- Installing the New Battery
- Testing Your New Battery
- Common Mistakes to Avoid When Changing a Battery
- How to Maintain Your New Battery for Longevity
- When Should You Replace Your Battery?
- Conclusion
Why Your Car Battery Matters More Than You Think
Your car battery is the heart of your vehicle’s electrical system. Without it, nothing happens. The engine won’t turn over. The lights won’t come on. The radio stays silent. Many people ignore their automotive battery until something goes wrong. That is a mistake.
A dead battery can leave you stranded on a cold morning or in the middle of a busy road. It is one of the most common reasons cars fail to start. The good news? Replacing a car battery is one of the simplest maintenance tasks you can do yourself. You do not need to be a mechanic. You do not need expensive tools. You just need a little knowledge and the right guidance.
How to Change a Car Battery Step by Step is a skill every car owner should have. It saves money. It saves time. And it gives you confidence knowing you can handle a roadside problem on your own. This guide breaks down the entire process into easy, manageable steps. By the end, you will feel ready to tackle the job yourself.
Before we dive in, let me share something important. A car can technically run without a battery once the engine is going, but you cannot start it again without one. So keeping your battery in good shape is non-negotiable. If you want to learn more about what happens when a battery fails completely, check out our article on can a car run without a battery.
Tools and Safety Gear You Will Need
Gathering your tools before you start is the first smart move. You do not want to be halfway through the job and realize you are missing something. Here is everything you need:
Essential Tools
- Wrench set (typically 10mm or 13mm for most vehicles)
- Battery terminal cleaner or a wire brush
- Baking soda and water solution (for cleaning corrosion)
- New battery that matches your vehicle specifications
- Pliers or a battery terminal puller
- Anti-corrosion spray or petroleum jelly
Safety Gear
- Safety gloves (battery acid can burn skin)
- Safety goggles (to protect eyes from sparks or acid)
- Closed-toe shoes
- Old clothes (batteries can leak)
Working with a car battery involves sulfuric acid and electrical current. It is not dangerous if you take proper precautions. But skipping safety gear is never worth the risk. Always work in a well-ventilated area. Keep open flames away from the battery. And never smoke while handling a battery.
Pro tip: If you want to verify your old battery’s condition before replacing it, you can use a multimeter to test your car battery at home. This helps confirm whether the battery is truly dead or if something else is causing the problem.
Step-by-Step Guide to Removing the Old Battery
Now we get to the core of the process. Removing the old battery is straightforward when you follow the correct sequence. Rushing this step can cause damage or injury. So let us go through it carefully.
Step 1: Park the Car and Turn Off the Engine
Find a flat, stable surface to work on. Turn off the engine. Remove the keys from the ignition. Engage the parking brake. This keeps the vehicle completely still and prevents any accidental electrical shorts.
Step 2: Locate the Battery
Open the hood and look for the battery. In most cars, it sits in the engine bay on the left or right side. It is a rectangular box with two cables attached. There will be a positive (+) terminal and a negative (-) terminal. The positive terminal is usually red, and the negative terminal is usually black.
Step 3: Disconnect the Negative Cable First
This is the most important safety rule. Always disconnect the negative cable first. The negative terminal connects to the car’s chassis or frame. Disconnecting it first prevents the risk of short circuits. Use your wrench to loosen the nut on the negative terminal clamp. Once loose, carefully pull the cable off and tuck it away from the battery.
Step 4: Disconnect the Positive Cable
Now disconnect the positive cable using the same method. Loosen the nut and remove the clamp. Keep the cables organized so you remember which one was positive and which was negative.
Step 5: Remove the Battery Hold-Down
Most batteries are secured with a bracket or hold-down clamp. Look for a bolt or strap holding the battery in place. Use your wrench to remove it. Set the hold-down hardware aside in a safe spot.
Step 6: Lift Out the Old Battery
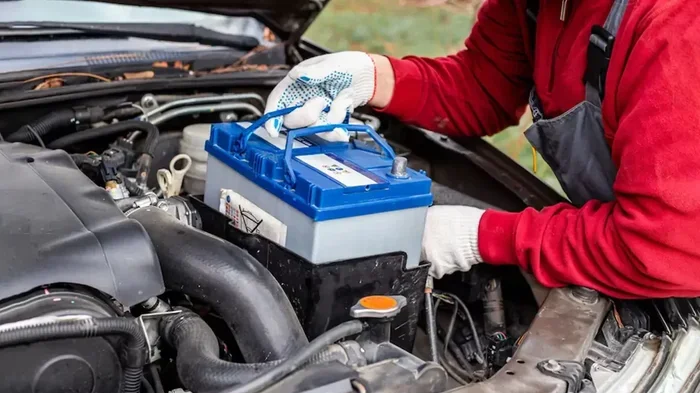
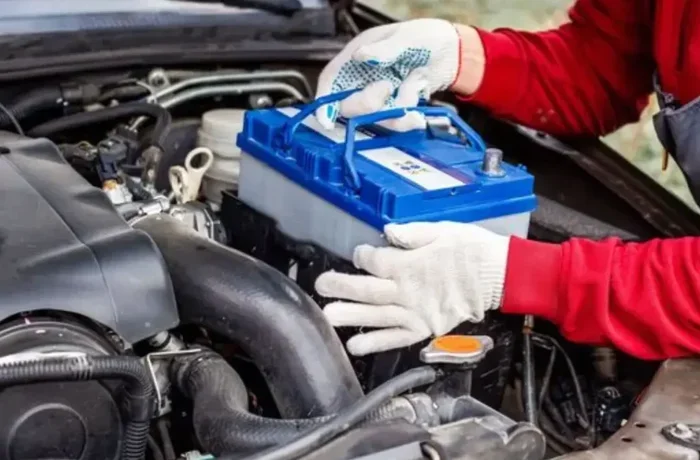
Car batteries weigh about 40 pounds. They are heavy. Use both hands to lift the battery straight up and out of the tray. Place it on a flat surface away from children and pets. Never tilt the battery sideways, as this can cause acid to leak.
Step 7: Clean the Battery Tray
Before installing the new battery, clean the tray. Use your baking soda solution and a rag to wipe away any corrosion or residue. This ensures a clean, solid connection for the new battery.
Installing the New Battery
With the old battery out, you are ready to put the new one in. This part is satisfying because you can already feel the job coming together.
Step 1: Place the New Battery in the Tray
Carefully lower the new battery into the tray. Make sure the positive and negative terminals match the cable positions. The positive terminal should line up with the red cable, and the negative with the black cable.
Step 2: Secure the Battery Hold-Down
Reattach the bracket or hold-down clamp. Tighten the bolt or strap firmly. The battery should not move when you press on it. A secure hold prevents vibrations from damaging the battery during driving.
Step 3: Connect the Positive Cable First
This is the reverse of removal. Connect the positive cable first. Place the clamp over the positive terminal and tighten the nut with your wrench. Make sure the connection is snug and secure.
Step 4: Connect the Negative Cable
Now connect the negative cable. Same process: place the clamp, tighten the nut. You should hear a click or feel the connection seat firmly.
Step 5: Apply Anti-Corrosion Protection
Before closing the hood, apply a thin layer of anti-corrosion spray or petroleum jelly to both terminals. This protects against future buildup and keeps the connection clean for longer.
If you are unsure whether your old battery could have been drained by a faulty accessory, you might want to check if something like a bad key fob can drain your car battery. This is a common hidden cause of battery failure.
Testing Your New Battery
You have the new battery installed. Do not just close the hood and drive away. Take a moment to test everything. This simple step can save you from a frustrating morning.
Start by turning the key or pressing the start button. The engine should turn over quickly and smoothly. If it cranks slowly or struggles, something may be wrong. Double-check that both cables are tight and properly connected.
Next, turn on the headlights, radio, and other electrical systems. They should work normally without dimming or flickering. If everything looks good, you have successfully completed the car battery replacement process.
For a more thorough check, you can use a multimeter to measure the battery voltage. A healthy new battery should read around 12.6 volts or higher. If you are not familiar with using a multimeter, our guide on testing a car battery with a multimeter walks you through the process in detail.
Also, keep in mind that a completely dead battery may need a jump start to get going again. If you find yourself in that situation, knowing how to jump-start properly can be a lifesaver.
Common Mistakes to Avoid When Changing a Battery
Even simple tasks have pitfalls. Here are the most common mistakes people make when changing a car battery:
- Forgetting to disconnect the negative cable first. This can cause sparks and potentially damage electrical components.
- Mixing up the cables during reinstallation. Connecting the positive cable to the negative terminal can fry your car’s electronics.
- Not cleaning the terminals. Corrosion builds up over time and can prevent a solid connection with the new battery.
- Buying the wrong battery size. Batteries come in different group sizes. Check your owner’s manual before purchasing.
- Leaving lights or accessories on. This drains the new battery before you even drive the car.
- Throwing the old battery in the trash. Car batteries contain hazardous materials and must be recycled properly.
Avoiding these mistakes keeps you safe and ensures your new battery lasts as long as possible. Most car batteries last between three and five years with proper care.
How to Maintain Your New Battery for Longevity
Installing a new battery is only half the battle. Proper maintenance helps it last longer and perform better. Here are some simple habits that make a real difference.
Inspect the Terminals Regularly
Every few months, pop the hood and look at your battery terminals. White or blue-green buildup is corrosion. If you see it, clean it off with a wire brush and baking soda solution. Clean terminals mean better electrical flow.
Keep the Battery Secure
Make sure the hold-down clamp remains tight. A loose battery vibrates during driving, which damages the internal plates and shortens its lifespan.
Avoid Short Trips When Possible
Short trips do not give the battery enough time to fully recharge. If you can, combine errands into one longer drive. This helps the alternator keep the battery charged.
Check the Battery Voltage Seasonally
Cold weather is tough on batteries. Before winter hits, check your voltage with a multimeter. If it reads below 12.4 volts, consider charging or replacing the battery before the cold season arrives.
If you ever find yourself with a dead battery and need to charge it, our article on how to charge a dead car battery provides helpful guidance for getting back on the road.
When Should You Replace Your Battery?
Knowing when to replace your battery saves you from unexpected breakdowns. Watch for these warning signs:
- The engine cranks slowly when you turn the key
- The dashboard warning light illuminates
- Your battery is more than three years old
- You notice swelling or bloating on the battery case
- You have to jump-start the car frequently
- The battery leaks fluid or smells like rotten eggs
If you notice any of these signs, do not wait. Replace the battery as soon as possible. A failing battery can leave you stranded at the worst possible moment.
Conclusion
How to Change a Car Battery Step by Step is a skill that every driver should own. It is straightforward, affordable, and incredibly rewarding to do yourself. You just need the right tools, the correct safety gear, and a little patience.
Start by disconnecting the negative cable first. Remove the old battery carefully. Clean the tray. Install the new battery. Connect the cables in reverse order. Test everything. And recycle your old battery responsibly.
With the knowledge you have gained from this guide, you are fully equipped to handle a battery replacement confidently. Do not wait for the next dead battery to surprise you. Be prepared. Be proactive. And remember that a little regular maintenance goes a long way in keeping your car running strong.
Your car battery keeps you moving. Taking care of it properly is one of the best things you can do as a car owner. Now go out there and get the job done. You have got this.
Frequently Asked Questions
How long does it take to change a car battery?
For most people, the entire process takes between 15 and 30 minutes. Experienced car owners can do it even faster. The key is having all your tools ready before you start. Being prepared eliminates delays and keeps the process smooth and efficient.
Is it safe to change a car battery by yourself?
Yes, it is very safe as long as you follow the proper safety steps. Wear gloves and goggles. Always disconnect the negative cable first. Work in a ventilated area. As long as you take these precautions, changing a battery is one of the safest DIY car maintenance tasks you can do at home.
How do I know which battery to buy for my car?
Check your owner’s manual for the recommended battery group size and cold cranking amps (CCA). You can also look at the label on your old battery. Match the size, terminal placement, and CCA rating to ensure the new battery fits and performs correctly for your vehicle.
Can I drive immediately after installing a new battery?
Yes, you can drive right away after installing a new battery. Just make sure both cables are tight and properly connected. Start the engine and check that all electrical systems work normally. If everything looks and sounds good, you are ready to hit the road.
What should I do with my old car battery?
Never throw an old car battery in the regular trash. Car batteries contain sulfuric acid and lead, which are hazardous materials. Take your old battery to an auto parts store, a recycling center, or a dealership. Most of these locations accept old batteries for free and ensure they are recycled properly.
How long does a new car battery last?
Most new car batteries last between three and five years. The exact lifespan depends on driving habits, climate, and battery quality. Regular maintenance like cleaning terminals and checking voltage can help extend your battery’s life. Keeping your battery in good condition means fewer surprises down the road.