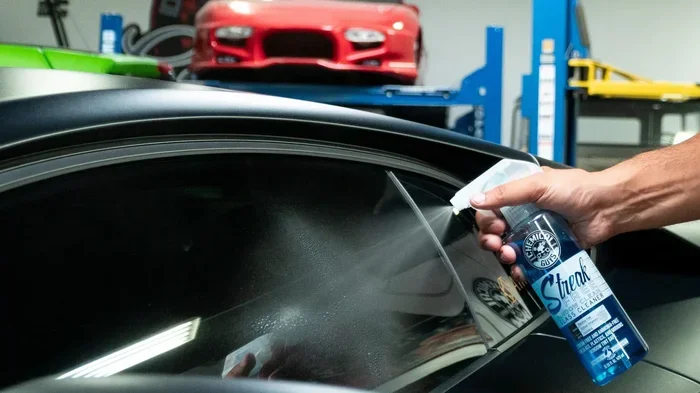
How to Clean Tinted Car Windows Without Any Streaks
Cleaning tinted car windows the right way keeps your tint intact and your glass crystal clear. You will learn the best tools, safest solutions, and step-by-step methods that deliver a streak-free shine every time. This guide covers everything from daily care to deep cleaning for both interior and exterior surfaces. Whether you have a fresh tint or a years-old film, these tips will help you avoid damage and buildup. By the end, you will know exactly how to clean tinted car windows like a pro.
There is nothing worse than spending an hour cleaning your car windows only to end up with a streaky mess. If you have tinted windows, the challenge gets even bigger. You cannot just grab any cleaner and start scrubbing. The wrong product or technique can damage your window tint film and leave your glass looking worse than before.
How to clean tinted car windows without streaks is a skill every car owner should master. The good news is that it is not as hard as it sounds. With the right tools, the right solution, and a little patience, you can achieve a flawless streak-free shine on every window. This guide walks you through everything you need to know. From choosing the safest cleaner to handling tough water spots, we have you covered.
Whether you are new to auto detailing or just looking for better results, this article will give you practical, actionable advice. You will learn what products to avoid, which tools work best, and how to protect your tint for years to come. Let us dive in.
Key Takeaways
- Always use ammonia-free cleaners: Ammonia breaks down tint film over time and causes bubbling or peeling.
- Microfiber cloths are essential: They trap dirt without scratching and leave zero lint behind.
- Clean in the shade: Direct sunlight dries your solution too fast and creates stubborn streaks.
- Avoid paper towels and rough fabrics: They scratch tint film and leave behind fibers.
- Use a two-bucket method: One bucket for soapy water and one for rinsing your cloth keeps your glass truly clean.
- Apply a protective coating after cleaning: Sealants add UV defense and make future cleaning easier.
📑 Table of Contents
- Why Cleaning Tinted Windows Requires Special Care
- Best Tools for Cleaning Tinted Windows
- The Right Cleaning Solutions for Tinted Windows
- Step-by-Step Guide to Streak-Free Window Cleaning
- Dealing with Tough Stains and Water Spots
- Common Mistakes to Avoid When Cleaning Tinted Windows
- Protecting Your Tint After Cleaning
- How Often Should You Clean Tinted Windows?
- Conclusion
Why Cleaning Tinted Windows Requires Special Care
Tinted windows are not just regular glass with a dark shade. They have a thin tint film applied to the inner surface. This film blocks UV rays, reduces heat, and adds privacy to your vehicle. But it is also more sensitive than standard glass. Using harsh chemicals or abrasive tools can scratch, peel, or cloud the film.
When you clean tinted car windows, you are cleaning two different surfaces at once. The outer glass needs degreasing and spot removal. The inner tint film needs a gentle, residue-free touch. This is why most regular window cleaners fail. They contain ammonia or alcohol that slowly breaks down the adhesive holding the tint in place.
Over time, dirt, dust, and hard water deposits build up on tinted surfaces. This buildup creates a hazy look that no amount of wiping fixes. The key is to use the right cleaning solution and the right method from the start. Once you damage a tint, fixing it is expensive and inconvenient. Prevention through proper cleaning is always the better choice.
Understanding Your Tint Film Type
Not all tint films are the same. Ceramic tints are the most durable and resist chemicals better than dyed or metalized films. If you have a ceramic window tint, you have a bit more flexibility with cleaners. However, you should still avoid ammonia-based products to be safe. Dyed tints are the most common and the most vulnerable. They fade easily when exposed to harsh chemicals. Metalized tints can scratch more easily, so you need extra soft cloths. Knowing your tint type helps you choose the safest cleaning approach.
Best Tools for Cleaning Tinted Windows
Having the right tools makes all the difference when you clean tinted car windows. Cheap tools cause scratches and streaks. Quality tools protect your film and deliver a better result. Here is what you need in your cleaning kit.
Microfiber Cloths
A high-quality microfiber cloth is the single most important tool for tint-safe cleaning. Microfiber is soft, lint-free, and absorbs liquid without scratching. Never use paper towels, old t-shirts, or rough rags on tinted windows. Paper towels are too abrasive and leave tiny fibers behind. Old cotton shirts may look soft but they trap dirt particles that drag across the film.
You should have at least two microfiber cloths per session. One for applying your cleaning solution and one for drying and buffing. Use different cloths for the interior and exterior windows to avoid cross-contamination.
Spray Bottles and Squeegees
A fine-mist spray bottle gives you even coverage without soaking the surface. Too much liquid can seep behind the tint edges and cause peeling. A good squeegee helps you remove solution quickly and evenly. Look for one with a soft rubber blade that glides smoothly without catching on the tint edges.
Soft-Bristle Brushes
For stubborn dirt around window edges or in corners, a soft-bristle brush helps loosen grime without scratching. Use it gently and always dampen the brush before applying it to the film.
The Right Cleaning Solutions for Tinted Windows
Choosing the correct cleaning solution is the most critical step. The wrong product can cloud your tint, strip its color, or weaken the adhesive bond. Here are the safest options and what to avoid.
What to Use
Ammonia-free window cleaners are your best friend for tinted windows. Look for products labeled “tint-safe” or “ammonia-free.” These cleaners dissolve dirt and grease without attacking the film. A simple DIY solution of soapy water also works wonders. Mix a few drops of mild dish soap with warm water in a spray bottle. This gentle formula lifts dirt without any risk to your tint.
For tougher grime, vinegar and water is another excellent option. Mix one part white vinegar with three parts water. Spray it on, let it sit for a minute, and wipe it off with a microfiber cloth. Vinegar cuts through grease and water spots without harming the film.
What to Avoid
Never use household glass cleaners like Windex or any product containing ammonia. These are the biggest culprits behind tint damage. Alcohol-based cleaners also dry out the film and cause it to crack or peel over time. Avoid anything labeled “industrial strength” or “heavy-duty degreaser.” These are too harsh for the delicate tint surface.
| Safe Cleaners | Unsafe Cleaners |
|---|---|
| Ammonia-free window spray | Ammonia-based sprays (Windex, etc.) |
| Mild soap and water | Alcohol-based glass cleaners |
| Vinegar and water mix | Industrial-strength degreasers |
| Dedicated tint-safe cleaners | Abrasive or powder-based cleaners |
| Baby shampoo and water | Bleach or hydrogen peroxide solutions |
Step-by-Step Guide to Streak-Free Window Cleaning
Now that you have your tools and solution ready, here is the exact process to follow. This method works for both interior and exterior tinted windows and guarantees a streak-free finish.
Step 1: Choose the Right Location and Time
Always clean your tinted windows in the shade or indoors. Direct sunlight heats the glass and causes your cleaning solution to evaporate too quickly. When the solution dries before you can wipe it off, it leaves behind residue and streaks. A garage, covered parking area, or shaded driveway works perfectly.
Step 2: Rinse the Window First
Before applying any cleaner, rinse the window with plain water. This removes loose dirt, dust, and sand particles that could scratch the film during wiping. Use a gentle stream of water or a damp microfiber cloth to lift away surface debris.
Step 3: Apply Your Cleaning Solution
Spray your chosen cleaning solution onto the window or onto your microfiber cloth. Never spray directly onto the tint edges, as liquid can seep behind the film. Work in small sections, about one square foot at a time. This keeps the solution from drying before you can wipe it away.
Step 4: Wipe Gently in One Direction
Use a clean microfiber cloth and wipe in smooth, overlapping strokes. Always wipe in one direction rather than circular motions. Circular wiping tends to push dirt around and creates more streaks. Apply light pressure. Let the cleaning solution do the work. Pressing too hard can grind dirt particles into the tint film.
Step 5: Dry and Buff Immediately
After wiping a section, immediately dry it with a second clean microfiber cloth. This prevents water spots from forming. Buff the surface in gentle circular motions until it feels completely smooth and looks clear. A properly dried tinted window should have a smooth, almost slippery feel.
Step 6: Inspect and Repeat if Needed
Walk around the car and check each window from different angles. If you still see streaks or haze, repeat the process on that section. Sometimes a second pass with a dry cloth is all it takes to remove the final residue.
Quick Tips for Perfect Results
- Fold your cloth into quarters so you always have a clean surface to work with.
- Flip the cloth frequently to avoid redepositing dirt onto the window.
- Keep a separate cloth for drying — never reuse the same one for both wiping and drying.
- Work top to bottom so that drips and runoff do not dirty already-clean sections.
- Use distilled water if your tap water leaves hard water spots on your glass.
Dealing with Tough Stains and Water Spots
Even with regular care, tinted windows can develop stubborn stains. Bird droppings, tree sap, hard water spots, and road grime are the most common culprits. Here is how to handle each one without damaging your tint.
Bird Droppings and Tree Sap
These are acidic and can eat into tint film if left too long. The key is to act quickly. Spray your ammonia-free cleaner generously over the spot and let it sit for two to three minutes. This softens the residue. Then gently wipe with a damp microfiber cloth. If the stain persists, apply a small amount of vinegar solution and let it work for another minute before wiping again. Never pick or scrape at dried sap or droppings with your fingernails or a sharp object.
Hard Water Spots
Hard water leaves behind mineral deposits that cling to glass and tint film. These white, chalky spots are especially common on cars parked near sprinklers or in areas with hard water. To remove them, mix equal parts water and white vinegar. Spray the affected area, let it sit for five minutes, and wipe gently with a microfiber cloth. For severe buildup, you may need to repeat the process twice.
Haze on Tinted Windows
A cloudy or hazy look on tinted windows usually comes from built-up residue of previous cleaners or polish. This is common when ammonia-based products have been used over time. To remove the haze, wash the window thoroughly with a soap and water solution. Follow up with a vinegar rinse. The haze should lift after one or two treatments. If it does not, the tint film itself may be degrading and could need professional replacement.
Expert Insight: When to Call a Professional
Sometimes stains are too deep or the tint is too damaged for DIY cleaning. If you notice bubbling, peeling, or discoloration that does not improve with gentle cleaning, it is time to see a professional. A skilled auto detailing expert can assess whether your tint needs repair or full replacement. Trying to fix severely damaged tint yourself often makes things worse and costs more in the long run.
Common Mistakes to Avoid When Cleaning Tinted Windows
Even well-meaning car owners make mistakes that harm their tinted windows. Knowing what not to do is just as important as knowing what to do. Here are the most common errors and how to avoid them.
Using Ammonia-Based Cleaners
This is the number one mistake. Ammonia is present in most household glass cleaners, and it is convenient. But it slowly dissolves the adhesive in your tint film. Within weeks of regular use, ammonia-based cleaners can cause bubbling, peeling, and discoloration. Always check the label before spraying anything on your tinted windows.
Scrubbing Too Hard
More pressure does not mean a cleaner window. In fact, aggressive scrubbing scratches the tint film and pushes dirt deeper into the pores of the film. Use light, gentle strokes and let your cleaning solution do the heavy lifting.
Skipping the Rinse
Jumping straight to the cleaning solution without rinsing first means you are grinding dirt into your glass. Always rinse or pre-wipe to remove loose particles first. This one simple step dramatically reduces the risk of scratches.
Cleaning in Direct Sunlight
Cleaning your tinted windows in the hot sun seems efficient, but it is a recipe for streaks. The heat causes the solution to evaporate almost instantly, leaving behind a residue film. Find shade or wait for a cooler time of day.
Using Dirty or Rough Cloths
A grimy cloth does more harm than good. It deposits dirt and grit onto your window, creating micro-scratches over time. Always use a fresh, clean microfiber cloth for each cleaning session.
Protecting Your Tint After Cleaning
Cleaning is only half the battle. Protecting your tint after each wash session extends its life and keeps it looking great. Here is how to add an extra layer of defense to your window tint care routine.
Apply a Tint Sealant
After cleaning, apply a protective coating designed for tinted windows. These sealants create a hydrophobic layer that repels water, dust, and UV rays. They make future cleaning faster and easier because dirt slides right off. Look for sealants that are explicitly labeled safe for use on tinted surfaces.
Use a UV-Protectant Dashboard Cover
UV damage is one of the biggest enemies of tint film. Parking in direct sunlight for years causes fading and degradation. A UV-protectant dashboard cover or windshield sun shade reduces the heat and UV exposure that reaches your interior windows.
Wipe Down Windows Weekly
Regular light cleaning prevents buildup from becoming a serious problem. A quick wipe-down with a damp microfiber cloth once a week takes only five minutes and keeps your windows looking their best between deep cleaning sessions.
How Often Should You Clean Tinted Windows?
The frequency depends on your driving conditions and environment. If you park outdoors or drive on dusty roads, you should clean your windows every one to two weeks. Indoor parking and occasional driving allows for monthly cleaning. Regardless of your schedule, always clean your windows when you notice visible buildup or haze forming.
How to clean tinted car windows regularly is the best way to maintain their appearance and longevity. A consistent routine prevents tough stains from setting in and keeps your streak-free shine looking professional between deep cleans.
Seasonal Cleaning Tips
- Spring: Remove pollen and sap buildup after winter. A vinegar solution works great for spring cleaning.
- Summer: Focus on removing water spots from sprinkler exposure and bug splatter from road trips.
- Fall: Clear leaf debris and sap from tree sap that drips onto parked cars.
- Winter: Remove salt residue and ice melt spray promptly to prevent mineral buildup on your tint film.
Conclusion
How to clean tinted car windows without streaks comes down to three things: using the right products, choosing the right tools, and following a gentle technique. Ammonia-free cleaners, soft microfiber cloths, and a patient, methodical approach will always outperform shortcuts and harsh chemicals. Your tinted windows are an investment in comfort, privacy, and UV protection for your vehicle. Taking care of them through proper cleaning ensures they last for years without fading, peeling, or clouding.
Start with the basics covered in this guide. Stock up on ammonia-free cleaners and quality microfiber cloths. Clean in the shade, wipe gently, and dry thoroughly. Add a protective sealant to your routine for extra defense. Over time, you will notice that your tinted windows stay clearer longer and require less effort to maintain. The streak-free finish you get will make your entire car look like it just left the detailer’s shop. Stick with these methods, and your tinted windows will thank you for years to come.
Frequently Asked Questions
Can I use Windex on tinted car windows?
No, you should not use Windex or any ammonia-based glass cleaner on tinted windows. Ammonia breaks down the tint film over time, causing bubbling, peeling, and discoloration. Stick to ammonia-free cleaners or a simple soap and water solution instead.
What is the best homemade cleaner for tinted windows?
A mixture of mild dish soap and warm water is the safest homemade cleaner for tinted windows. You can also use a one-to-three ratio of white vinegar to water for tougher grime. Both options are gentle, effective, and completely safe for tint film.
How do I remove water spots from tinted windows?
Mix equal parts white vinegar and water, spray it on the affected area, and let it sit for five minutes. Wipe gently with a microfiber cloth and dry immediately. Repeat if needed for stubborn spots. Always rinse with plain water afterward.
Is it safe to use a squeegee on tinted windows?
Yes, a squeegee is safe to use on tinted windows as long as the rubber blade is soft and clean. Wipe gently and avoid pressing too hard along the tint edges. A squeegee actually helps reduce streaks when used correctly.
How long does car tint last with proper cleaning?
With proper cleaning and care, quality car tint can last five to ten years or more. Using ammonia-free cleaners, microfiber cloths, and gentle techniques prevents premature wear. Regular maintenance also keeps the tint looking clear and vibrant throughout its lifespan.
Can I clean tinted windows right after installation?
Wait at least three to seven days after tint installation before cleaning the windows. The adhesive needs time to cure fully. During this period, avoid rolling down the windows or applying any cleaning products to the tinted surfaces.