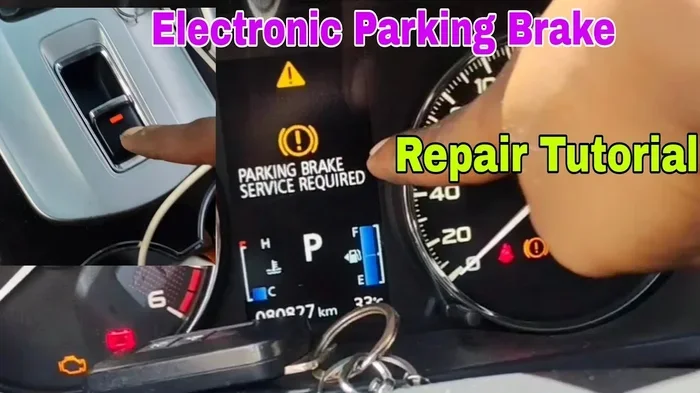
How to Fix an Electronic Parking Brake Malfunction
An electronic parking brake malfunction can leave you stranded or unsafe on the road. This guide walks you through the most common causes, diagnostic steps, and practical fixes you can try at home. Whether your brake light is flashing, the system won’t release, or you hear strange noises, we cover it all. By the end, you will know exactly what to do and when to call a professional.
Dealing with an electronic parking brake malfunction is frustrating. Your car sits there, and the brake light on the dashboard won’t go off. Or worse, the brake won’t release when you need it to. Either way, it throws a wrench into your day.
Electronic parking brakes have become standard on most modern vehicles. They are convenient, compact, and reliable when they work. But like any electronic system, they can fail. The good news is that many of these problems are fixable. You do not need to be a master mechanic to handle them.
In this guide, we break down every common cause of an electronic parking brake malfunction. We give you step-by-step diagnostic methods. And we share practical fixes you can try yourself. Let us get your brake system back in working order.
Key Takeaways
- Electrical faults are the #1 cause: Wiring issues, blown fuses, and faulty sensors trigger most electronic parking brake problems.
- DIY fixes save money: Many common issues like stuck calipers or sensor errors can be resolved without a mechanic.
- Resetting the system often works: A simple reset procedure can clear error codes and restore normal function.
- Brake fluid matters: Low or contaminated brake fluid can cause the entire electronic brake system to fail.
- Know when to seek help: Complex issues involving the electronic brake control module need professional diagnosis.
- Regular maintenance prevents problems: Routine brake inspections keep your electronic parking brake working reliably for years.
📑 Table of Contents
- Understanding How Your Electronic Parking Brake Works
- Common Causes of Electronic Parking Brake Malfunction
- Step-by-Step Diagnostic Guide
- How to Fix Common Electronic Parking Brake Problems
- When to Call a Professional Mechanic
- Preventing Future Electronic Parking Brake Problems
- Quick Tips for Electronic Parking Brake Maintenance
- Expert Insights on Electronic Brake Systems
- Conclusion
Understanding How Your Electronic Parking Brake Works
Before you can fix a problem, you need to understand how the system works. Electronic parking brakes replaced traditional hand levers and foot pedals in most new cars. Instead of a cable you pull, an electric motor activates the rear brake calipers.
The Basic Components
Your electronic parking brake system has several key parts. The electronic brake control module acts as the brain. It receives signals from your brake switch and controls the electric motors. The motors then engage or release the brake calipers on the rear wheels. Wiring connects everything together. Sensors monitor brake pad wear and system health.
Brake fluid also plays a role. The hydraulic system works alongside the electronic components. When you press the brake pedal, fluid pressure activates the front brakes. The electronic system handles the rear brakes independently. Both systems work together to stop your vehicle safely.
Why Electronic Systems Fail
Electronic systems depend on electricity and sensors. A single fault in the chain can cause the entire system to malfunction. Common triggers include blown fuses, corroded connectors, worn brake pads, and faulty sensors. Sometimes the issue is as simple as a dead 12-volt battery. Other times, it is a more complex wiring problem that needs professional attention.
Understanding these basics helps you troubleshoot smarter. You will know which questions to ask and what to look for. This saves time and money at the repair shop.
Common Causes of Electronic Parking Brake Malfunction
Not all parking brake problems are the same. Different symptoms point to different root causes. Here are the most common reasons your electronic parking brake might act up.
1. Faulty Brake Switch or Sensor
The brake switch tells your car when the parking brake is engaged. When this switch fails, the system gets confused. It might keep the brake engaged even when you release it. Or it might fail to engage when you need it to. A bad sensor often triggers the brake warning light on your dashboard.
2. Worn or Stuck Brake Calipers
The electric motor in the caliper can seize up over time. Corrosion, dirt, and lack of use cause this. When the caliper sticks, the brake pad presses against the rotor constantly. You might notice a grinding sound or your car pulling to one side. This is one of the most common reasons for a parking brake stuck condition.
3. Low or Contaminated Brake Fluid
Brake fluid transmits force through the hydraulic system. Low fluid levels mean insufficient pressure. Contaminated fluid loses its effectiveness over time. Both conditions can cause your electronic brake system to throw error codes. Check your brake fluid reservoir regularly. If the fluid looks dark or dirty, it is time for a change.
4. Wiring and Electrical Issues
Wiring harnesses run through your undercarriage. They endure heat, moisture, road salt, and vibration. Over time, wires can corrode, fray, or disconnect. A broken wire in the parking brake circuit causes all sorts of headaches. The system loses communication, and the warning light comes on.
5. Failed Electronic Brake Control Module
The control module manages the entire electronic parking brake system. When it fails, everything goes wrong. You might get error codes that are hard to interpret. A failed module usually requires professional diagnosis and replacement. This is the least common but most expensive cause of electronic parking brake malfunction.
6. Dead or Weak Battery
Your car needs a healthy 12-volt battery to power the electronic brake system. A weak battery can cause intermittent problems. The system might behave erratically or fail to engage properly. If you notice brake issues after your car sits for a few days, check your battery first. A bad battery can cause the wrench light to come on, which sometimes overlaps with brake warnings.
Step-by-Step Diagnostic Guide
Before you start fixing anything, you need to diagnose the problem correctly. Follow these steps to identify the root cause of your electronic parking brake malfunction.
Step 1: Check the Dashboard Warning Lights
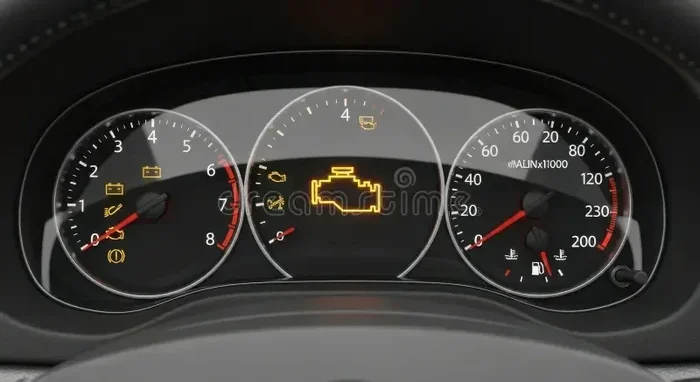
Start your car and look at the dashboard. Is the brake warning light on? Is it flashing or solid? A solid light usually means a persistent problem. A flashing light often indicates a more urgent issue. Pay attention to any other warning lights too. Multiple lights together can point to a shared cause like a low battery or electrical fault.
Step 2: Try the Manual Release
Most electronic parking brakes have a manual release. Look for a small handle or tool slot near the center console. Use your emergency brake tool to release the brake manually. If the brake releases this way, the problem is likely electrical. If it does not release, the caliper or mechanical linkage might be seized.
Step 3: Inspect the Brake Fluid
Open the hood and locate the brake fluid reservoir. Check the fluid level. It should be between the minimum and maximum marks. Look at the color of the fluid. Fresh brake fluid is clear or light yellow. Dark brown or black fluid needs flushing. Low fluid often causes the electronic system to throw errors.
Step 4: Scan for Error Codes
An OBD2 scanner is your best friend here. Plug it into the diagnostic port under your dashboard. Look for error codes related to the brake system. Common codes include C1234, C0034, and U0100. Write down every code you see. These codes tell you exactly which part of the system is failing.
Step 5: Inspect the Wiring and Connectors
Look under your vehicle for the wiring harness connected to the rear brakes. Check for corroded connectors, frayed wires, or loose plugs. Clean any corrosion with electrical contact cleaner. Reconnect any loose wires securely. Sometimes the fix is as simple as plugging something back in.
Step 6: Test the Brake Switch
The brake switch is usually located near the brake pedal. Use a multimeter to test it for continuity. If the switch does not register when you press or release the pedal, it needs replacement. This is a cheap and easy fix that solves many mysterious brake light issues.
How to Fix Common Electronic Parking Brake Problems
Now that you have diagnosed the issue, let us get into the fixes. We cover the most common problems and how to solve them.
Fix 1: Reset the Electronic Parking Brake System
A simple reset often clears temporary error codes and restores normal function. Here is how to do it:
- Turn off the engine and let the car sit for 30 seconds.
- Turn the ignition on without starting the engine.
- Press and hold the parking brake button for 10 seconds.
- Release the button and wait for the dashboard lights to cycle.
- Start the engine and test the parking brake.
This reset procedure works for many intermittent faults. If the light comes back on, the problem is likely more serious and needs further investigation.
Fix 2: Replace a Faulty Brake Switch
A bad brake switch is one of the easiest repairs to do yourself. The switch usually costs between $15 and $40. Here is what to do:
- Locate the brake switch near the brake pedal arm.
- Unplug the electrical connector.
- Remove the old switch by unscrewing it.
- Install the new switch and tighten it securely.
- Plug the connector back in.
- Test the parking brake and the dashboard light.
This fix takes about 15 minutes. No special tools are needed beyond a screwdriver.
Fix 3: Clean or Replace Seized Brake Calipers
If your caliper is sticking, start by cleaning it. Spray penetrating oil on the caliper slides and let it sit for 10 minutes. Work the caliper back and forth manually. If it moves freely, clean off the old grease and apply fresh brake caliper grease. If the caliper still does not move, it needs replacement. A new caliper costs between $100 and $300 per side, plus labor if you pay a mechanic.
For a detailed look at how long brake-related repairs take, you might want to check out this article on how long it takes to fit a new bumper for a sense of typical repair timelines.
Fix 4: Top Off or Flush Brake Fluid
Low brake fluid is an easy fix. Buy the correct type of brake fluid for your vehicle. Check your owner manual for the specification. Open the reservoir, add fluid to the max line, and bleed the system if needed. Flushing old fluid completely takes a bit more work but prevents corrosion inside the brake lines.
Fix 5: Replace the Electronic Brake Control Module
This is a job for a professional. The control module is the brain of your electronic parking brake system. When it fails, replacement is the only option. A new module costs between $200 and $600 depending on your vehicle make and model. Labor adds another $100 to $200. Have a certified technician handle this repair to ensure proper programming and calibration.
Fix 6: Address Wiring and Connector Problems
Corroded or damaged wiring needs to be repaired or replaced. Start by cleaning the connectors with electrical contact cleaner. If a wire is broken, splice in a new section of matching gauge wire. Use heat-shrink tubing to seal the connection. For damaged harnesses, replacement might be the safest option. Always disconnect the battery before working on any electrical components.
When to Call a Professional Mechanic
Not every electronic parking brake malfunction should be handled at home. Some problems require specialized tools and expertise. Here are signs that it is time to visit a mechanic:
- The brake warning light stays on after resetting: This suggests a deeper electrical or module issue.
- You hear grinding or metal-on-metal sounds: This means your brake pads are worn down to the rotor. Driving like this damages your brakes further.
- The brake system fails completely: If the parking brake will not engage or release at all, do not drive the vehicle.
- You get multiple error codes: Multiple codes often indicate a wiring harness problem or module failure that needs professional scanning.
- Your vehicle pulls to one side when braking: This could indicate a seized caliper or uneven brake wear that needs immediate attention.
Also, if you ever feel unsafe driving your car, do not take chances. Tow it to a shop. A parking brake stuck situation can be dangerous, especially on hills. Professional mechanics have diagnostic tools and experience that make complex repairs faster and safer.
Many dealerships and independent shops offer free or low-cost brake inspections. This is a great first step if you are unsure about the severity of the problem. You can also check whether your extended warranty covers brake repairs. Some warranties include electronic brake components.
Preventing Future Electronic Parking Brake Problems
Prevention is always better than repair. A little maintenance goes a long way toward keeping your electronic parking brake working flawlessly. Here are simple habits that prevent most problems.
1. Use the Parking Brake Regularly
Electronic parking brakes can seize if they sit unused for long periods. Engage and release the brake at least once a week. This keeps the calipers moving freely and the motor in good working condition.
2. Check Brake Fluid Monthly
Make it a habit to check your brake fluid level once a month. Top it off if needed. Change the fluid every two years or as recommended by your vehicle manufacturer. Clean fluid keeps the hydraulic system running smoothly.
3. Keep Your Battery Healthy
A weak battery causes all sorts of electronic gremlins. Test your battery at least twice a year. Replace it every three to five years. Clean the terminals and ensure the connections are tight. A healthy battery keeps your electronic systems running without interruption.
4. Address Warning Lights Immediately
Do not ignore dashboard warning lights. The brake warning light is one you should never overlook. Even if the brake seems to work fine, a warning light means something is wrong. Get it checked before it becomes a bigger problem. Sometimes a simple reset after an oil change clears the light, but you should verify the underlying cause first.
5. Follow Your Vehicle Maintenance Schedule
Your owner manual has a maintenance schedule for a reason. Follow it. Regular brake inspections, pad replacements, and system checks catch small problems before they become expensive repairs. Staying on top of maintenance keeps your entire brake system reliable for the life of the vehicle.
Quick Tips for Electronic Parking Brake Maintenance
- Tip 1: Always release the electronic parking brake before driving. Driving with it engaged wears out the brake pads quickly.
- Tip 2: Keep your car on level ground when engaging the parking brake. This reduces stress on the caliper mechanism.
- Tip 3: Use the correct brake fluid specified in your owner manual. Mixing fluid types can damage the system.
- Tip 4: If your car sits for more than two weeks, drive it for at least 10 minutes to keep the electronic systems active.
- Tip 5: Keep a set of jumper cables in your trunk. A dead battery can mimic a parking brake malfunction.
Expert Insights on Electronic Brake Systems
Automotive technicians see electronic parking brake problems every day. Here are some expert tips that can save you time and money.
Start with the simplest fix first. Many people jump to expensive repairs when a reset or a $20 switch solves the problem. Always check the basics: fluid level, battery voltage, and visible wiring before replacing expensive parts.
Do not ignore corrosion. Road salt and moisture cause corrosion on connectors and wiring. A little electrical contact cleaner and a wire brush can prevent major problems. Many mechanics say that 80% of electronic brake issues trace back to corroded connections.
Use OEM parts when possible. Aftermarket brake components vary widely in quality. OEM parts are designed specifically for your vehicle and meet the manufacturer’s standards. They cost more but last longer and fit properly.
Keep records of all repairs. Write down every fix, part replacement, and error code. This history helps you and any future mechanic diagnose problems faster. It also helps you spot patterns if the same issue keeps coming back.
For more information on whether certain brake-related issues are worth fixing yourself, check out this guide on whether a parking brake can be fixed to understand common repair scenarios.
Conclusion
An electronic parking brake malfunction does not have to be a nightmare. Most causes are simple and fixable with basic tools and a little patience. Start by diagnosing the problem systematically. Check the dashboard lights, brake fluid, wiring, and sensors. Try a reset before replacing expensive parts. Many issues resolve with a simple fix like a new brake switch or a fluid top-off.
Remember that your brake system is critical to your safety. Do not take shortcuts on repairs that affect how your car stops. When in doubt, consult a professional mechanic. A qualified technician can diagnose complex issues with specialized tools and years of experience.
Stay proactive with maintenance. Check your brake fluid, use the parking brake regularly, and never ignore warning lights. These simple habits keep your electronic parking brake working reliably for years. Your car stops for you every day. Give it the care it deserves, and it will keep you safe on every drive.
Frequently Asked Questions
What causes an electronic parking brake to fail?
The most common causes are faulty brake switches, seized calipers, low brake fluid, corroded wiring, and a weak battery. The electronic brake control module can also fail, though this is less common. Regular maintenance helps prevent most of these issues.
Can I drive my car with an electronic parking brake malfunction?
It depends on the severity of the problem. If the brake releases and works normally, you can drive carefully to a repair shop. If the brake is stuck or will not engage, do not drive the vehicle. Have it towed to a mechanic to avoid safety risks and further damage.
How much does it cost to fix an electronic parking brake?
Costs vary widely. A brake switch replacement costs $15 to $40. Caliper repairs run $100 to $300 per side. A new electronic brake control module costs $200 to $600 plus labor. Simple resets and fluid checks cost nothing. Always get a quote before committing to major repairs.
How do I reset my electronic parking brake?
Turn off the engine and wait 30 seconds. Turn the ignition on without starting the engine. Press and hold the parking brake button for 10 seconds. Release the button and wait for the dashboard lights to cycle. Start the engine and test the system. If the light returns, the problem needs further diagnosis.
Can a dead battery cause the parking brake light to come on?
Yes. A weak or dead battery can cause the electronic parking brake system to behave erratically. The system may throw error codes or keep the warning light on. Check your battery voltage first if you notice brake issues, especially after your car has sat unused for a while.
How often should I have my electronic parking brake inspected?
Have the system inspected at least once a year or during every oil change. Regular inspections catch small problems before they become expensive repairs. Your mechanic can check the calipers, wiring, fluid level, and sensor function during a routine service visit.