How to Replace an Old Front Door Handle the Right Way
Replacing an old front door handle is a simple home project you can finish in under an hour. This guide walks you through every step, from removing the broken handle to installing a new one with confidence. You will learn the right tools, common mistakes, and how to pick the perfect replacement for your front entry door.
A front door handle takes a lot of daily wear. Over time, it can become loose, stiff, or outright broken. Maybe the knob wobbles when you turn it, or the lever feels gritty and won’t latch properly. Whatever the issue, replacing it is one of the easiest and most satisfying home maintenance jobs you can do.
You do not need to be a professional carpenter or a skilled handyman. With the right tools and a clear set of steps, almost anyone can swap out an old door handle in less than sixty minutes. This guide gives you everything you need to know, from picking the right replacement part to making sure the new one works perfectly.
Let us walk through the process together. By the end, you will feel confident tackling this project on your own and saving money on a service call.
Key Takeaways
- You need only basic tools: a screwdriver, Allen wrench, and a tape measure are usually all you need.
- Remove the old handle carefully: taking it apart step by step prevents damage to your door.
- Choose the right replacement: match the handle type, backset, and door thickness for a perfect fit.
- Installation is straightforward: follow the manufacturer instructions and align the spindle correctly.
- Test before finishing: always check the lock, latch, and smooth operation before securing everything.
- Avoid common errors: stripping screws, mismatching parts, and rushing the process are the top mistakes.
📑 Table of Contents
- What You Will Need Before You Start
- Removing the Old Front Door Handle
- Choosing the Right Replacement Front Door Handle
- Installing the New Front Door Handle
- Testing and Adjusting Your New Door Handle
- Common Mistakes to Avoid When Replacing a Front Door Handle
- When to Call a Professional
- Final Thoughts
What You Will Need Before You Start
Before you dive into removing the old handle, gather your supplies. Having everything ready makes the job faster and keeps you from scrambling halfway through. Here is a simple checklist of what you will need.
Essential Tools
- Phillips and flat-head screwdrivers — most handles use standard screws
- Allen wrench set — many modern handles use hex bolts
- Tape measure — you need to measure the backset and door thickness
- Pliers — helpful for gripping stubborn parts
- Soft cloth or towel — protects your door finish from scratches
What to Look for in a Replacement
Not all handles are the same. Before buying a new one, check the following details about your current door. The backset is the distance from the edge of the door to the center of the hole. Most front doors use either a 2 3/8-inch or 2 3/4-inch backset. You should also measure the door thickness, which is typically 1 3/8 inches or 1 3/4 inches for standard exterior doors.
Next, decide on the style you want. Do you prefer a door knob or a lever handle? Levers are easier to use and more modern looking. Knobs offer a classic appearance. Also, make sure the new handle is rated for exterior use if it will face weather and UV exposure.
One thing many people overlook is the door handle mechanism type. Some doors use a simple mortise lock while others have a cylindrical lock. Knowing which one you have helps you choose the right replacement. You can also look at how how long does it take to fit a new bumper — the parallel is that fitting any new component on a door requires matching the right specs first.
Removing the Old Front Door Handle
Now that you have your tools and replacement handle ready, it is time to remove the old one. This is the part most people dread, but it is actually quite simple when you follow the right order.
Step 1: Remove the Decorative Rosette or Escutcheon
Start by looking at the base plates on both sides of the door. These are called rosettes or escutcheons. On some handles, there is a small slot or set screw hidden under a tiny cap. Use a flat-head screwdriver to pop off the cap, then loosen the set screw. Once loose, gently pull the rosette away from the door.
Step 2: Unscrew the Handle From the Door
Look for the mounting screws on the base of the handle. They are usually visible on the interior side of the door. Use a Phillips screwdriver to loosen and remove them. Once the screws are out, the handle should pull right off the door. If it feels stuck, wiggle it gently side to side. Do not force it or you could scratch the door surface.
If your handle has a hidden screw mechanism, check the small hole on the base. Insert an Allen wrench or a thin pin to release the locking tab. This is common on lever-style handles. You can also look at how can you replace just one headlight — the same idea applies here, where you carefully disassemble one piece at a time without damaging surrounding parts.
Step 3: Remove the Latch and Deadbolt
After removing the handles, you will see the latch mechanism on the edge of the door. There are usually two screws holding the latch plate to the door. Remove them and pull the latch out. If your door has a deadbolt, remove its screws and pull that mechanism out too.
Keep all the screws and small parts in a bowl or container. You will need them if you are reusing the same door hardware holes.
Step 4: Clean the Door Surface
With the old hardware removed, take a moment to clean the door. Wipe down the holes and surfaces with a damp cloth. This removes dust, dirt, and old paint that could interfere with the new handle installation. It is a small step that makes a big difference.
Choosing the Right Replacement Front Door Handle
Picking the right new handle is just as important as the installation itself. A wrong choice means extra work, extra cost, and frustration. Let us break down what matters most.
Handle Type: Knob vs. Lever
Levers are the most popular choice for front doors today. They are easy to operate, especially for children, older adults, and anyone carrying groceries. Door knobs still work well and offer a traditional look, but they require a twisting motion that can be harder for some people.
Consider your household needs. If you have young kids or elderly family members, a lever handle is the safer and more practical option. If you want a classic or vintage aesthetic, a knob might be the better match.
Material and Durability
Front door handles face a lot of exposure to rain, sun, and temperature changes. Here are the most common materials and what to expect from each:
- Brass: durable, classic look, resists corrosion well
- Stainless steel: modern look, very strong, easy to clean
- Bronze: rich appearance, develops a natural patina over time
- Zinc alloy: budget-friendly, but less durable than metal options
If you want something that lasts a long time, go with solid brass or stainless steel. These materials hold up well against the elements and look great for years.
Matching the Backset and Door Thickness
This is where many people make mistakes. The backset must match your existing door hole. If the new handle does not fit the hole, you will need to drill a new one, which is much more work. Always double-check the measurements before you buy. Also confirm that the new handle is compatible with your door thickness. Most exterior doors are 1 3/4 inches thick, but some older doors may differ.
Think of it like choosing the right how many gallons is my car tank — you need to know the exact specs so everything fits and works properly. A handle that is the wrong size will not function correctly no matter how good the installation is.
Installing the New Front Door Handle
This is the rewarding part. With the old handle gone and the new one ready, you can now install everything. Follow these steps carefully for the best results.
Step 1: Install the Latch Mechanism
Start by inserting the latch into the hole on the edge of the door. The tapered side should face the direction the door closes. Secure the latch plate with the two screws you removed earlier. Tighten them firmly but do not overtighten, as this can crack the wood.
Step 2: Insert the Spindle
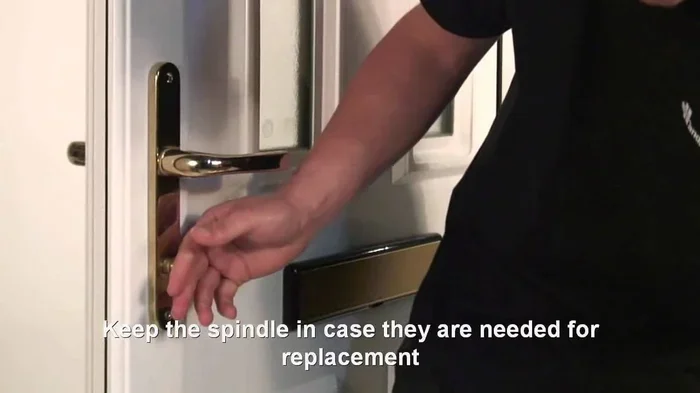
The spindle is the metal rod that connects the two handles together. Slide it through the hole in the door. Make sure it sits correctly in the grooves on both sides of the latch. Some spindles have a square end that fits into a square hole in the latch — ensure it clicks in fully.
If you are replacing a handle with a different spindle size, you may need to adjust the hole slightly. Most modern handles use a standard 7mm spindle, but it is always worth checking.
Step 3: Attach the Interior Handle
Take the interior handle and slide it onto the spindle. Align the screw holes on the base plate with the holes in the door. Insert the screws and hand-tighten them first. Then use a screwdriver to snug them up. Make sure the handle sits flush against the door and does not wobble.
Step 4: Attach the Exterior Handle
Now slide the exterior handle onto the other end of the spindle. Line up the screw holes and insert the screws. Tighten them evenly on both sides. Go back and forth between the two sides a few times to make sure the handle operates smoothly.
If your handle uses a hidden screw mechanism, now is the time to tighten it. Insert the Allen wrench into the small hole on the base and secure the locking tab. This keeps the handle firmly in place and prevents it from spinning.
One tip that helps a lot: if you have ever dealt with how can I replace my throttle body myself, the mindset is the same — take it slow, follow the sequence, and do not force anything that does not want to go in. Patience pays off.
Testing and Adjusting Your New Door Handle
Before you call the job done, you need to test everything thoroughly. A handle that feels off after installation will only cause frustration later.
Check the Latch Operation
Turn the handle and watch the latch retract. It should slide in and out smoothly without sticking. If it feels tight, check that the spindle is fully seated and that the latch is aligned with the strike plate on the door frame.
Test the Lock
If your handle has a built-in lock or keyhole cylinder, test it from both sides. Turn the key or flip the lock toggle and confirm the latch engages fully. The deadbolt should also operate smoothly without requiring excessive force.
Check the Door Swing
Open and close the door several times. The handle should feel comfortable and natural in your hand. There should be no grinding, squeaking, or resistance. If something feels off, you may need to adjust the handle position slightly or tighten a screw.
Adjusting the Strike Plate
If the latch does not line up with the strike plate, you may need to adjust the plate. Loosen the screws on the strike plate, slide it slightly, and re-tighten. Small adjustments like this often solve alignment issues completely.
Common Mistakes to Avoid When Replacing a Front Door Handle
Even simple projects have pitfalls. Knowing what can go wrong helps you avoid it. Here are the most common mistakes people make when replacing a front door handle.
Buying the Wrong Size
The biggest mistake is purchasing a handle without checking the backset and door thickness. A handle that does not fit your existing holes will require extra work or a completely new purchase. Always measure twice and buy once.
Overtightening Screws
It is tempting to crank down on screws to make everything feel solid. But overtightening can strip the holes, crack the wood, or warp the handle. Tighten just enough to hold the handle firmly in place.
Skipping the Strike Plate Alignment
A handle that does not latch properly is almost always a strike plate alignment issue. Take the extra minute to check this before you finish the job.
Forgetting to Test Before Finalizing
Do not assume everything works just because it looks installed. Always test the latch, lock, and handle operation before you put away your tools. Fixing a problem after the screws are fully tightened is much harder than catching it during testing.
Ignoring Weatherproofing
If your new handle is for an exterior door, make sure it is rated for outdoor use. Interior handles will degrade quickly when exposed to rain and sun. Also, consider applying a small amount of silicone lubricant to the moving parts to protect against moisture.
When to Call a Professional
Most front door handle replacements go smoothly with a little patience. But there are situations where calling a professional makes sense. If your door has a complex smart lock system, if the door frame is damaged, or if the existing holes are stripped and cannot hold screws, a locksmith or handyman can help.
You should also consider professional help if you are replacing a handle on a sliding glass door or a door with a special security system. These doors have unique mechanisms that require specific expertise.
However, for a standard entry door with a typical knob or lever handle, this is a straightforward DIY project. You will save money, learn a useful skill, and have the satisfaction of completing the job yourself.
Final Thoughts
Replacing an old front door handle is one of the most impactful small home improvements you can make. It updates the look of your entry, improves security, and makes daily use more comfortable. The entire process takes less than an hour, costs very little, and requires only basic tools.
The key to success is preparation. Measure your door, choose the right replacement, and follow each step carefully. Do not rush through the removal or installation. Take your time, and you will have a new handle that looks and works like it came from the factory.
Now that you know how to replace an old front door handle the right way, there is no reason to keep using a broken or outdated one. Grab your tools, pick out a new handle you love, and get started today. Your front door will thank you for it.
Frequently Asked Questions
How long does it take to replace a front door handle?
Most people finish the entire job in 30 to 60 minutes. The removal takes about 10 to 15 minutes, and the installation takes roughly the same amount of time. If you need to drill new holes, it will take longer.
Do I need any special tools to replace a door handle?
No special tools are required. A standard Phillips screwdriver, an Allen wrench set, and a tape measure are all you typically need. A pair of pliers can also be helpful for stubborn parts.
Can I replace a front door handle myself without any experience?
Absolutely. This is one of the easiest home maintenance tasks you can do. As long as you follow the steps carefully and measure before buying a replacement, anyone can do it successfully.
What is the backset on a front door?
The backset is the distance from the edge of the door to the center of the hole where the handle installs. Most front doors use either a 2 3/8-inch or 2 3/4-inch backset. You can measure this with a simple tape measure before purchasing a new handle.
How do I know if my new handle will fit my door?
Check three things before buying: the backset measurement, the door thickness, and the handle type (knob or lever). Matching all three ensures a perfect fit. Most product descriptions list these specifications clearly.
Should I replace both the handle and the lock at the same time?
It is a good idea if the lock is also old or worn. Replacing both together ensures everything works smoothly and matches aesthetically. However, if the lock is still in good condition, you can replace just the handle.
=== META DATA ===
SEO Title: How to Replace an Old Front Door Handle the Right Way
Meta Title: How to Replace an Old Front Door Handle the Right Way
Meta Description: Learn how to replace an old front door handle the right way with our step-by-step guide. Find the best tools, tips, and mistakes to avoid for a smooth swap.
URL Slug: how-to-replace-old-front-door-handle
Primary Keyword: front door handle
LSI Keywords (15-20): door handle replacement, old door handle, door knob replacement, door lever handle, replace door handle, door handle tools, door lock cylinder, door handle screws, door handle installation, front entry door, door hardware, door handle repair, mortise lock, knob handle, door handle mechanism, door handle removal, exterior door handle, door handle compatibility, backset measurement, door latch