Is It Cheaper to Do an Oil Change Yourself at Home
Doing your own oil change can save you anywhere from $25 to $75 per service. With a basic oil change kit and a little know-how, most car owners can complete the job in under 30 minutes. However, hidden costs like proper disposal and the right tools can eat into those savings if you are not careful.
Let us talk about something every car owner deals with eventually: oil changes. You see the signs on every corner. Jiffy Lube. Valvoline. Your local dealership. They all promise quick service and competitive prices. But have you ever stopped to wonder if you could do it yourself and save even more?
The short answer is yes. Doing an oil change yourself is almost always cheaper than paying someone else to do it. But the full picture is a bit more nuanced than that. There are costs to consider, tools you need, and some situations where paying a professional actually makes more sense.
In this guide, we will walk through everything you need to know about DIY oil changes. We will compare costs, list the tools you need, give you a step-by-step process, and help you decide if it is the right move for you. Whether you are a seasoned gearhead or a total beginner, this article has something for you.
Key Takeaways
- DIY oil changes save money: You can cut costs by 50% or more compared to professional services.
- Basic tools are all you need: A wrench set, oil filter wrench, drain pan, and jack stands are the essentials.
- Proper disposal matters: Recycling used motor oil is free at most auto parts stores.
- Not all cars are easy to work on: Some vehicles have tight undercarriage spaces that make DIY difficult.
- Time and convenience play a role: Professional oil changes take zero effort from you.
- Warranty considerations exist: Check your manual before DIY-ing if your car is still under warranty.
📑 Table of Contents
How Much Does a Professional Oil Change Cost?
Before we talk about savings, let us look at what you are saving from. The cost of a professional oil change varies quite a bit depending on where you go and what type of oil your car needs.
Conventional Oil Change Costs
A standard conventional oil change at a quick-lube shop typically runs between $35 and $75. This includes the oil, a new filter, and basic labor. Places like Autozone and similar chains often fall in this range. If you go to a dealership, you might pay even more. Toyota dealerships sometimes include oil changes in maintenance packages, but standalone services can run $60 to $100 or more.
Synthetic Oil Change Costs
If your car requires synthetic oil, expect to pay more. Synthetic oil changes typically cost between $65 and $125 at most shops. The oil itself is more expensive, and some vehicles require more oil, which adds to the cost. Luxury and European vehicles can push these numbers even higher.
Dealership vs. Independent Shop
Dealerships generally charge a premium for oil changes. You are paying for brand-name parts and certified technicians. Independent shops and quick-lube chains offer more competitive pricing. But neither option is as cheap as doing it yourself at home.
What You Need for a DIY Oil Change
One of the biggest advantages of changing your own oil is the simplicity of the process. You do not need a garage or fancy equipment. Here is what you will need to get started.
Essential Tools and Supplies
- Motor oil: Check your owner’s manual for the correct type and amount. Common options include 5W-30 and 10W-30. Synthetic blend and full synthetic oils offer better protection but cost more.
- Oil filter: Make sure you get the right filter for your vehicle model. A quality filter costs between $5 and $15.
- Drain pan: You need something to catch the old oil. A basic drain pan costs around $10 to $20.
- Socket wrench and ratchet: You will use these to loosen the drain plug. A 14mm or 17mm socket is common for most cars.
- Oil filter wrench: This helps you remove the old filter without struggle. A strap-style wrench works for most filters.
- Jack and jack stands: You need to get under the car safely. Never rely on a jack alone. Jack stands cost around $30 to $50 for a set.
- Funnel: Pouring new oil without a funnel is messy. A simple funnel costs just a few dollars.
- Gloves and safety glasses: Protect your hands and eyes from hot oil and debris.
Optional but Helpful Items
- Torque wrench: This ensures you tighten the drain plug to the correct specification. Over-tightening can strip threads.
- Ramps: If you do not want to use jack stands, drive-on ramps are a great alternative.
- Oil disposal containers: Many auto parts stores accept used oil for free recycling. But having a sealed container makes transport easier.
- Shop towels: You will need these for cleanup. A pack costs a few dollars and lasts many oil changes.
Total Startup Cost
If you are starting from scratch, expect to spend between $50 and $100 on tools and supplies. After that, each oil change will cost you mainly just the oil and filter. A typical DIY oil change costs about $20 to $40 in supplies. That is a significant savings compared to the $50 to $100 you would pay at a shop.
Step-by-Step Guide to Changing Your Own Oil
Now let us get into the actual process. Changing your own oil is easier than most people think. If you have ever changed a tire, you can handle this job. Here is a clear walkthrough.
Step 1: Warm Up the Engine
Start your car and let it idle for about 5 minutes. Warm oil flows more easily and drains better. Do not drive the car around the block. Just let it sit running in the driveway or garage.
Step 2: Lift the Vehicle Safely
Use a floor jack to lift the front of the car. Place jack stands under the designated frame points. Never work under a car supported only by a jack. Safety should always come first when working on your vehicle.
Step 3: Locate the Drain Plug
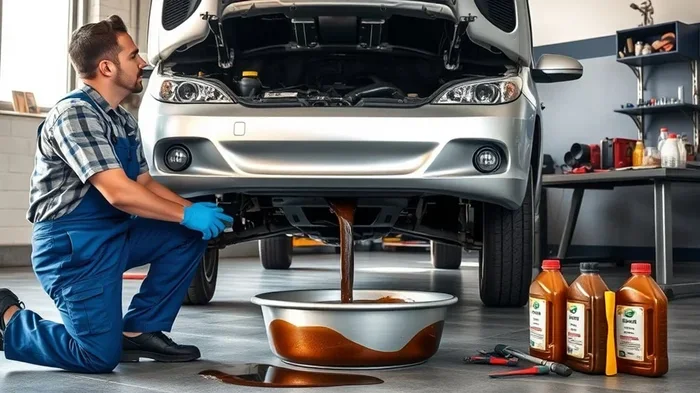
Get under the car and find the oil pan. The drain plug is at the bottom of the oil pan. Place your drain pan directly underneath it before you start loosening the plug.
Step 4: Drain the Old Oil
Use your socket wrench to loosen the drain plug. Turn it counterclockwise. Be ready for the oil to flow out quickly. Let it drain completely. This usually takes about 5 to 10 minutes.
Step 5: Remove the Old Oil Filter
Use your oil filter wrench to loosen the old filter. It will probably still have oil in it, so keep your drain pan close. Set the old filter aside for proper disposal.
Step 6: Install the New Oil Filter
Before installing the new filter, rub a little fresh oil around the rubber gasket. This creates a better seal and makes future removal easier. Hand-tighten the new filter, then give it a quarter turn with the wrench. Do not over-tighten.
Step 7: Replace the Drain Plug
Once all the oil has drained, reinstall the drain plug. Tighten it to the manufacturer’s specification. If you have a torque wrench, use it. Over-tightening can damage the oil pan threads.
Step 8: Add New Oil
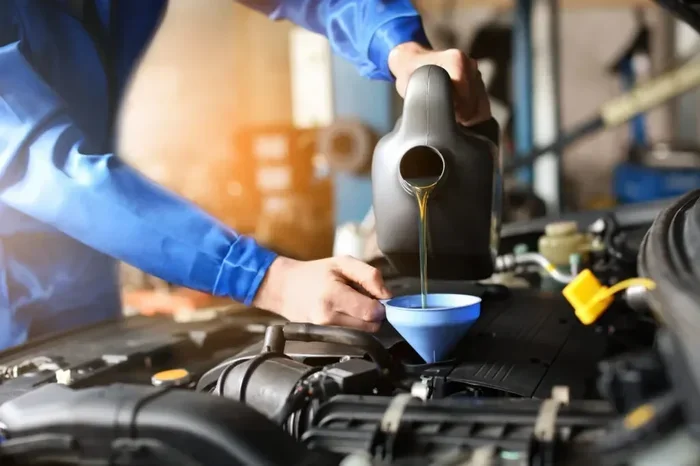
Remove the oil fill cap on top of the engine. Insert a funnel and pour in the new oil. Check your owner’s manual for the correct amount. Add it gradually and check the dipstick frequently.
Step 9: Check for Leaks
Start the engine and let it run for a minute. Look under the car for any drips around the drain plug and oil filter. Turn off the engine and wait a few minutes for the oil to settle. Check the dipstick again and top off if needed.
Step 10: Dispose of the Old Oil Properly
Never pour old oil down the drain or into the trash. Most auto parts stores, including Autozone, accept used motor oil for free recycling. Pour the old oil into a sealed container and bring it to your nearest recycling drop-off.
After you finish, remember to reset your oil change light if your vehicle has one. This keeps your maintenance tracking accurate.
Hidden Costs of DIY Oil Changes
DIY oil changes are cheaper overall, but they are not free. There are some hidden costs you should be aware of before you dive in.
Oil Disposal Fees
Most places recycle used oil for free. But some disposal centers charge a small fee, especially if you bring large quantities. Factor in about $5 to $10 per oil change for proper disposal if your local drop-off is not free.
Tool Replacement and Upgrades
Tools wear out. Socket wrenches get dropped. Oil filter wrenches break. Over time, you may need to replace or upgrade your equipment. Budget a small amount each year for tool maintenance.
Mistakes That Cost Money
If you strip the drain plug or over-tighten the oil filter, you could end up with a leak. Fixing a stripped drain plug can cost $100 or more at a repair shop. Mistakes happen to everyone, so take your time and follow the steps carefully.
Time Investment
Your time has value too. A professional oil change takes about 15 minutes. A DIY oil change takes 30 to 45 minutes for a first-timer. As you gain experience, this time drops significantly. But if your time is very valuable to you, the cost savings may not feel worth the effort.
When DIY Oil Changes Make Sense
Not every situation calls for a DIY oil change. Here are some scenarios where doing it yourself really shines.
You Change Oil Frequently
If you follow a 3,000-mile oil change interval or use synthetic oil and change every 5,000 to 7,500 miles, the savings add up fast. Over a year, a DIYer can save $100 or more compared to professional services.
You Have Multiple Vehicles
If you maintain a fleet of cars or trucks, DIY oil changes become even more cost-effective. The initial tool investment pays for itself quickly when you are servicing multiple vehicles.
You Enjoy Working on Cars
For many car enthusiasts, DIY maintenance is a hobby, not just a chore. There is satisfaction in knowing you did the job right. It also gives you a better understanding of your vehicle.
You Live in a Rural Area
If your nearest oil change shop is 30 miles away, doing it yourself saves you a trip. The time and gas you save can make DIY even more worthwhile.
You Have a High-Mileage Vehicle
Older vehicles with high mileage often need more frequent oil changes. At that point, the cost of professional oil changes can really add up. DIY becomes a smart financial choice.
Common Mistakes to Avoid
Even experienced DIYers make mistakes. Here are the most common ones and how to avoid them.
Using the Wrong Oil
Not all oil is the same. Using the wrong viscosity or type can hurt your engine. Always check your owner’s manual before you buy oil. If you are unsure, ask at your local parts store or check online for your specific vehicle.
Forgetting the New Oil Filter
This sounds obvious, but it happens more than you think. Always have the new filter ready before you start draining the old oil. Running an engine with an old or no filter can cause serious damage.
Over-Tightening the Drain Plug
Stripped drain plug threads are a nightmare to fix. Hand-tighten the plug first, then use the wrench for just a quarter turn past hand-tight. If your manual specifies a torque value, use a torque wrench.
Not Checking the Oil Level
After you add new oil, always check the dipstick. Overfilling your engine can cause problems just like underfilling it. Add oil in small increments and check frequently.
Skipping Proper Disposal
Used motor oil is a hazardous material. Never dump it on the ground or in a storm drain. Improper disposal can result in fines in many states. Always recycle it properly.
Ignoring Your Warranty
If your car is still under warranty, check the terms before doing your own oil changes. Some manufacturers require proof of professional maintenance to keep the warranty valid. Toyota and other brands may have specific service requirements.
Expert Insights on DIY Oil Changes
We spoke with several experienced mechanics about the pros and cons of DIY oil changes. Here is what they had to say.
Mark T., ASE-certified mechanic with 15 years of experience: “I always tell my customers that if they feel comfortable doing it themselves, go for it. Just make sure you have the right tools and follow the manual. The biggest mistake I see is people using the wrong oil filter. It is a small part, but it makes a huge difference.”
Sarah L., longtime DIY car owner: “I have been changing my own oil for over ten years. I save at least $150 a year. It takes me about 20 minutes now. I also feel more connected to my car. I know exactly what is going into it and when.”
Dr. James R., automotive engineering professor: “The technical difficulty of an oil change is very low. Most modern vehicles are designed to make this process straightforward. The main barriers are comfort working under the car and proper disposal. If you can overcome those, DIY is a great option.”
Key Takeaways
- DIY oil changes save significant money: You can save $25 to $75 per oil change by doing it yourself at home.
- Basic tools are affordable: A starter kit costs $50 to $100 and lasts for years of use.
- The process is straightforward: Most people can learn to change their own oil in under an hour with a little practice.
- Proper disposal is non-negotiable: Always recycle used motor oil at a designated drop-off point.
- Check your warranty first: Some manufacturers require professional maintenance to keep your warranty intact.
- Safety matters most: Never work under a vehicle supported only by a jack. Use jack stands every time.
- Experience reduces time: Your first DIY oil change may take an hour. After a few times, you can do it in 20 minutes.
Conclusion
So, is it cheaper to do an oil change yourself? The answer is a clear yes. DIY oil changes save you money, give you control over the quality of parts used, and teach you valuable skills about your vehicle. The upfront cost of tools and supplies pays for itself within just a few oil changes.
That said, DIY oil changes are not for everyone. If you are uncomfortable working under your car, short on time, or your vehicle is still under a strict warranty, paying a professional is perfectly fine. There is no shame in that.
For those willing to give it a try, the process is simpler than you might think. Start with your first oil change during a weekend when you have plenty of time. Watch a tutorial specific to your vehicle model. Gather your tools. And take your time. Once you see how easy it is, you will wonder why you ever paid someone else to do it.
Remember, regular oil changes are the single most important thing you can do for your engine. Whether you do it yourself or pay a professional, never skip or delay an oil change. Your engine will thank you with years of reliable service.
And after you finish your first DIY oil change, do not forget to reset your oil change reminder light. That way, your maintenance records stay accurate and your next oil change does not sneak up on you.