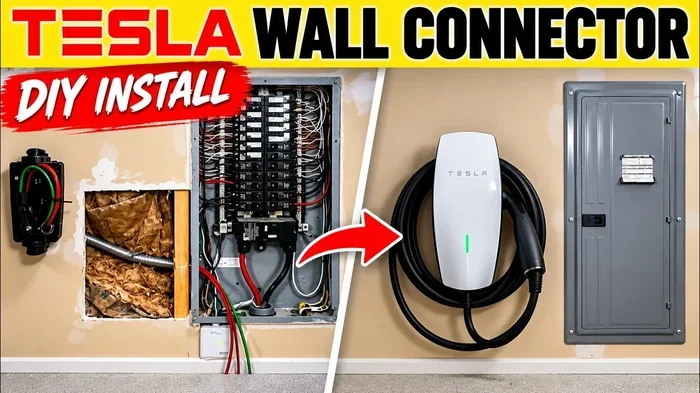
How to Install a 220V Outlet for Tesla Wall Connector
Installing a 220V outlet for your Tesla Wall Connector is one of the best upgrades you can make for home EV charging. This guide walks you through everything from electrical panel requirements to final installation. You will learn the tools needed, safety steps, and whether to hire a pro or go DIY.
Owning a Tesla is exciting. But one thing every Tesla owner thinks about is charging at home. A 220V outlet makes all the difference. It powers the Tesla Wall Connector and gives you fast, reliable charging every night. Without it, you are stuck with slow charging or constant trips to public stations.
This guide covers everything you need to know. We will walk you through the steps, the tools, the costs, and the safety tips. Whether you are a DIY enthusiast or just curious about the process, this article has you covered. By the end, you will know exactly what it takes to set up your own home charging station.
If you have ever wondered how much work goes into building a car like a Tesla, check out how many man hours it takes to build a car. It gives you a new appreciation for the engineering behind every vehicle on the road.
Key Takeaways
- A 220V outlet is essential: It powers the Tesla Wall Connector for fast, reliable home charging.
- You need a dedicated 40-50 amp circuit: This ensures your charger runs safely without tripping breakers.
- NEMA 14-50 outlets are the standard: They are widely compatible with Tesla and other EVs.
- DIY is possible but risky: Working with high voltage demands electrical knowledge and safety precautions.
- Professional installation costs $200-$800: Hiring an electrician saves time and reduces safety risks.
- Location matters: Mount the Wall Connector near your parking spot for the shortest cable run.
📑 Table of Contents
- What Is a 220V Outlet and Why Do You Need It for Tesla?
- Tools and Materials You Will Need
- Step-by-Step Installation Guide
- Common Mistakes to Avoid
- How Much Does It Cost to Install a 220V Outlet for Tesla?
- Should You DIY or Hire an Electrician?
- Tips for Optimizing Your Tesla Home Charging Setup
- How Long Does the Installation Take?
- Safety Tips You Cannot Ignore
- How to Maintain Your 220V Outlet and Wall Connector
- Final Thoughts
What Is a 220V Outlet and Why Do You Need It for Tesla?
A 220V outlet delivers double the voltage of a standard 110V household outlet. This extra power is critical for EV charging. A Tesla Wall Connector needs a 220V supply to charge your car efficiently. With a regular outlet, charging can take days. With a 220V setup, you can fully charge most Teslas overnight.
The Tesla Wall Connector delivers up to 48 amps of power. This depends on your circuit and car model. A NEMA 14-50 outlet is the most common choice. It is the same type of outlet used for large appliances like dryers and stoves. This outlet handles the high amperage safely and reliably.
Level 1 vs Level 2 Charging
Understanding the difference between charging levels helps you make the right choice.
- Level 1 Charging: Uses a standard 110V outlet. Adds about 3-5 miles of range per hour. Very slow. Not practical for daily use.
- Level 2 Charging: Uses a 220V outlet. Adds about 25-40 miles of range per hour. This is the sweet spot for home charging.
For most Tesla owners, Level 2 charging is the clear winner. It is fast enough for daily needs and safe for home use.
Tools and Materials You Will Need
Before you start, gather everything you need. Having the right tools saves time and prevents frustration. Here is a complete list.
Essential Tools
- Voltage tester: Ensures circuits are dead before you touch anything.
- Wire stripper: Prepares copper wire for connections.
- Screwdriver set: Both flathead and Phillips head.
- Drill and drill bits: For mounting the Wall Connector and the outlet box.
- Fish tape: Helps pull wiring through walls and conduits.
- Wire nuts and electrical tape: For securing connections.
- Stud finder: Locates wall studs for secure mounting.
Materials Required
- NEMA 14-50 outlet: The standard 220V receptacle.
- 6 AWG or 8 AWG copper wire: Sized based on your circuit amperage.
- 30-amp or 50-amp circuit breaker: Matches your wiring and Tesla Wall Connector.
- Electrical box: Mounts the outlet safely within the wall.
- Conduit (if needed): Protects wiring runs through exposed areas.
- Tesla Wall Connector: The charging unit itself.
Make sure all materials meet local electrical codes. Using the wrong wire size or breaker can create serious safety hazards.
Step-by-Step Installation Guide
Now let us get into the actual installation. Follow these steps carefully. Safety always comes first when working with electricity.
Step 1: Turn Off the Power
Go to your electrical panel and switch off the main breaker. Never work on live circuits. Use your voltage tester to confirm the power is off. Test both the circuit you are working on and nearby outlets. This single step prevents electrocution and electrical fires.
Step 2: Plan Your Outlet Location
Choose a spot near your parking area. The Wall Connector cable should reach your Tesla easily. Avoid placing the outlet near water sources or in areas with poor ventilation. A dry, accessible location works best. Consider wall height too. Mounting the outlet at a comfortable height makes plugging in easier.
Think about how far your Tesla sits from the wall. The shorter the cable run, the better the charging efficiency. If you are unsure about placement, measure before you drill.
Step 3: Run the Wiring
This is the most involved step. You need to run a dedicated circuit from your electrical panel to the outlet location.
- Drill a hole through the wall from the panel to the outlet location.
- Feed the wire using fish tape. Pull the 6 AWG or 8 AWG copper wire through the conduit.
- Connect the wires to the circuit breaker at the panel. Black wire to the breaker, white wire to the neutral bar, and green wire to the ground bar.
- Secure all connections with wire nuts and electrical tape.
If this sounds complicated, that is because it is. Working inside an electrical panel involves high voltage and precise wiring. If you are not experienced, strongly consider hiring a licensed electrician.
Step 4: Install the NEMA 14-50 Outlet
Mount the electrical box at your chosen location. Pull the wires through and connect them to the NEMA 14-50 outlet.
- Black wire: Connect to the brass terminal (hot).
- White wire: Connect to the silver terminal (neutral).
- Green wire: Connect to the ground terminal.
Tighten all connections firmly. A loose connection can cause arcing, heat buildup, or fire. Once wired, mount the outlet into the electrical box and attach the faceplate.
Step 5: Install the Tesla Wall Connector
With the outlet in place, you can now mount the Tesla Wall Connector. Use the mounting bracket and screws that come in the box. Position the connector at a height that is easy to plug into your Tesla.
Connect the Wall Connector to the outlet. The Tesla Wall Connector has a weather-resistant design, so outdoor installation is fine. Just make sure the mounting location is sheltered from direct rain exposure when possible.
Step 6: Test the Installation
Go back to your electrical panel and turn the power back on. Plug in the Wall Connector and check the LED light on the unit. A solid green light means everything is working correctly. If you see a red or blinking light, double-check your wiring and connections.
Plug in your Tesla and start a charging session. Monitor the charging rate. A properly installed 220V outlet should deliver the expected amperage. If the rate is lower than expected, you may have a wiring issue or a breaker that needs adjustment.
Common Mistakes to Avoid
Even experienced DIYers can make errors. Here are the most common mistakes when installing a 220V outlet for a Tesla Wall Connector.
- Using the wrong wire gauge: Too thin a wire overheats and creates a fire risk. Always match the wire size to the circuit amperage.
- Skipping the dedicated circuit: Sharing a circuit with other appliances causes overloads and tripped breakers.
- Ignoring local codes: Electrical codes vary by location. Not following them can result in failed inspections or insurance issues.
- Poor grounding: A missing or weak ground connection is a serious safety hazard.
- Rushing the process: Taking shortcuts with wiring leads to dangerous outcomes. Patience saves lives.
If you are ever unsure about any step, stop and consult a professional. Electricity does not forgive mistakes.
How Much Does It Cost to Install a 220V Outlet for Tesla?
Cost is a big factor for most Tesla owners. The total expense depends on several factors.
Breakdown of Costs
- NEMA 14-50 outlet: $10-$25 for the outlet itself.
- Wire and conduit: $30-$80 depending on run length.
- Circuit breaker: $10-$30.
- Tesla Wall Connector: Around $400-$500 before any incentives.
- Electrician labor: $200-$800 depending on complexity and location.
The total outlet installation cost ranges from about $300 to $1,200 if you hire a professional. If you already have a suitable circuit in place, the cost drops significantly. Some homeowners save money by doing the outlet work themselves and having the electrician handle only the panel connection.
Keep in mind that some regions offer EV charging incentives or tax credits. These can offset a portion of the installation cost. Check with your local utility company or government programs for available rebates.
For more on the cost side of things, understanding how long it takes to fit a new bumper might give you perspective on automotive repair costs and time investments. Check out how long it takes to fit a new bumper for related insights.
Should You DIY or Hire an Electrician?
This is the question many Tesla owners face. Both options have pros and cons.
DIY Pros and Cons
Pros: You save on labor costs. You control the timeline. You learn a valuable skill.
Cons: Electrical work carries real risks. Mistakes can void warranties or cause insurance issues. Complex installations may require permits and inspections.
Professional Electrician Pros and Cons
Pros: Licensed electricians ensure code compliance. The work comes with a warranty. You avoid personal injury risks.
Cons: Higher upfront cost. You need to schedule around their availability.
For most people, hiring a licensed electrician is the safest choice. The 220V outlet handles high current, and a single mistake can have serious consequences. If you have experience with electrical work and understand your local codes, DIY can work. But always prioritize safety over savings.
If you are interested in how long a car can sit without being driven, check out how long a hybrid can sit without being driven. It covers important vehicle maintenance topics every car owner should know.
Tips for Optimizing Your Tesla Home Charging Setup
Once your 220V outlet is installed, you can maximize its benefits with a few smart strategies.
- Charge overnight: Plug in every night when electricity rates are lower. Wake up to a full battery every morning.
- Use a timer: Some Tesla owners use smart plugs or timers to schedule charging during off-peak hours.
- Keep the cable tidy: Use cable management clips to prevent wear and tear on the Wall Connector cable.
- Update your Tesla software: Tesla regularly releases updates that improve charging efficiency and speed.
- Monitor your charging speed: If you notice slower speeds, check the outlet, breaker, and cable for issues.
These small steps add up. They extend the life of your equipment and keep your charging experience smooth.
How Long Does the Installation Take?
If you hire a professional, the actual installation usually takes 2 to 4 hours. This includes running the wire, installing the outlet, mounting the Wall Connector, and testing everything.
DIY timelines vary widely. A first-timer might spend a full weekend on the project. Experienced DIYers with electrical knowledge can finish in a few hours. The biggest variable is the distance between your electrical panel and the outlet location. Longer runs require more wire and more drilling.
Safety Tips You Cannot Ignore
Working with 220V electricity demands respect. Here are non-negotiable safety tips.
- Always verify power is off before touching any wires or breakers.
- Use insulated tools rated for electrical work.
- Wear rubber-soled shoes and avoid working in wet conditions.
- Never exceed the circuit rating. A 50-amp circuit should not be pushed to its limit continuously.
- Install a ground fault circuit interrupter (GFCI) if the outlet is in a damp location.
- Label your new circuit in the electrical panel so future owners or electricians know what it powers.
These precautions protect you, your home, and your Tesla. Do not skip them.
How to Maintain Your 220V Outlet and Wall Connector
Your installation is not a one-and-done deal. Regular maintenance keeps everything running smoothly.
- Inspect the outlet every few months for signs of wear, discoloration, or looseness.
- Check the Wall Connector cable for fraying or damage.
- Clean the connector with a dry cloth to prevent dust buildup.
- Test the outlet with a plug-in tester annually.
- Schedule a professional inspection every 2-3 years to catch hidden issues.
Proper maintenance extends the life of your charging equipment and ensures safe operation for years to come.
Final Thoughts
Installing a 220V outlet for your Tesla Wall Connector is a rewarding project. It gives you the freedom to charge at home every night. You save time, money, and trips to public charging stations. Whether you choose to DIY or hire a professional, the key is to do the job right.
Take your time with the planning. Gather the right tools and materials. Follow the steps carefully. And when in doubt, call a licensed electrician. Your safety and your Tesla deserve nothing less.
Now that you know how to set up your home charging station, you are ready to join the growing community of Tesla owners who charge conveniently at home every single day.
Frequently Asked Questions
Can I use a 110V outlet to charge my Tesla?
Yes, but it is very slow. A standard 110V outlet adds only about 3-5 miles of range per hour. It can take several days to fully charge a Tesla. For practical daily charging, a 220V outlet is strongly recommended.
Do I need a special outlet for the Tesla Wall Connector?
Yes. The Tesla Wall Connector requires a NEMA 14-50 outlet or a hardwired connection. The NEMA 14-50 is a 220V, 50-amp outlet commonly used for electric dryers and stoves. It handles the power demands of the Wall Connector safely.
Can I install the 220V outlet myself?
You can, if you have experience with electrical work. However, working with 220V circuits carries serious risks. If you are not confident in your electrical skills, hiring a licensed electrician is the safer choice. Always check your local building codes before starting any DIY electrical project.
How much does it cost to install a 220V outlet for Tesla?
The total cost ranges from $300 to $1,200. This includes the outlet, wiring, circuit breaker, and labor if you hire a professional. The Tesla Wall Connector itself costs around $400-$500. Some areas offer EV charging incentives that can reduce the overall cost.
What size circuit breaker do I need for a Tesla Wall Connector?
A 50-amp breaker is the most common choice for a Tesla Wall Connector. It pairs with 6 AWG copper wire. Some setups use a 40-amp breaker with 8 AWG wire. Always match the breaker size to the wire gauge and follow local electrical codes.
Can I charge my Tesla faster with a 220V outlet?
Absolutely. A 220V outlet with a Tesla Wall Connector adds about 25-40 miles of range per hour. This is roughly 5-8 times faster than a standard 110V outlet. The faster charging speed makes overnight charging practical and reliable for daily use.
=== CONCLUSION ===
Installing a 220V outlet for your Tesla Wall Connector is one of the best investments you can make as a Tesla owner. It transforms your home into a personal charging station. You wake up every morning with a full battery and never worry about range anxiety. The process requires careful planning, the right materials, and a strong commitment to safety. Whether you tackle the project yourself or bring in a professional, the result is the same: fast, convenient, and reliable home charging. Start your installation today and enjoy the full Tesla experience from the comfort of your own home.